
This post was created with help from AI tools and carefully reviewed by a human (Muntaseer Rahman) . For more on how we use AI on this site, check out our Editorial Policy.
Check Out These FREE Tools We Made JUST For You!
DIY Betta Feeding Ring: 3 Methods (Circle, Square, Triangle)

Betta feeding ring is a lightweight tube formed into a circle, square or triangle that floats on the surface of the aquarium. Its main purpose is to hold floating fish food in one place, inside the ring, for betta fish to eat.
This will encourage your fish to come up to the surface to eat, making feeding time easy and enjoyable.
Feeding ring can be hard to find in most pet stores. So if you can’t find it, just make one yourself. Making betta feeding ring is extremely easy and require only a handful of items.
In this article, I’ll show you how to make DIY betta feeding ring in 3 different shapes: Circle, Square, and Triangle. You can try out whichever one you prefer!
Also, don’t forget to email me and let me know how the project went! Do take some pictures of your DIY betta feeding ring and email them to me for featuring in this post!
Method 1: DIY Circle Shaped Betta Feeding Ring

Supplies You’ll Need:
- Airline Tube
- Scissor
- A Glue Gun
- Silicon Glue
Step 1: Cut the Airline Tube

The airline tube is one of the standard tools for aquarium purposes. It is of diameter 5 mm and Imperial of 3/16. The term airline refers to any flexible pipe that delivers air from your pump to your tank. But it has greater purposes.
For making the feeding ring of betta fish, firstly, the knife cut the airline tube as shown in the above pictures. The small cut airline tube is cut through by side again. Cut the bigger one in different sizes according to the circle measure you want. The radius of my circle is approximately 2.5 cm.
Step 2: Put Small Cut Airline Tube on each Side of the Tube

As in the last picture, we saw that there was a small cut airline tube, now using that small cut tube, put that in each side of the airline tube. It’ll look more like the above picture.
Step 3: Stick Each Side using Silicon Glue

Water-resistant silicone glue is regularly used at home to fill holes and seal off any gaps and level surfaces. Silicone glue is an excellent sealant; it is flexible, durable, and has strong binding properties that can be applied to plastic, metal, and glass. Silicone glue is often used in sealing glass in aquariums. So, use silicon glue to seal each side of the airline tube.
Step 4: The Final Look

So, this is the final look after all steps. This airline tube now can be used as a feeding ring for the betta fish in aquariums.
Method 2: DIY Square Shaped Betta Feeding Ring

Supplies You Will Need:
- Straw
- Airline Tube
- Scissor
- Glue Gun
- Silicon Glue
Step 1: Cut the Straw

Straws are mainly made of plastic and are a great DIY material. The straws which have bending should be used. Using the bending attribute, the feeding ring will be made smoothly.
First, cut the four straws into similar lengths. That will keep the measure in the right direction. Take the measurements carefully. Otherwise, it’ll not fit into the perfect shape
Step 2: Cut the Airline Tube into Smaller Sizes

The airline tube is one of the standard tools for aquarium purposes. It is of diameter 5 mm and Imperial of 3/16. The term airline refers to any flexible pipe that delivers air from your pump to your tank. But it has greater purposes.
Now, using scissors, cut the airline tube into smaller but same sizes for further use.
Step 3: Seal One Edge of Straw using Airline Tube

We have cut straws and airline tubes. Now, using the glue gun and silicon glue, seal one side of the straw using an airline tube like in the above pictures. Sealing the edge will give proper insight into the next steps.
Step 4: Attach Another Straw

To seal both edge properly, another cut straw needs to be attached to another side of the airline tube using the glue gun. This is half of the part.
Step 5: Two Similar Straw
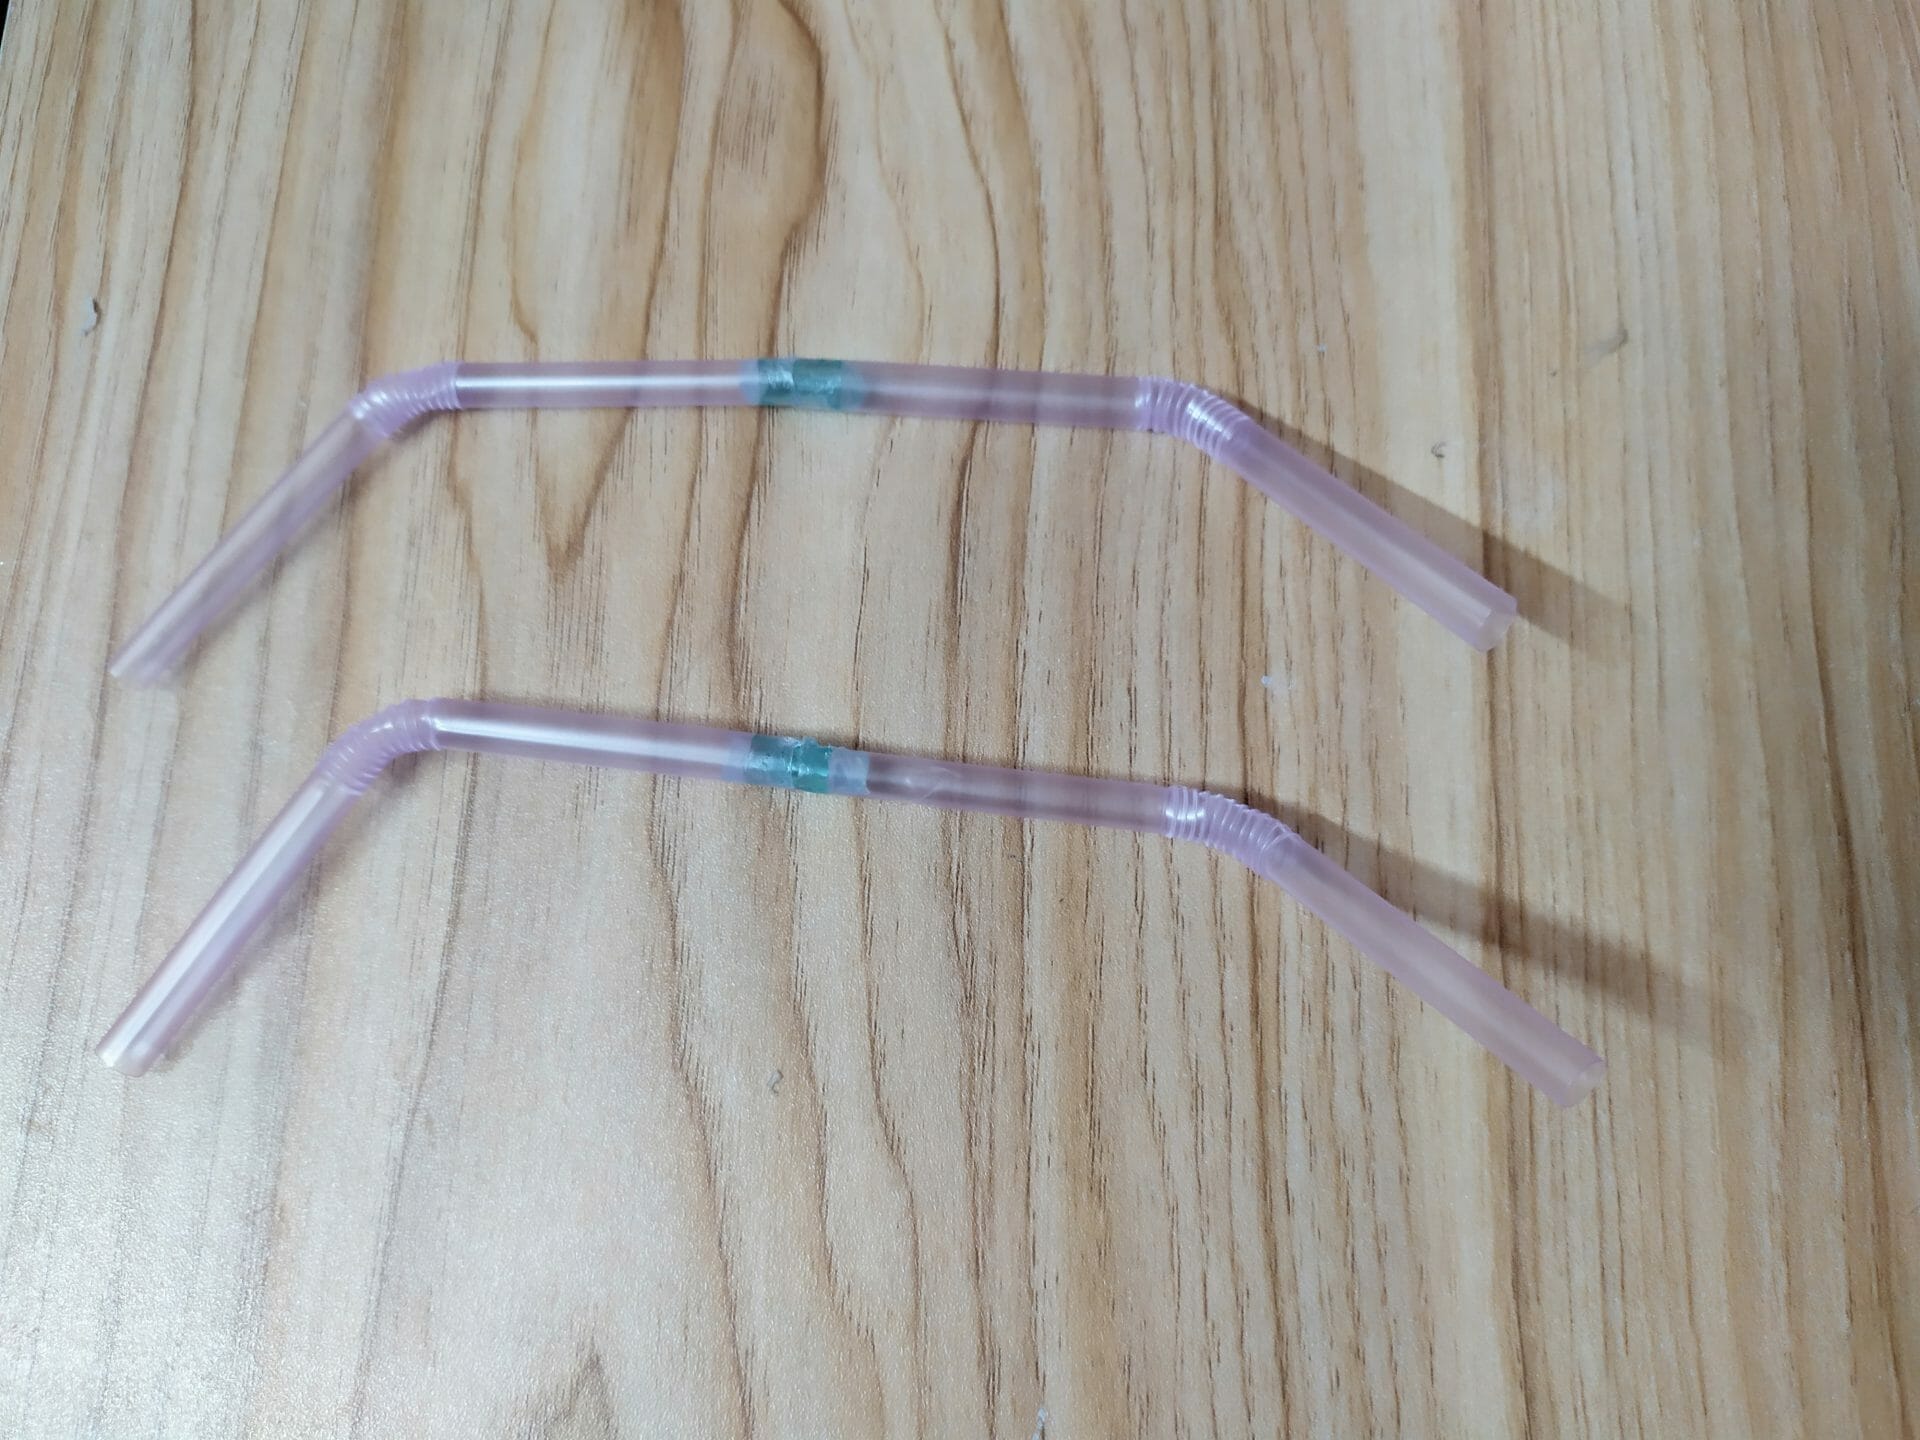
Previously, we had four straws. Firstly, attached one edge of the airline tube to one side of the straw. Then attached another straw and seal the edge of the airline tube. That’s how we attached two straw parts together. Similarly, another two straw parts should be attached. We’ll get two look-alike straw joints.
Step 6: Joint Two Attached Straws
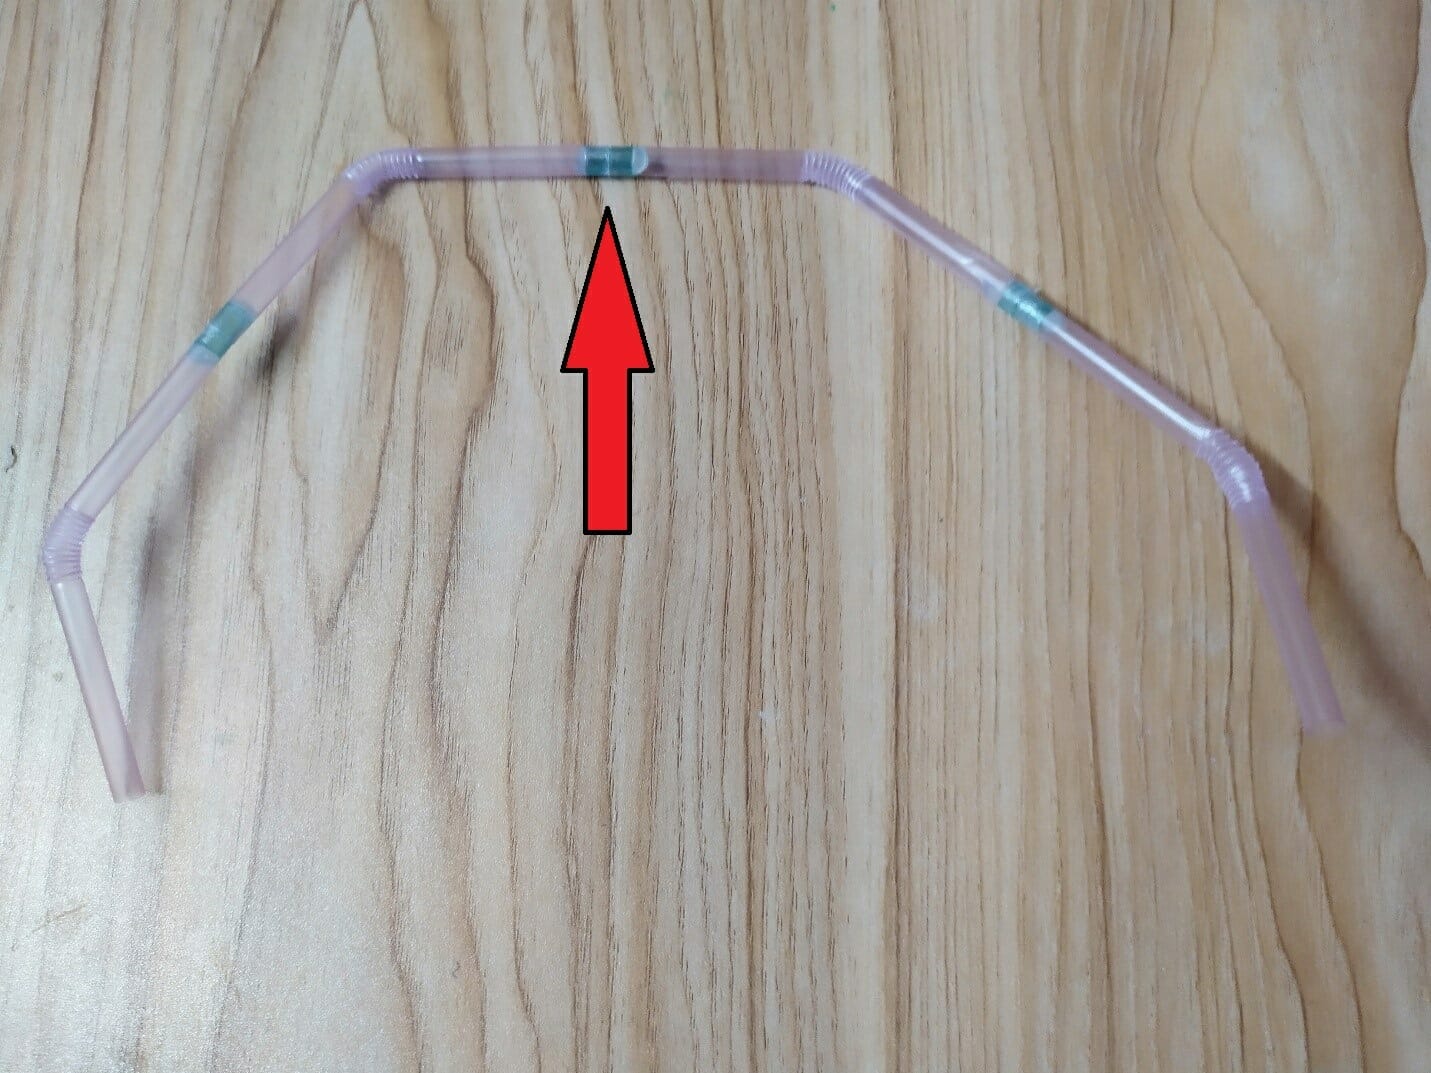
Previously, we had two attached straws. Now using another airline tube (marked using a red arrow), Joint the two attached straws. This will look more like the above picture. Two open edges are still there.
Step 7: Attach the Open Edges

Now, there were two open edges. Attach the two open edges using an airline tube and glue gun as before. The final attachment will more look like a square shape like the above picture. The measurements of the straws are important because of the final look. If the measurement went wrong, the square shape wouldn’t be built.
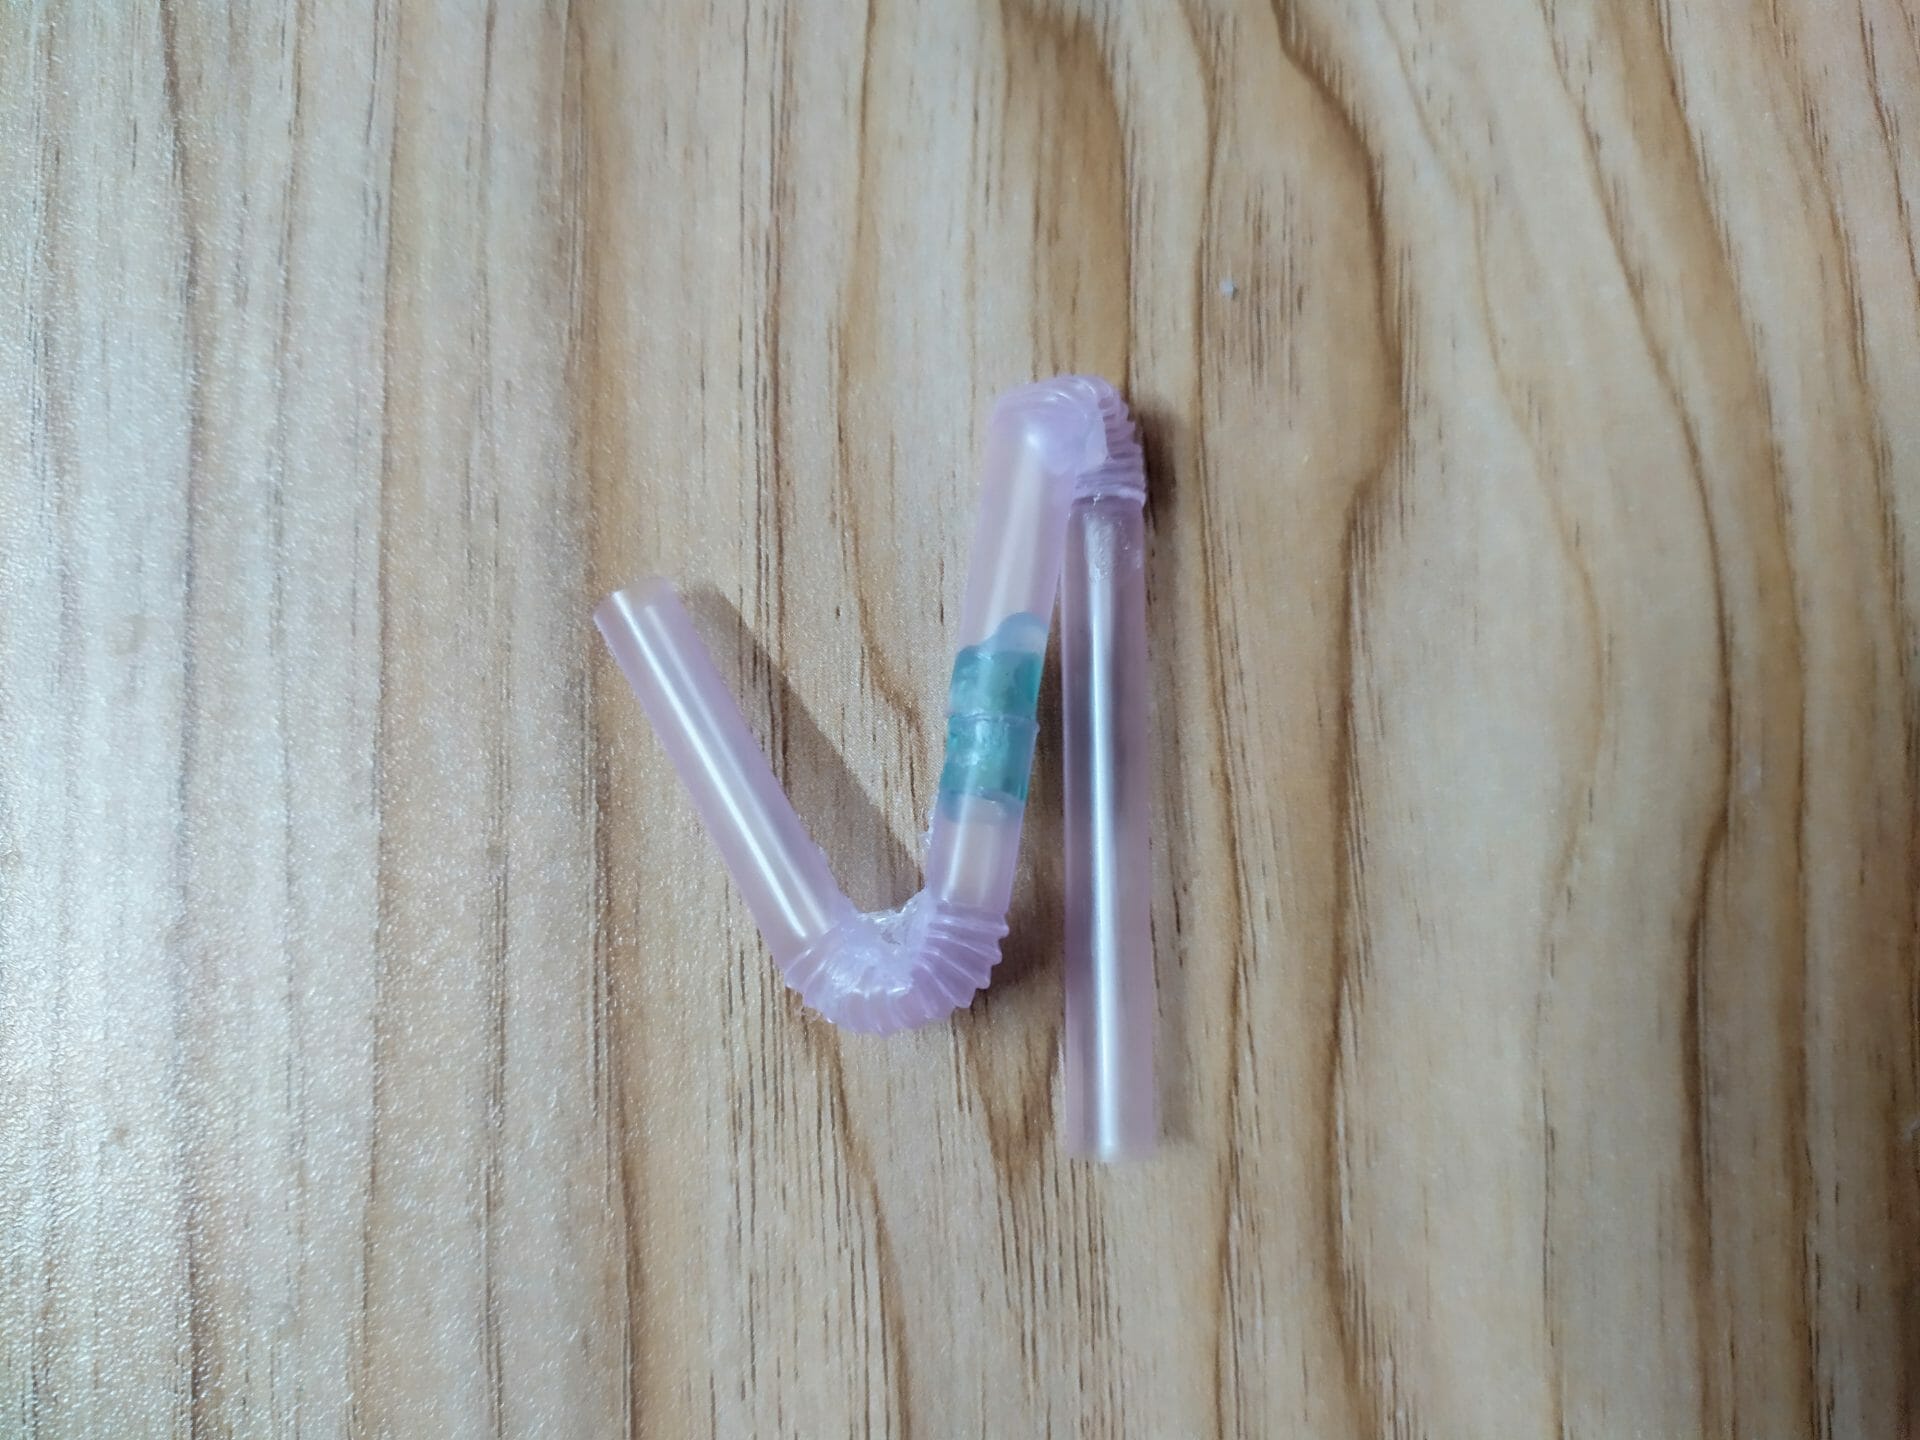
Step 8: Making the Holder

Need to take another straw for the holder of the feeding ring. Now, using glue, bend the straw and permanently fix it through the inside corner. This will look more like it.
Step 9: Take two Cutting Straw
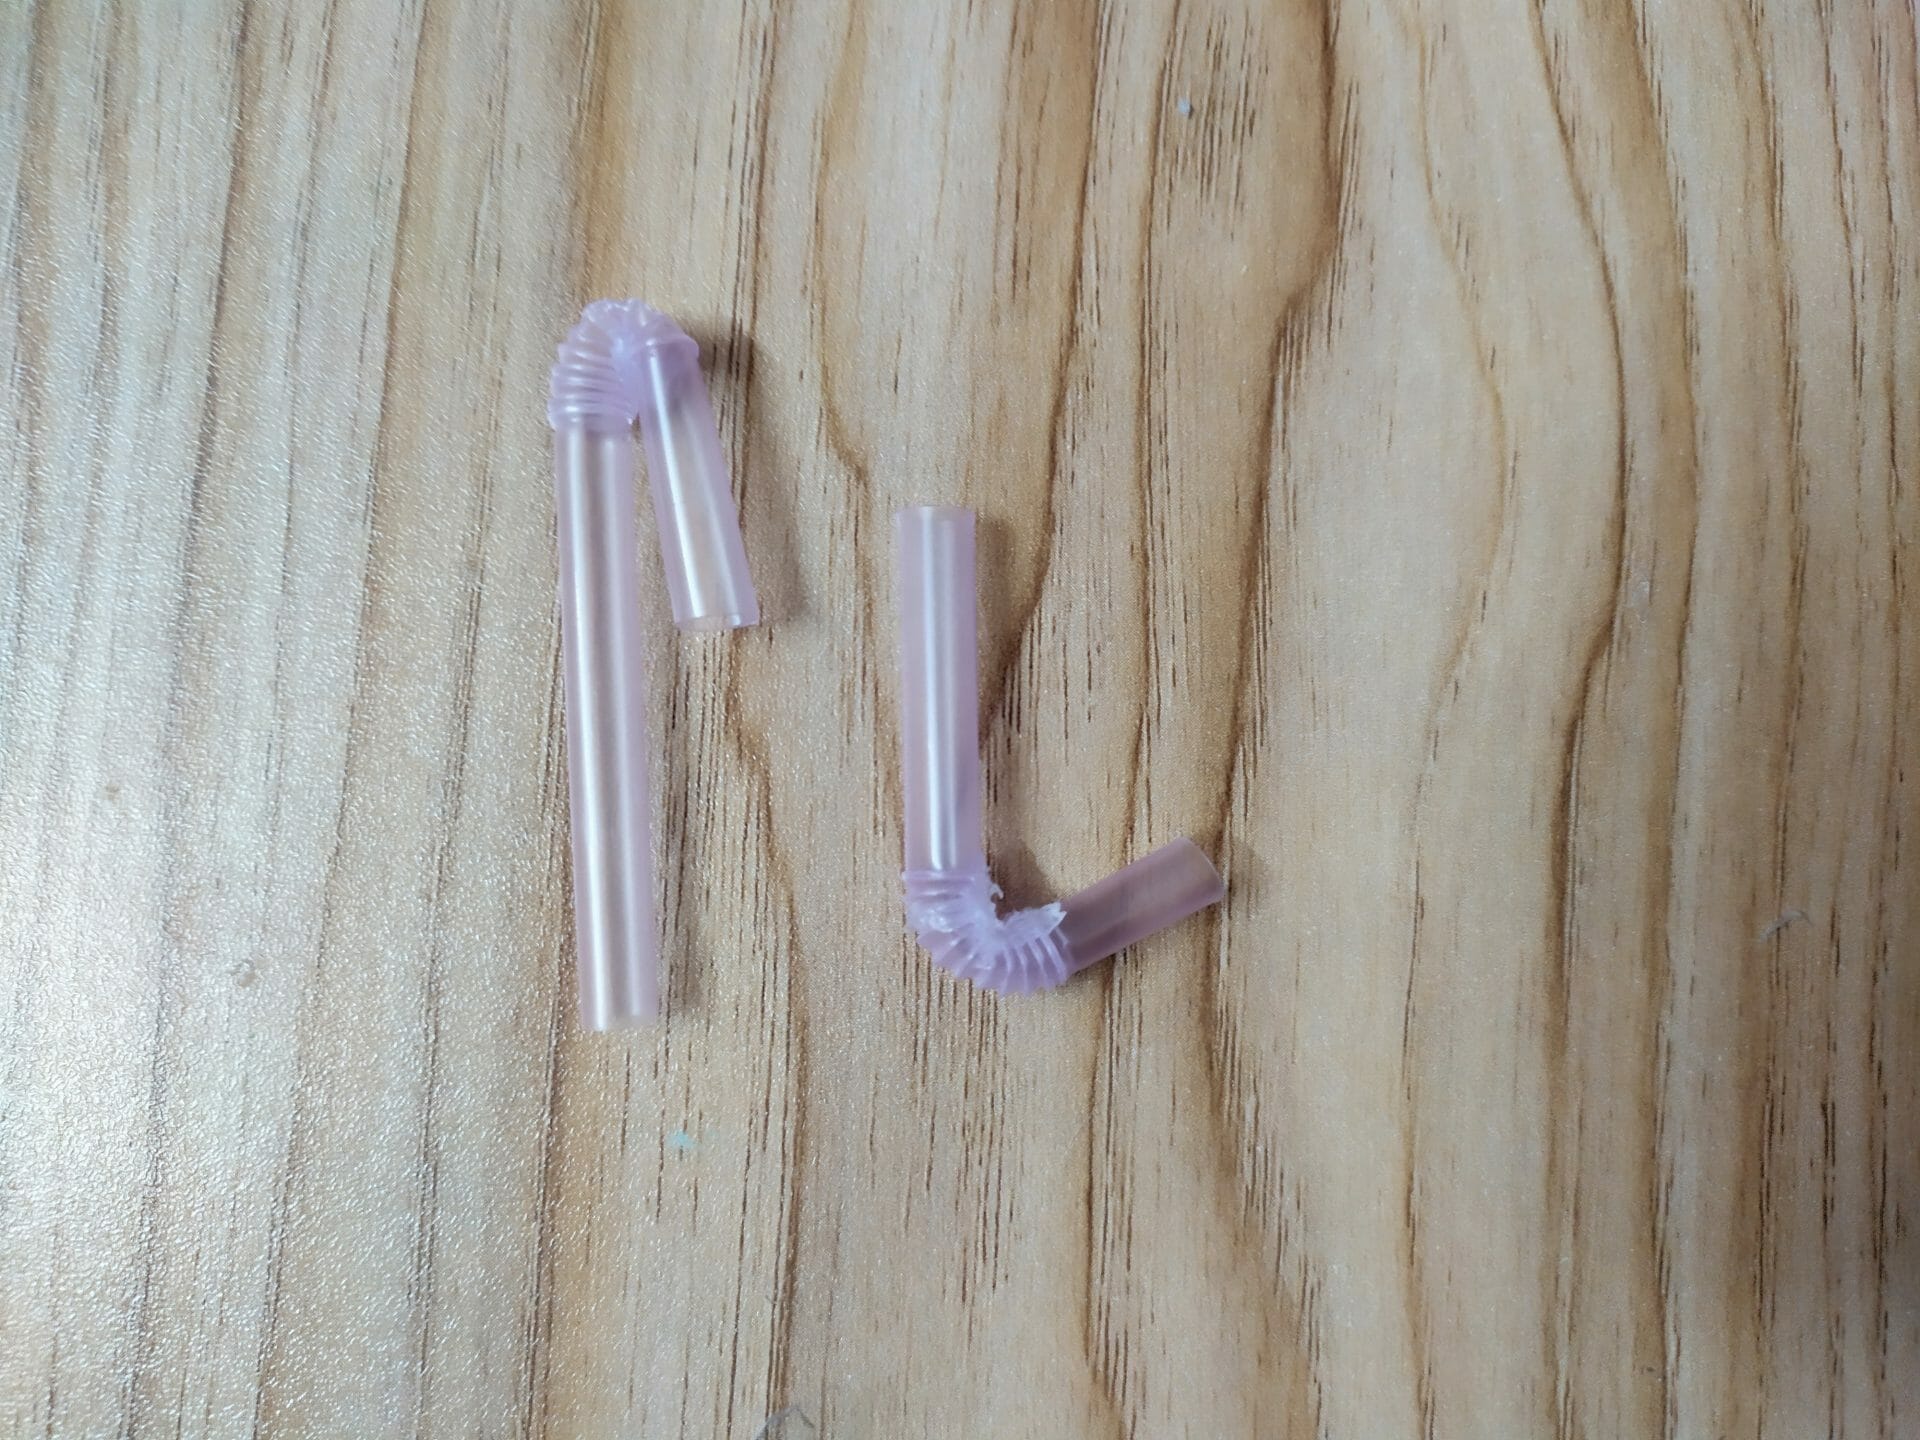
After permanently bending the straw, cut it like the left straw of the above picture. And take another straw and cut it like the right straw of the picture. These two straws will be used making the holder of the square feeding ring of the betta fish. The holder will be attached in the one side glass of the aquarium and will hold the square ring.
Step 10: Glue the Edge of the Airline Tube
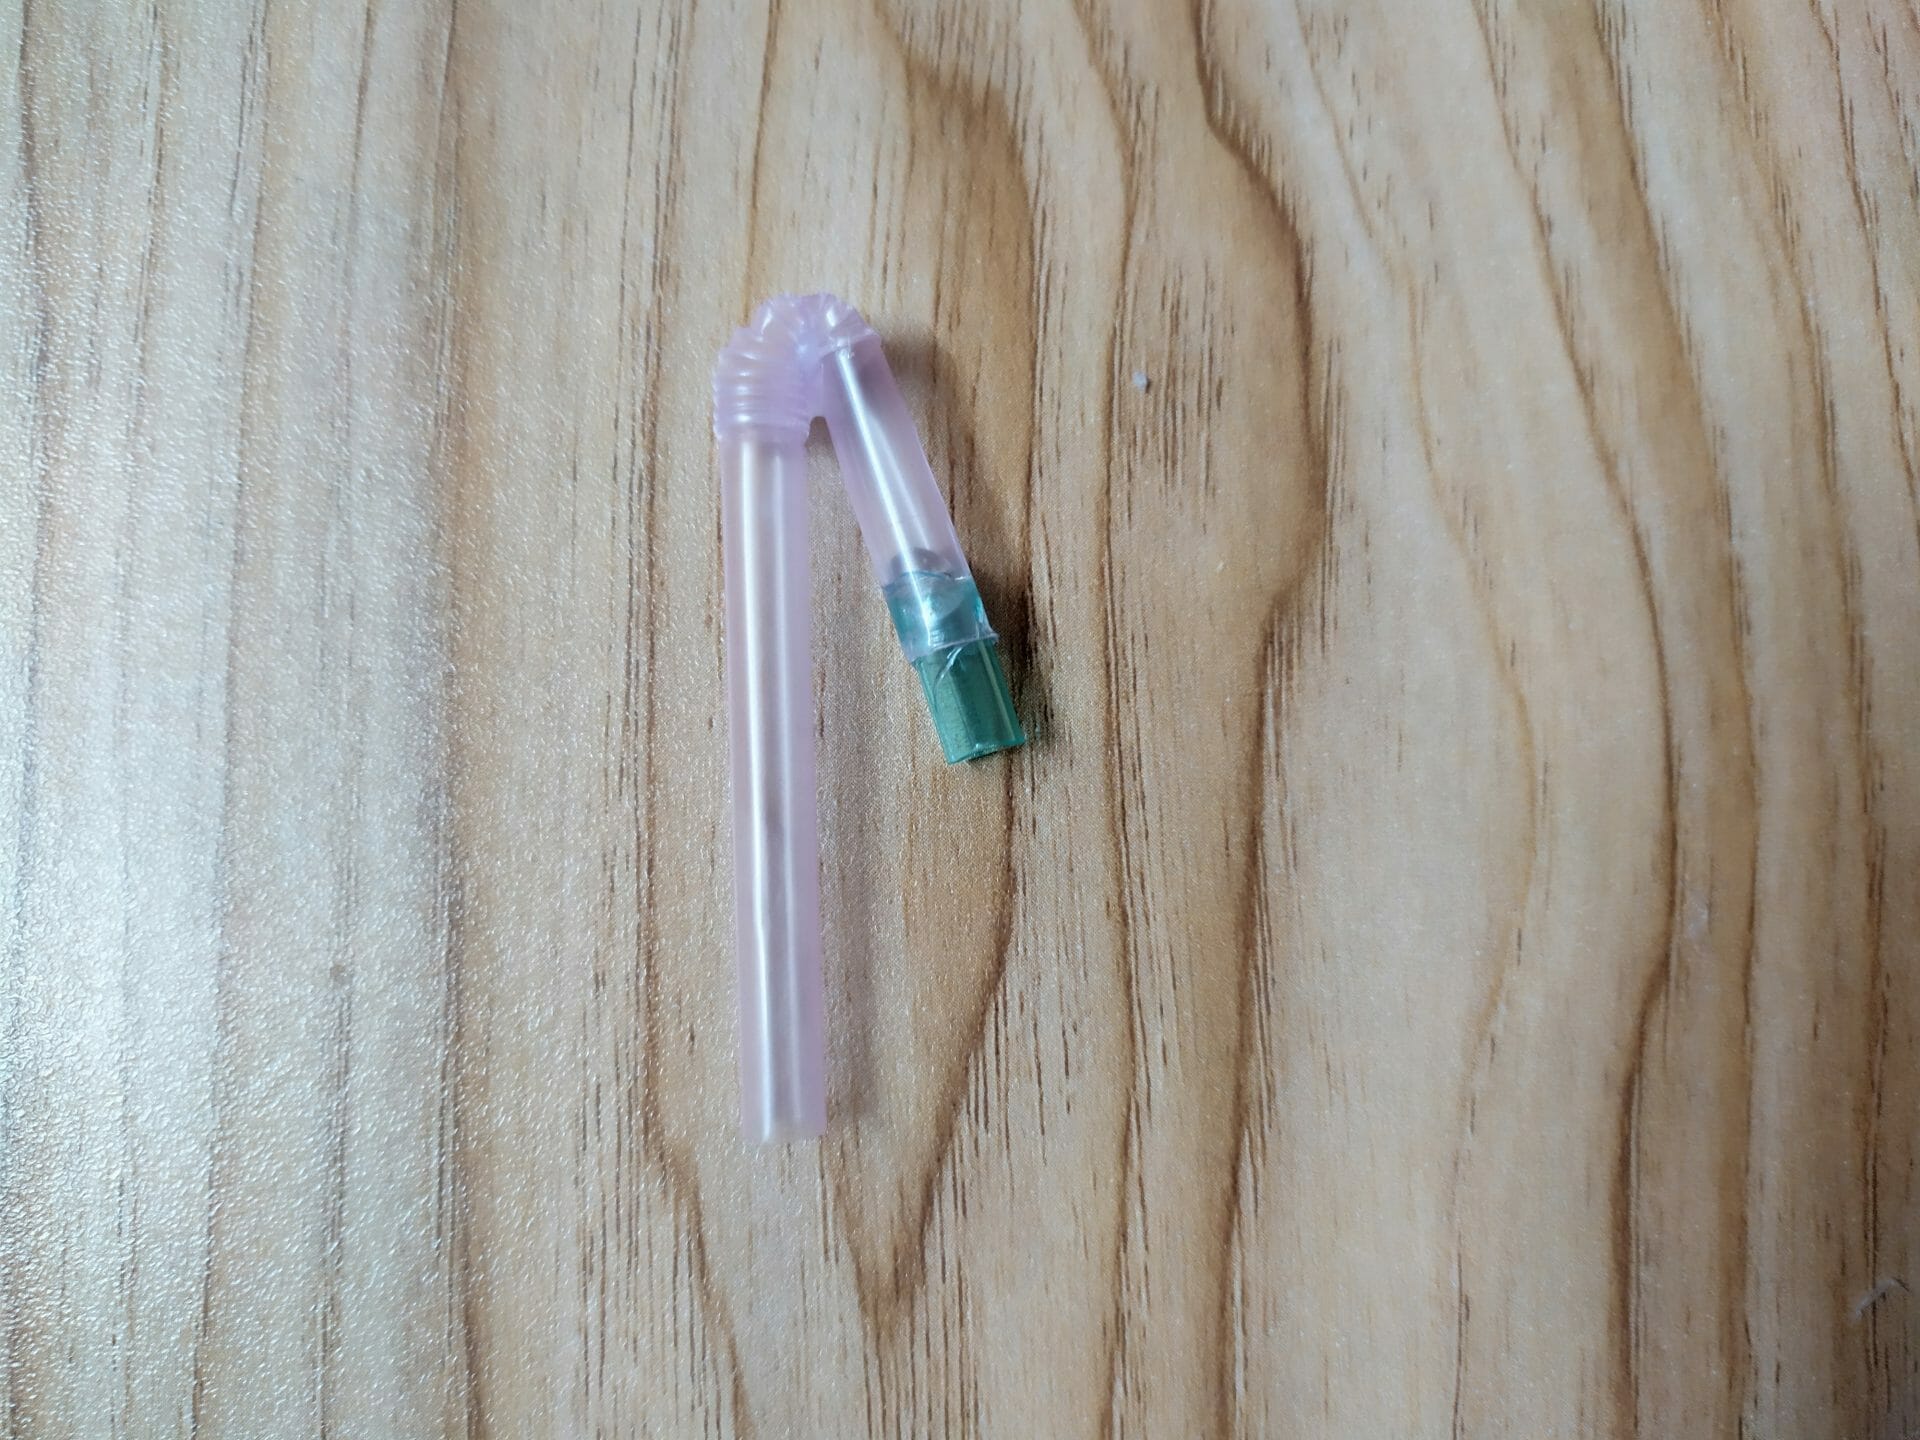
Now, using a small cut-through airline tube and glue, seal one edge of the straw. Check twice if it’s attached properly. This is the first straw that had been cut for the holder.
Step 11: Attach the Two Straw of the Holder
Now, use another left straw to seal the other edge of the airline tube. It’ll look more like the letter ‘N’. This will work as the holder of the feeding ring. Preciously cut the straw and attach it, as it’ll play an important role in the feeding ring.
Step 12: The Final Equipment of the Feeding Ring
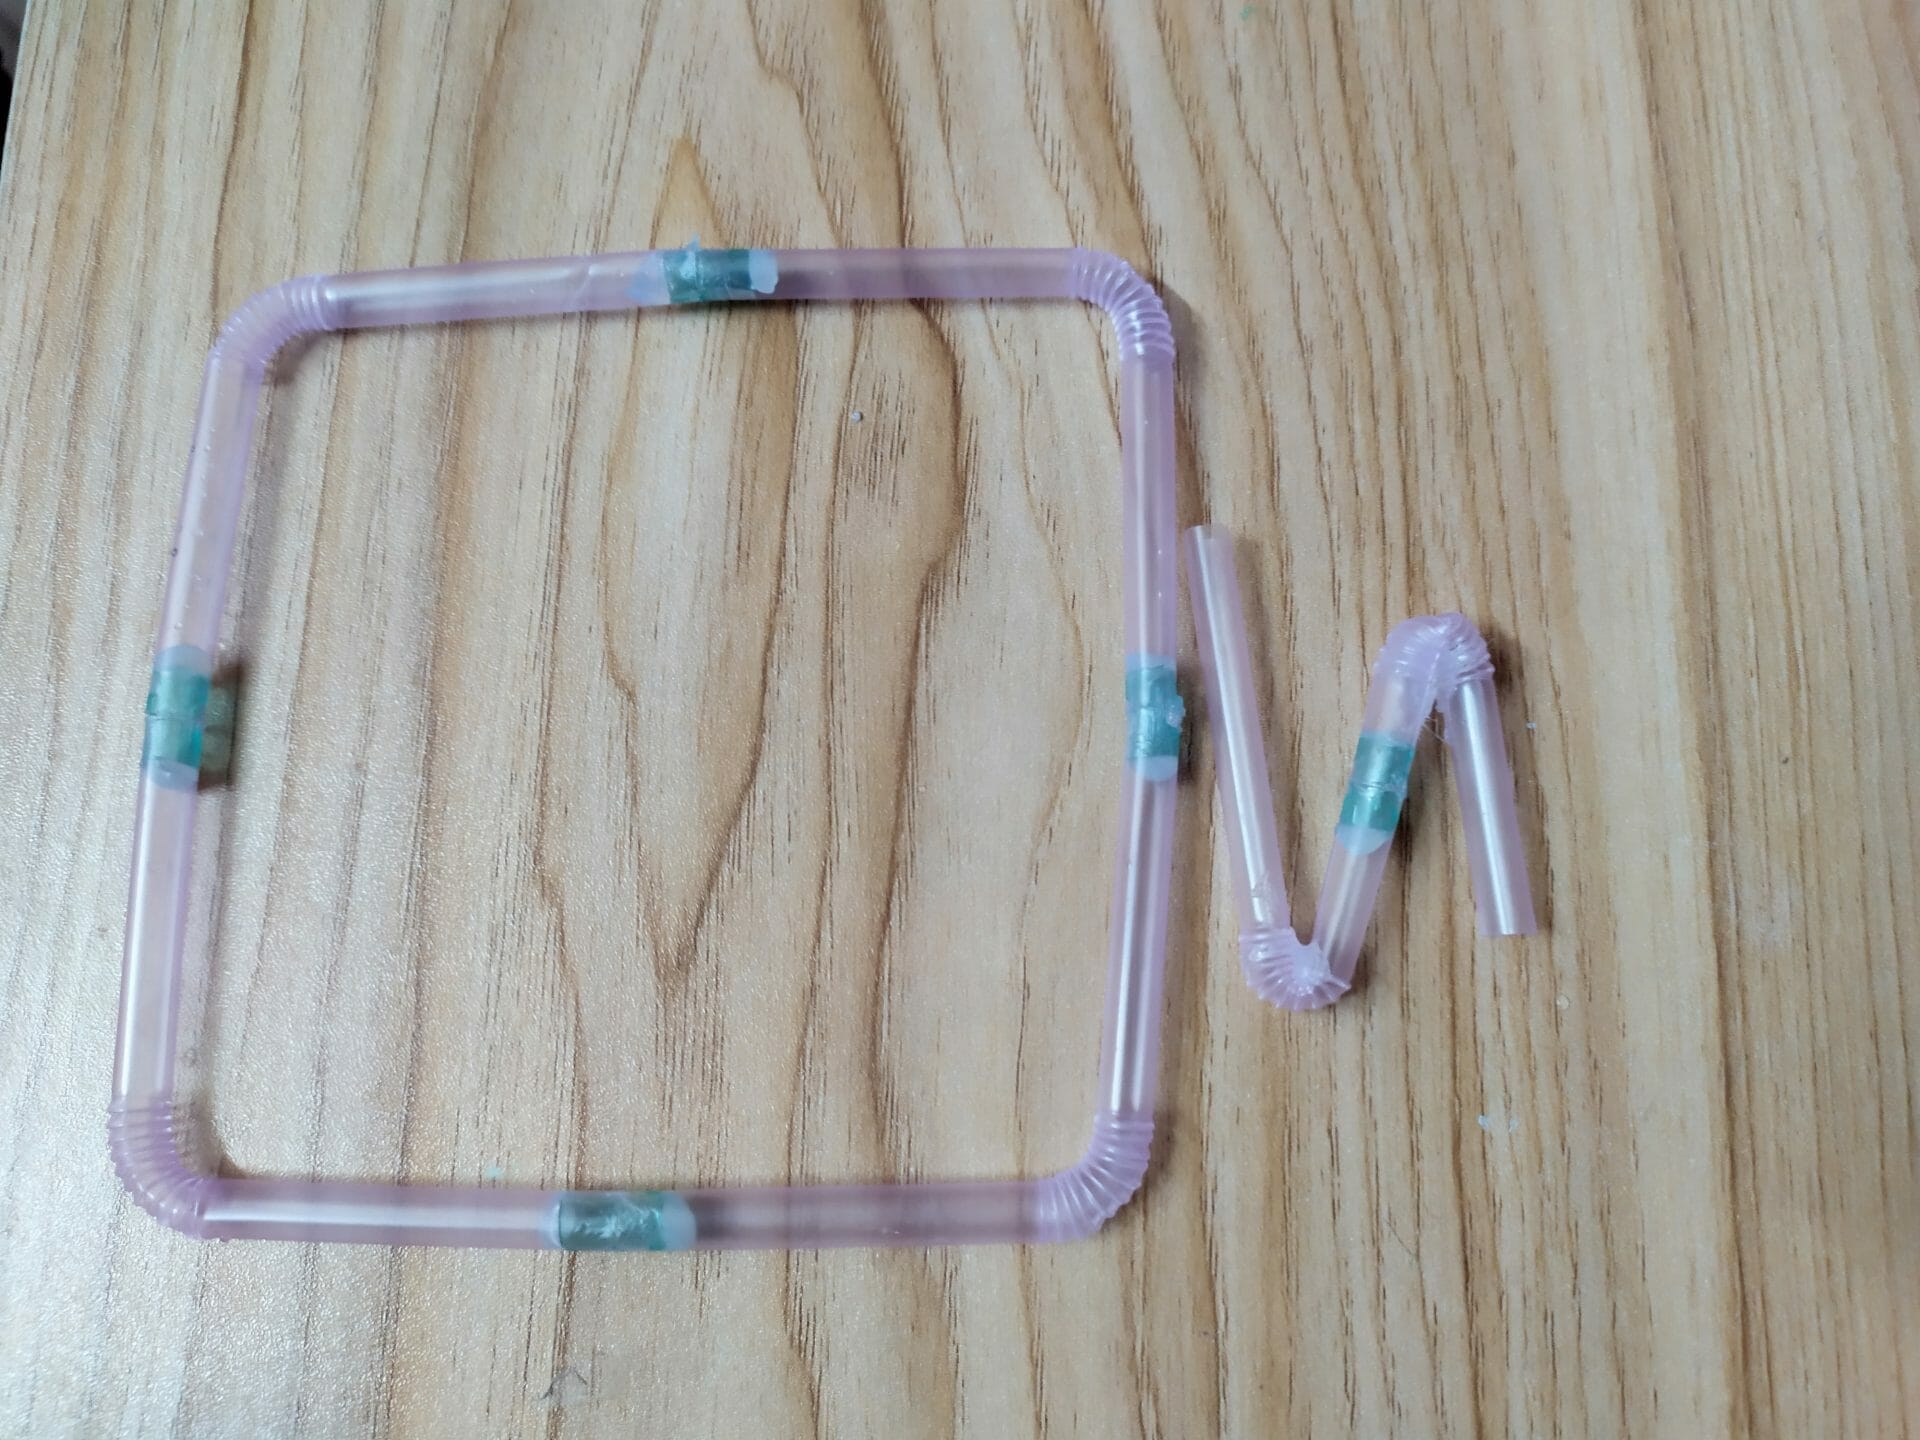
So, this is the two parts of the feeding ring. One is the square body which will float on the surface of the aquarium and will hold the food for the fish. The fish will come to the surface for finding food. The other one is the holder of the feeding ring. This will be attached to the aquarium glass. This will hold the feeding ring on the surface.
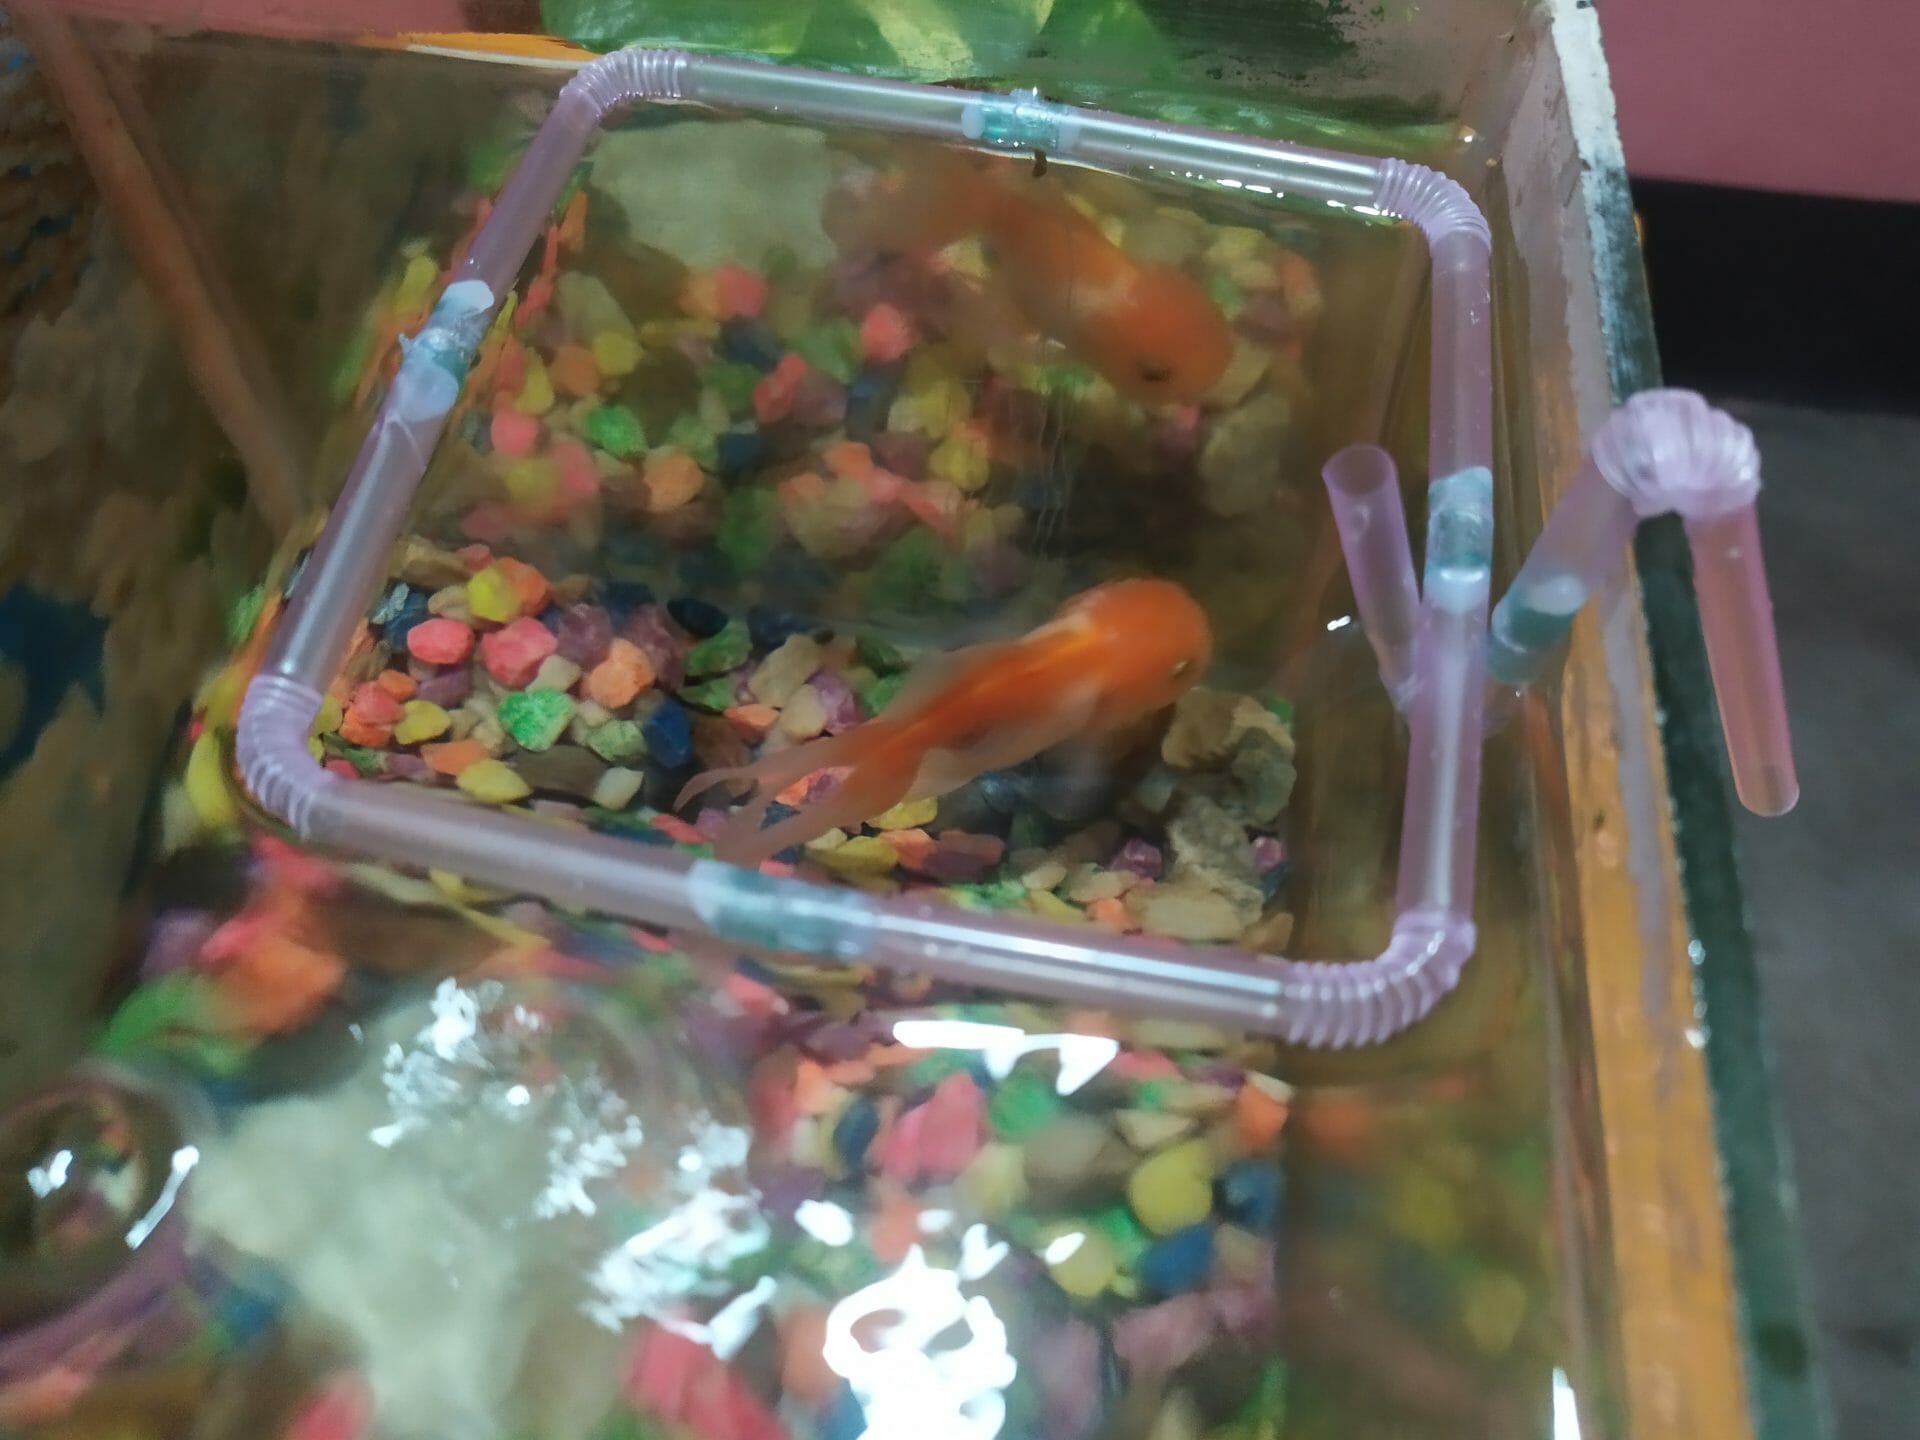
Step 13: Right Side Look in the Aquarium

This is the feeding ring that will look in the aquarium. This is the right side of the look. So, here the holder is holding the feeding ring on the surface of the aquarium.
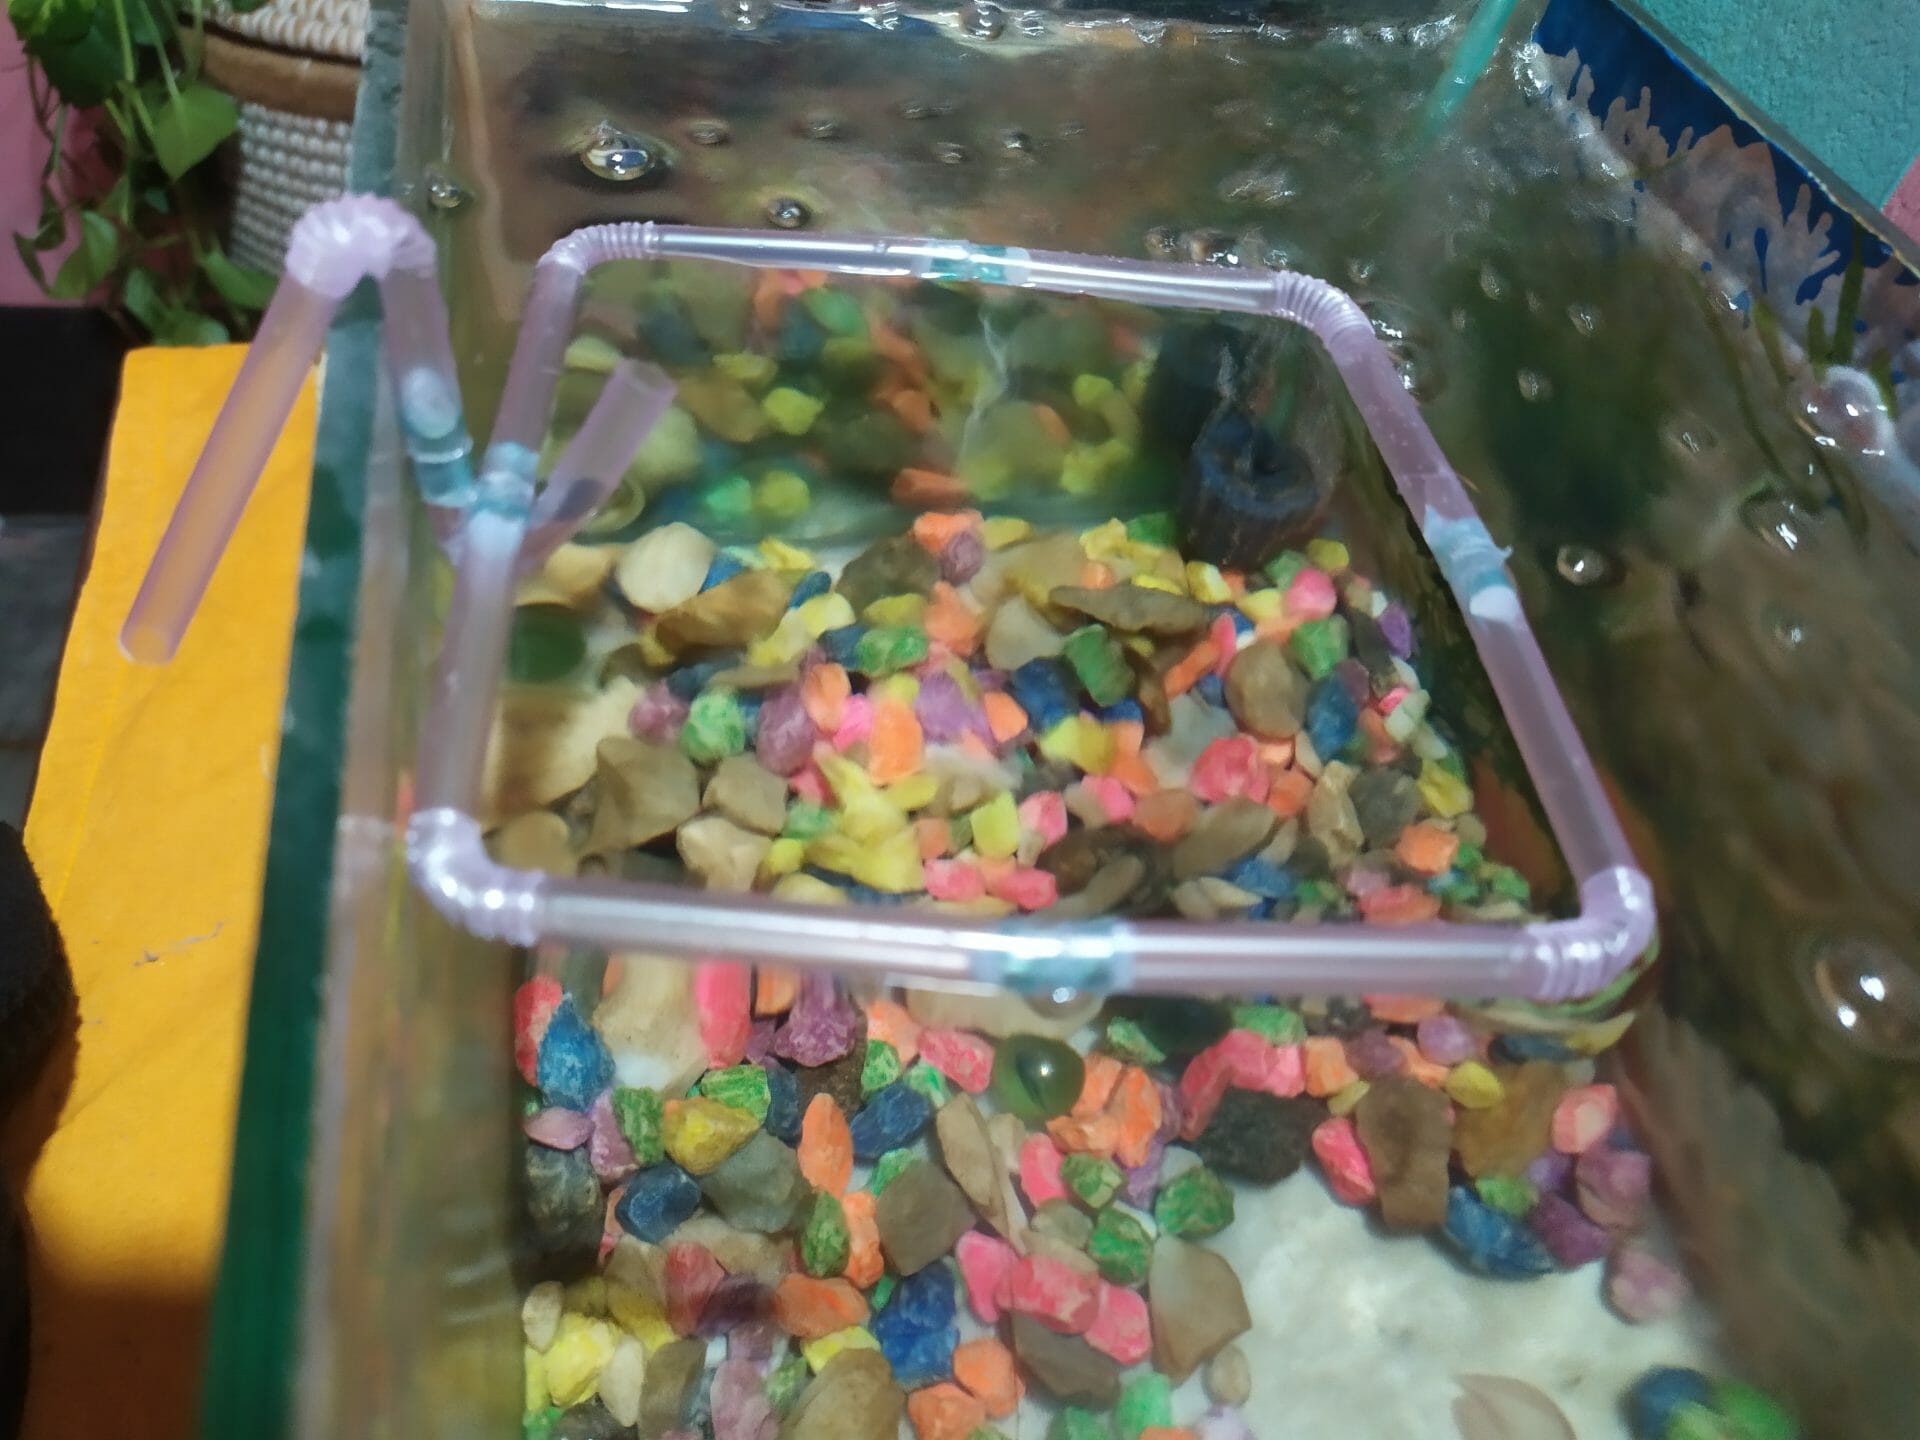
Step 14: Left Side Look in the Aquarium
This is the feeding ring that will look in the aquarium on the left side. This is the left side of the look. So, here the holder is holding the feeding ring on the surface of the aquarium.
Step 15: The Upper Side Look

So, this is the upper side look of the feeding ring. The holder is perfectly holding the ring on the surface of the aquarium. The feeding ring can be successfully used for the feeding of the betta fish.
Method 3: DIY Triangle Shaped Betta Feeding Ring

Supplies You Will Need:
- Two Types of Straw
- Scissor
- A Glue Gun
- Silicon Glue
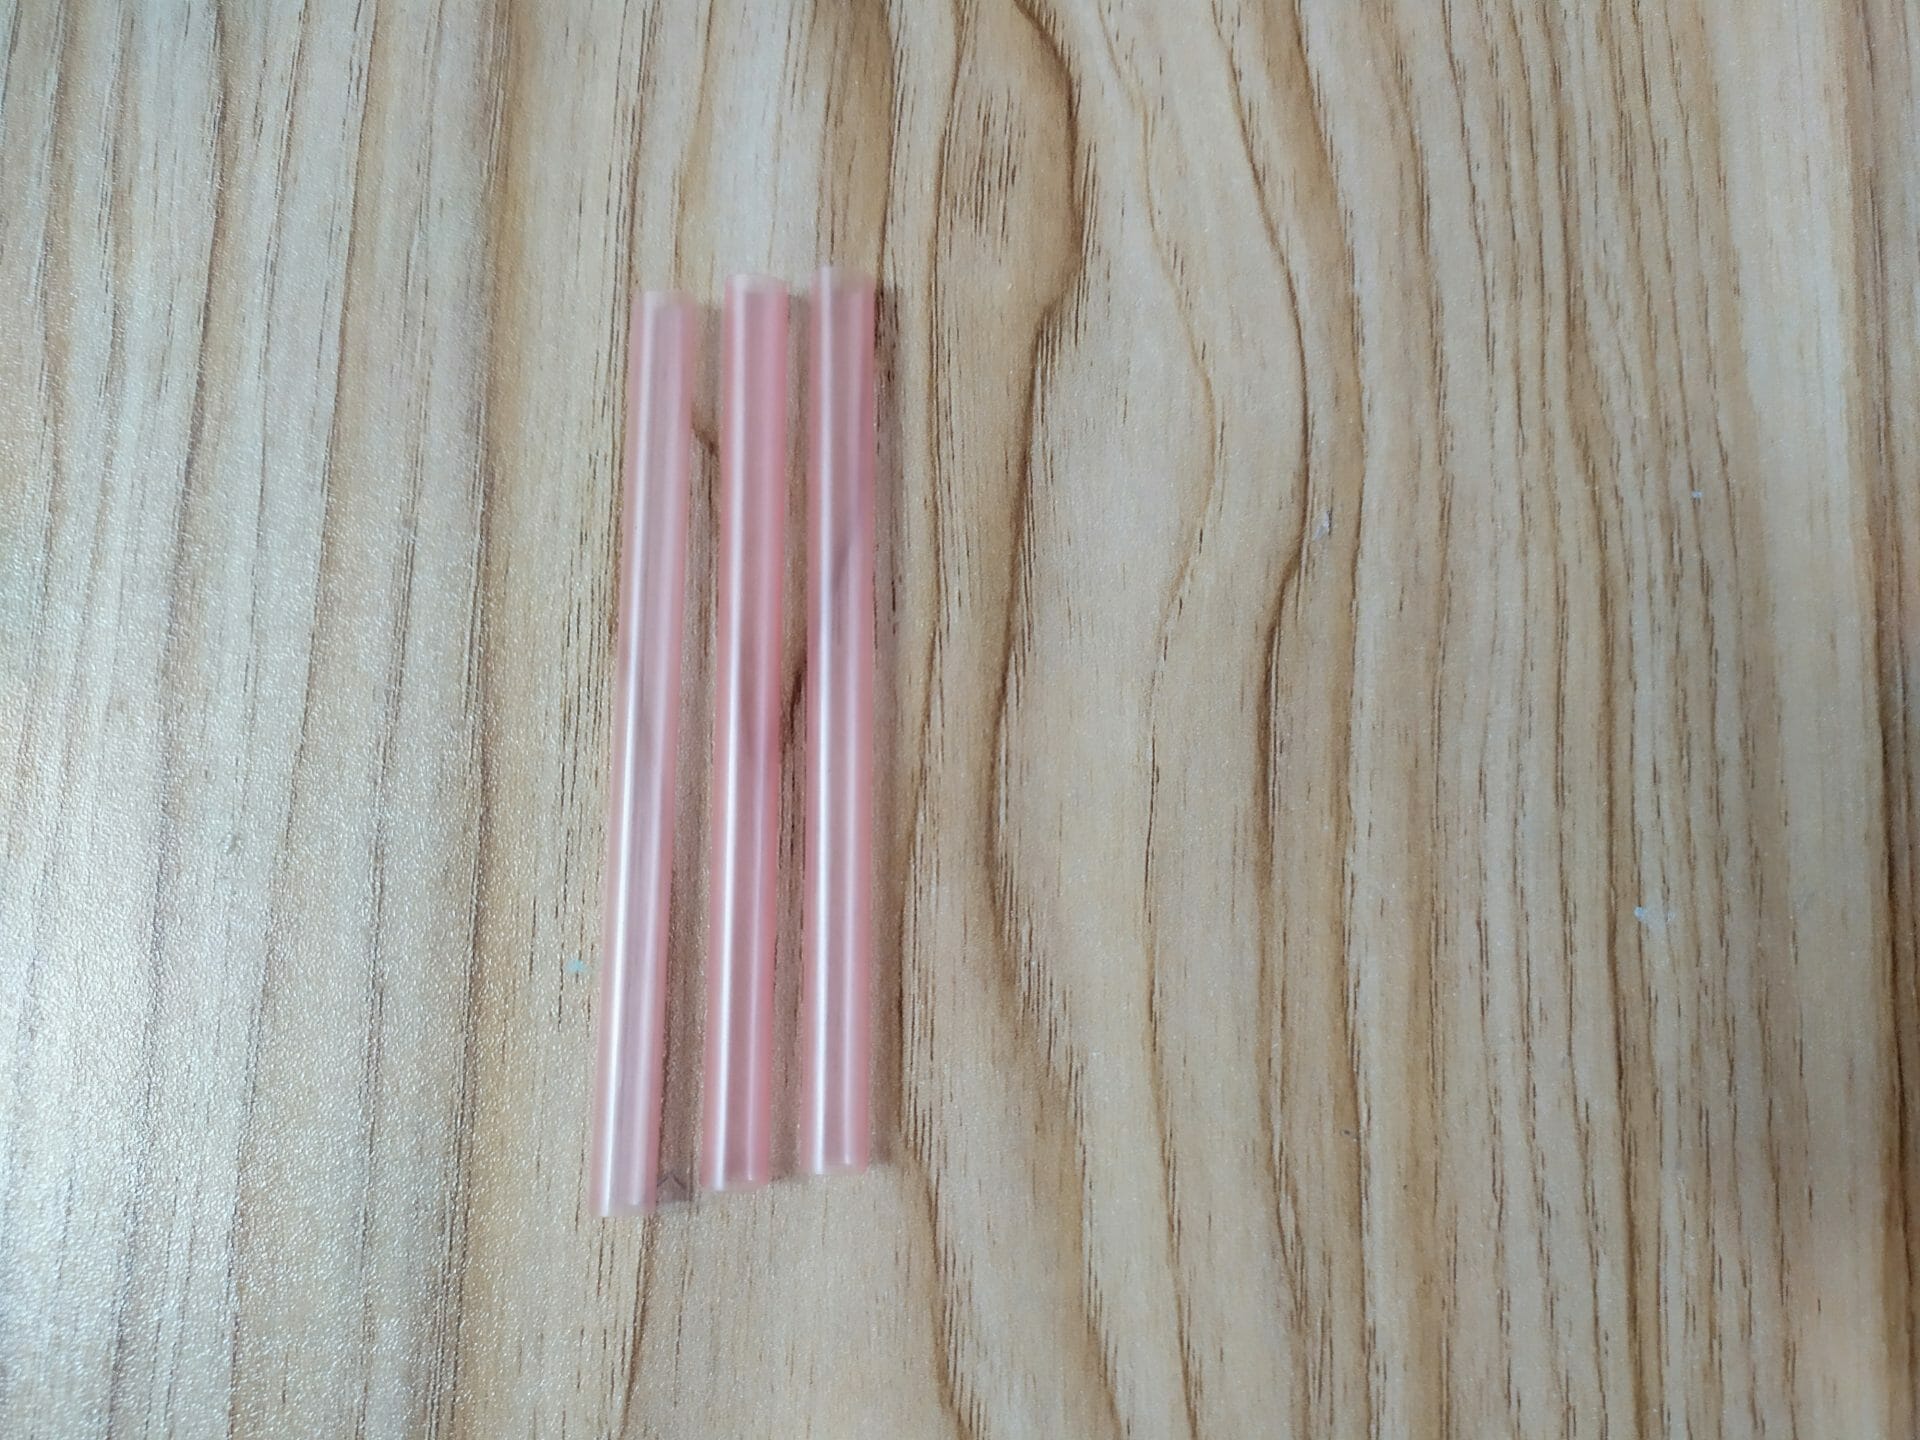
Step 1: Cut the straw
Straws are mainly made of plastic and are a great DIY material. Many kinds of DIY projects can be made using straws. Also, there are many sustainability benefits to using straw as a material resource.
First, cut the three straws into similar lengths. That will keep the measure in the right direction. Take the measurements carefully. Otherwise, it’ll not fit into the perfect shape.
Step 2: Cut the Other Straw
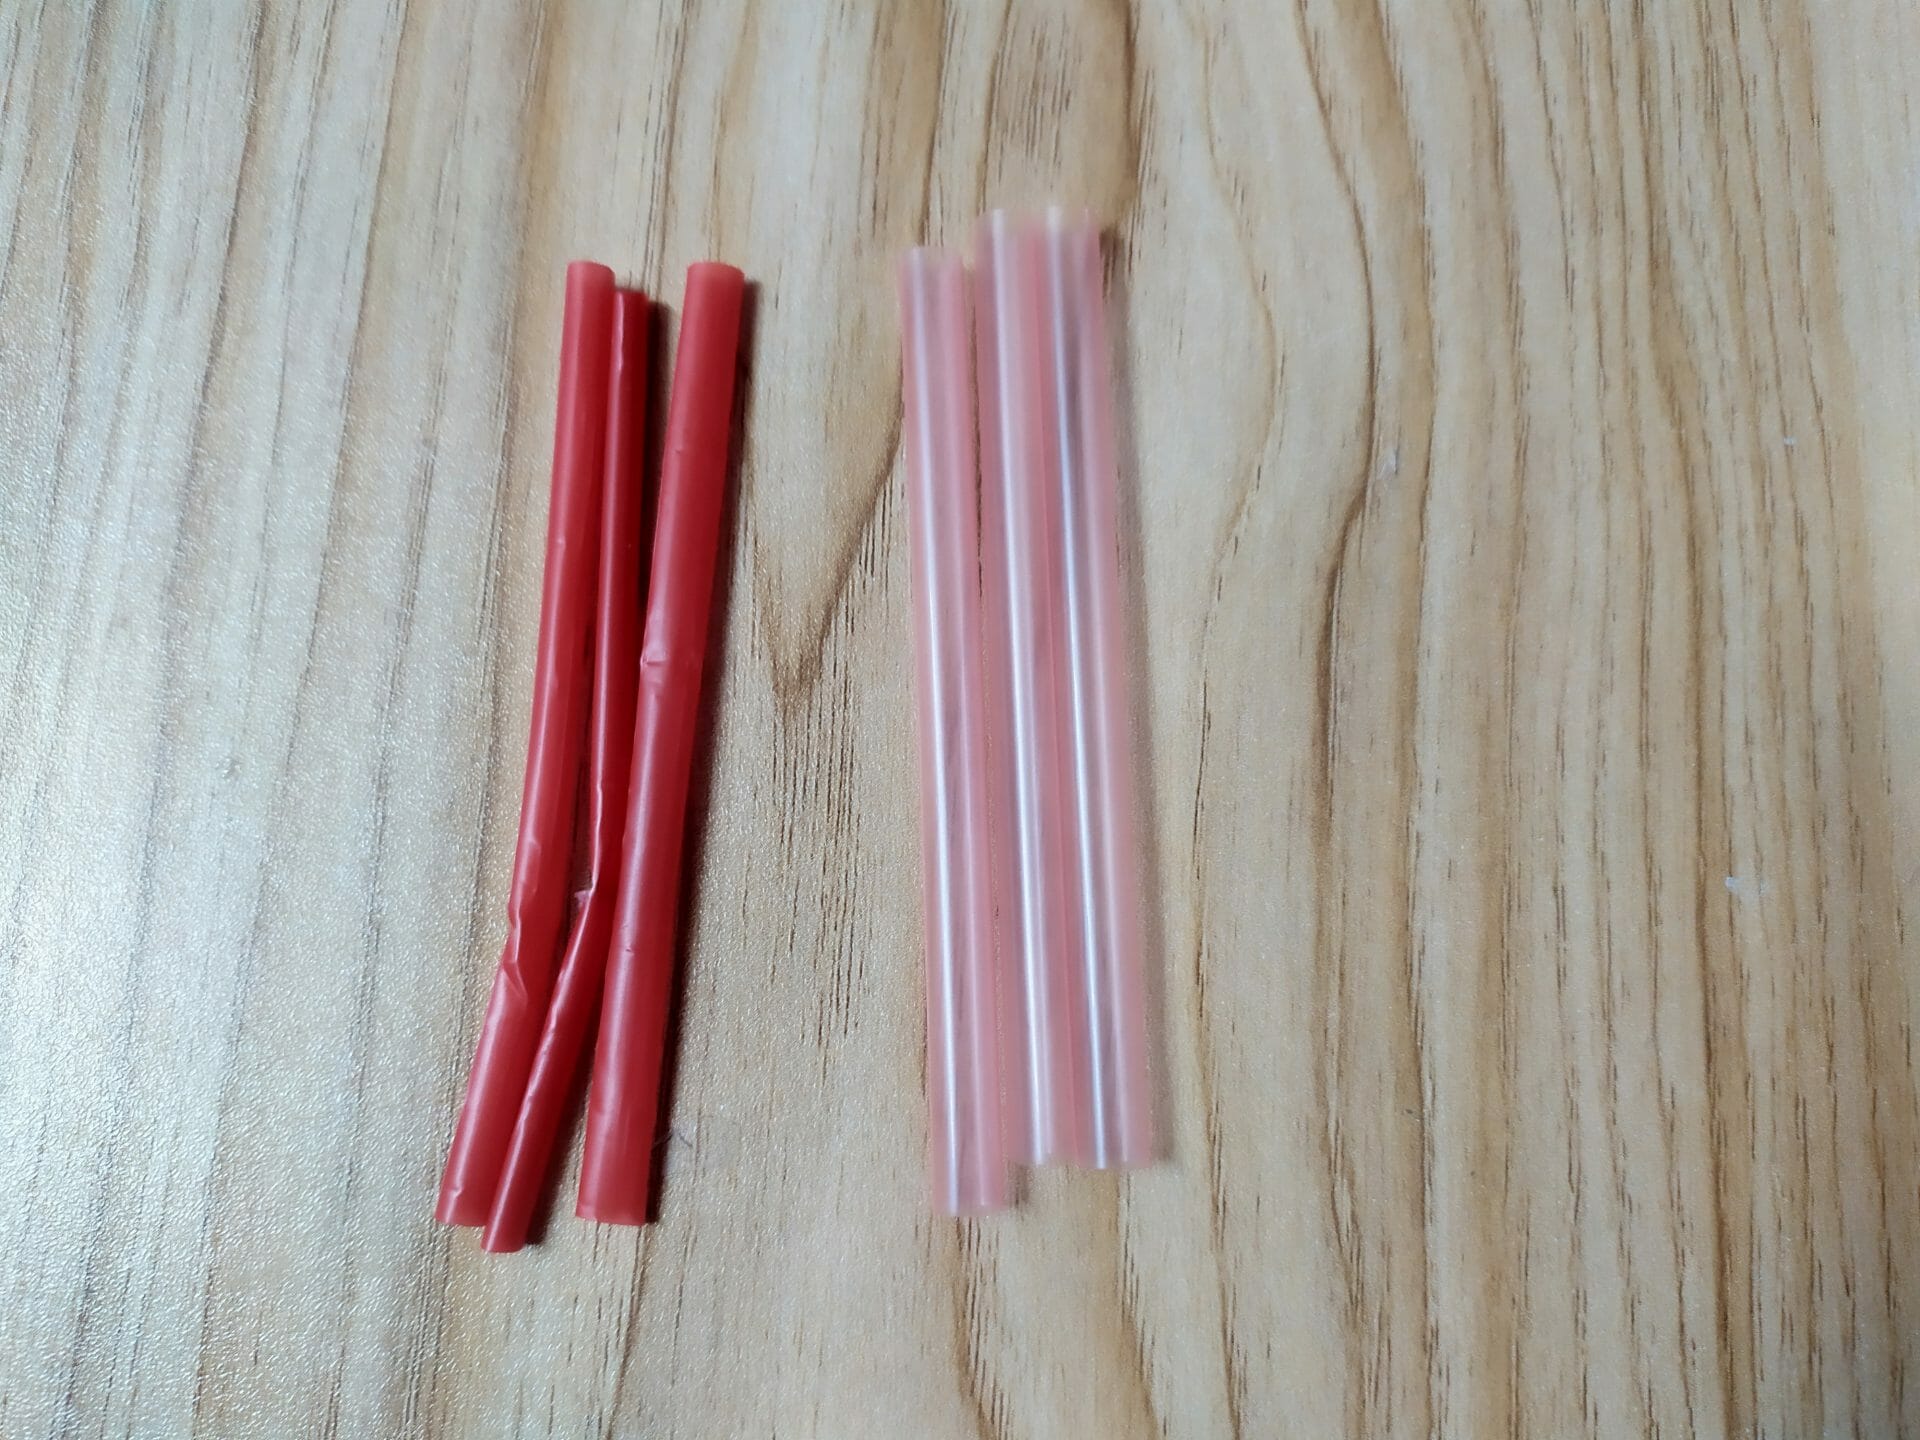
Now, using scissors, cut another straw that was without a bending point. Cut it to the same size as the previous one. The two types of straws will be similar in size. You can find these straws very easily in the market. You can take any color you want. But keep the measurements right.
Step 3: Seal Two Types of Straws Together
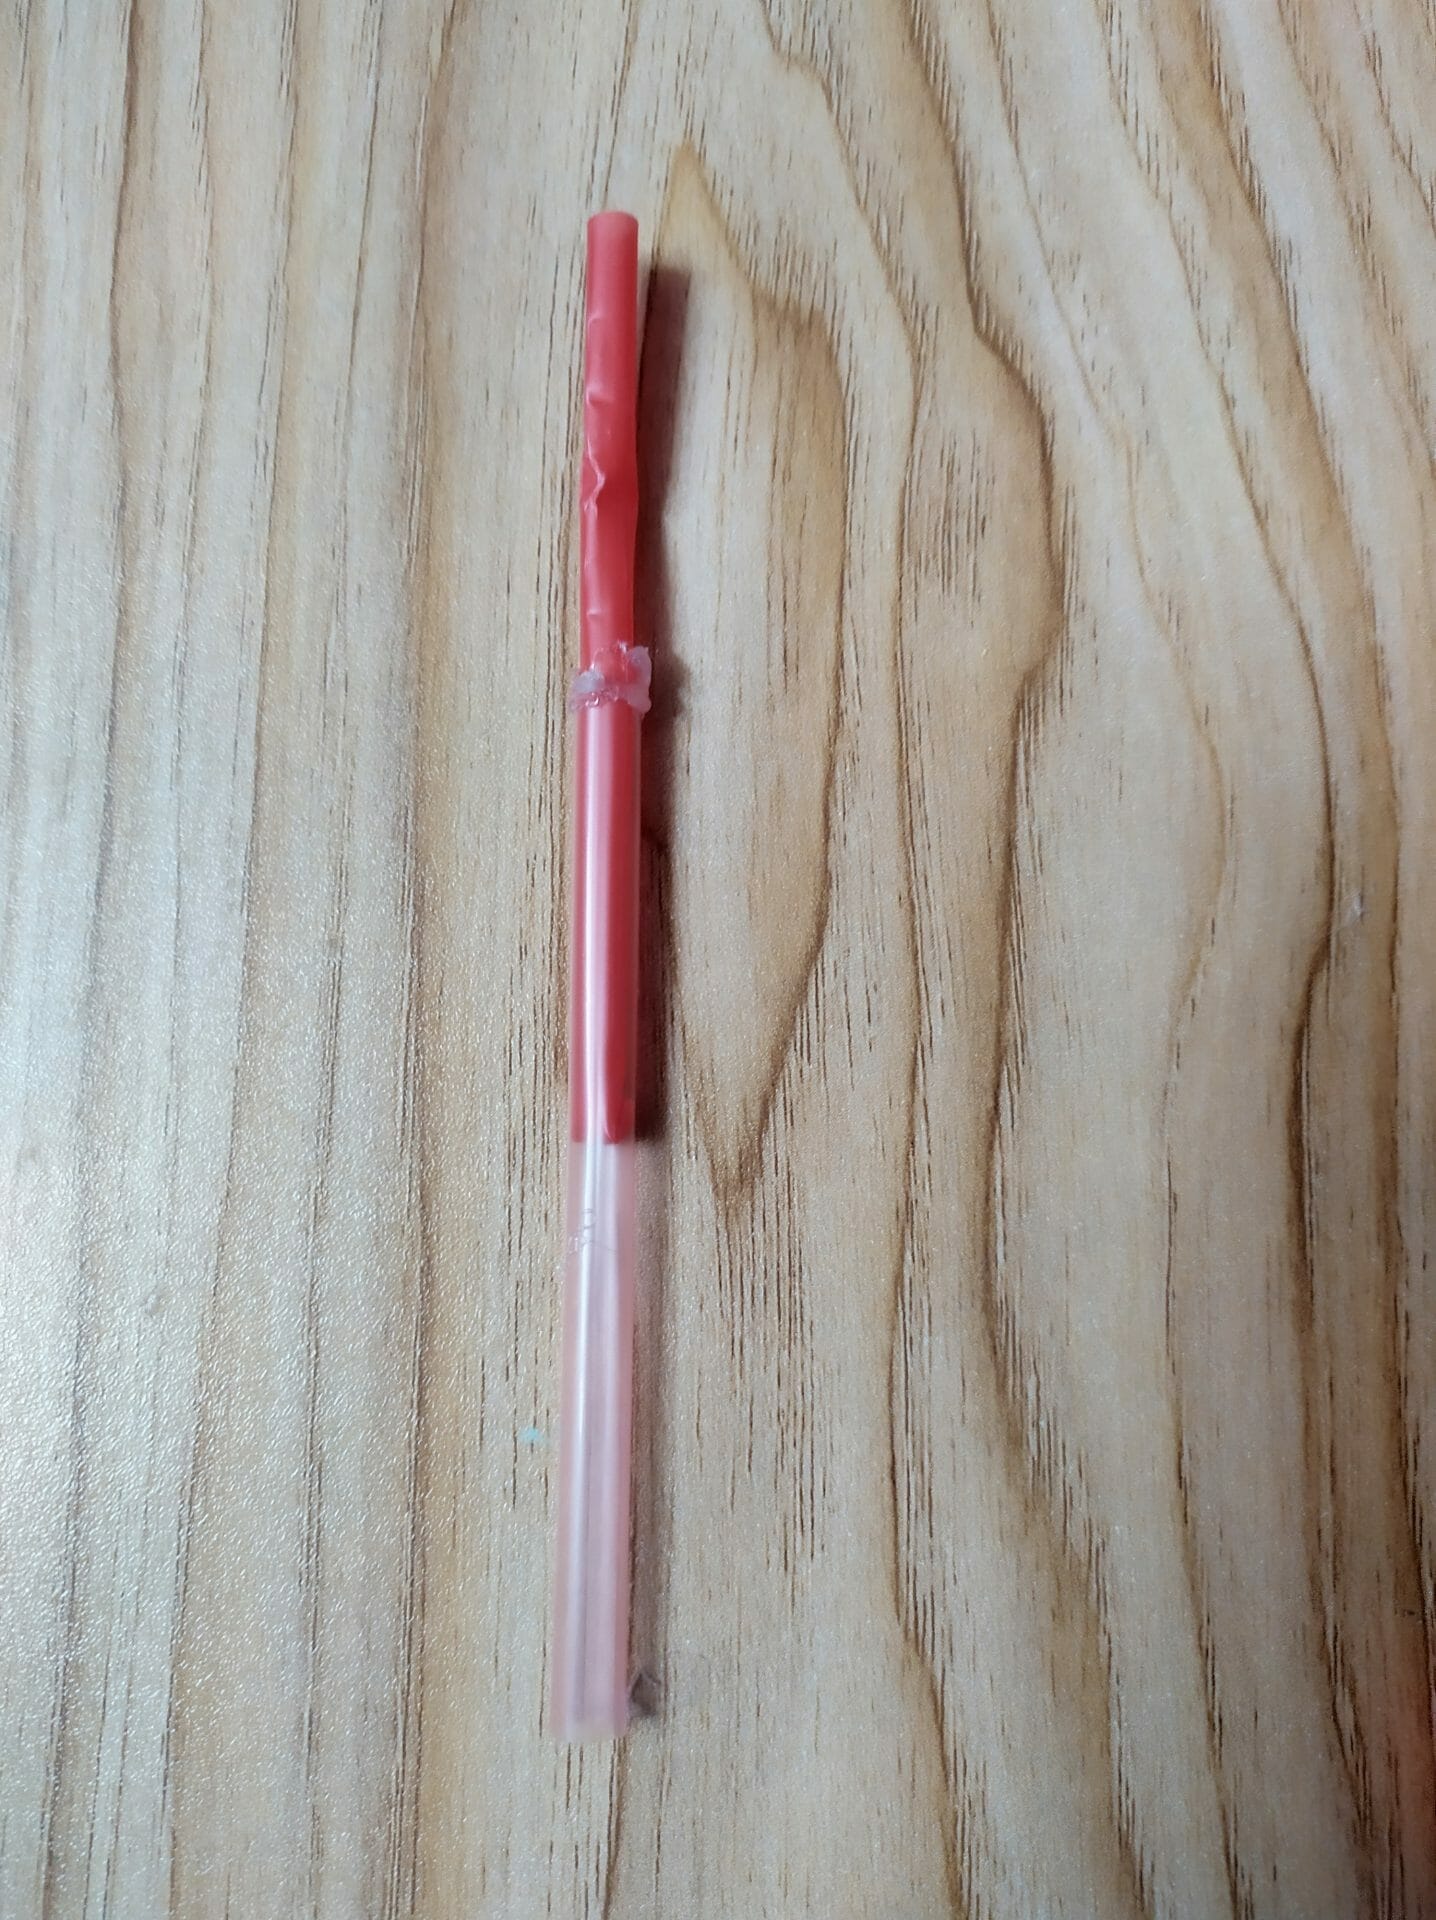
Now, put half of the red straw into the pink straw and seal the edge of the pink straw using the silicon gun. This will permanently attach the red and pink straw and it will not be detached further. The post-seal straw will look like the above picture.
Step 4: Attach Another Pink Straw
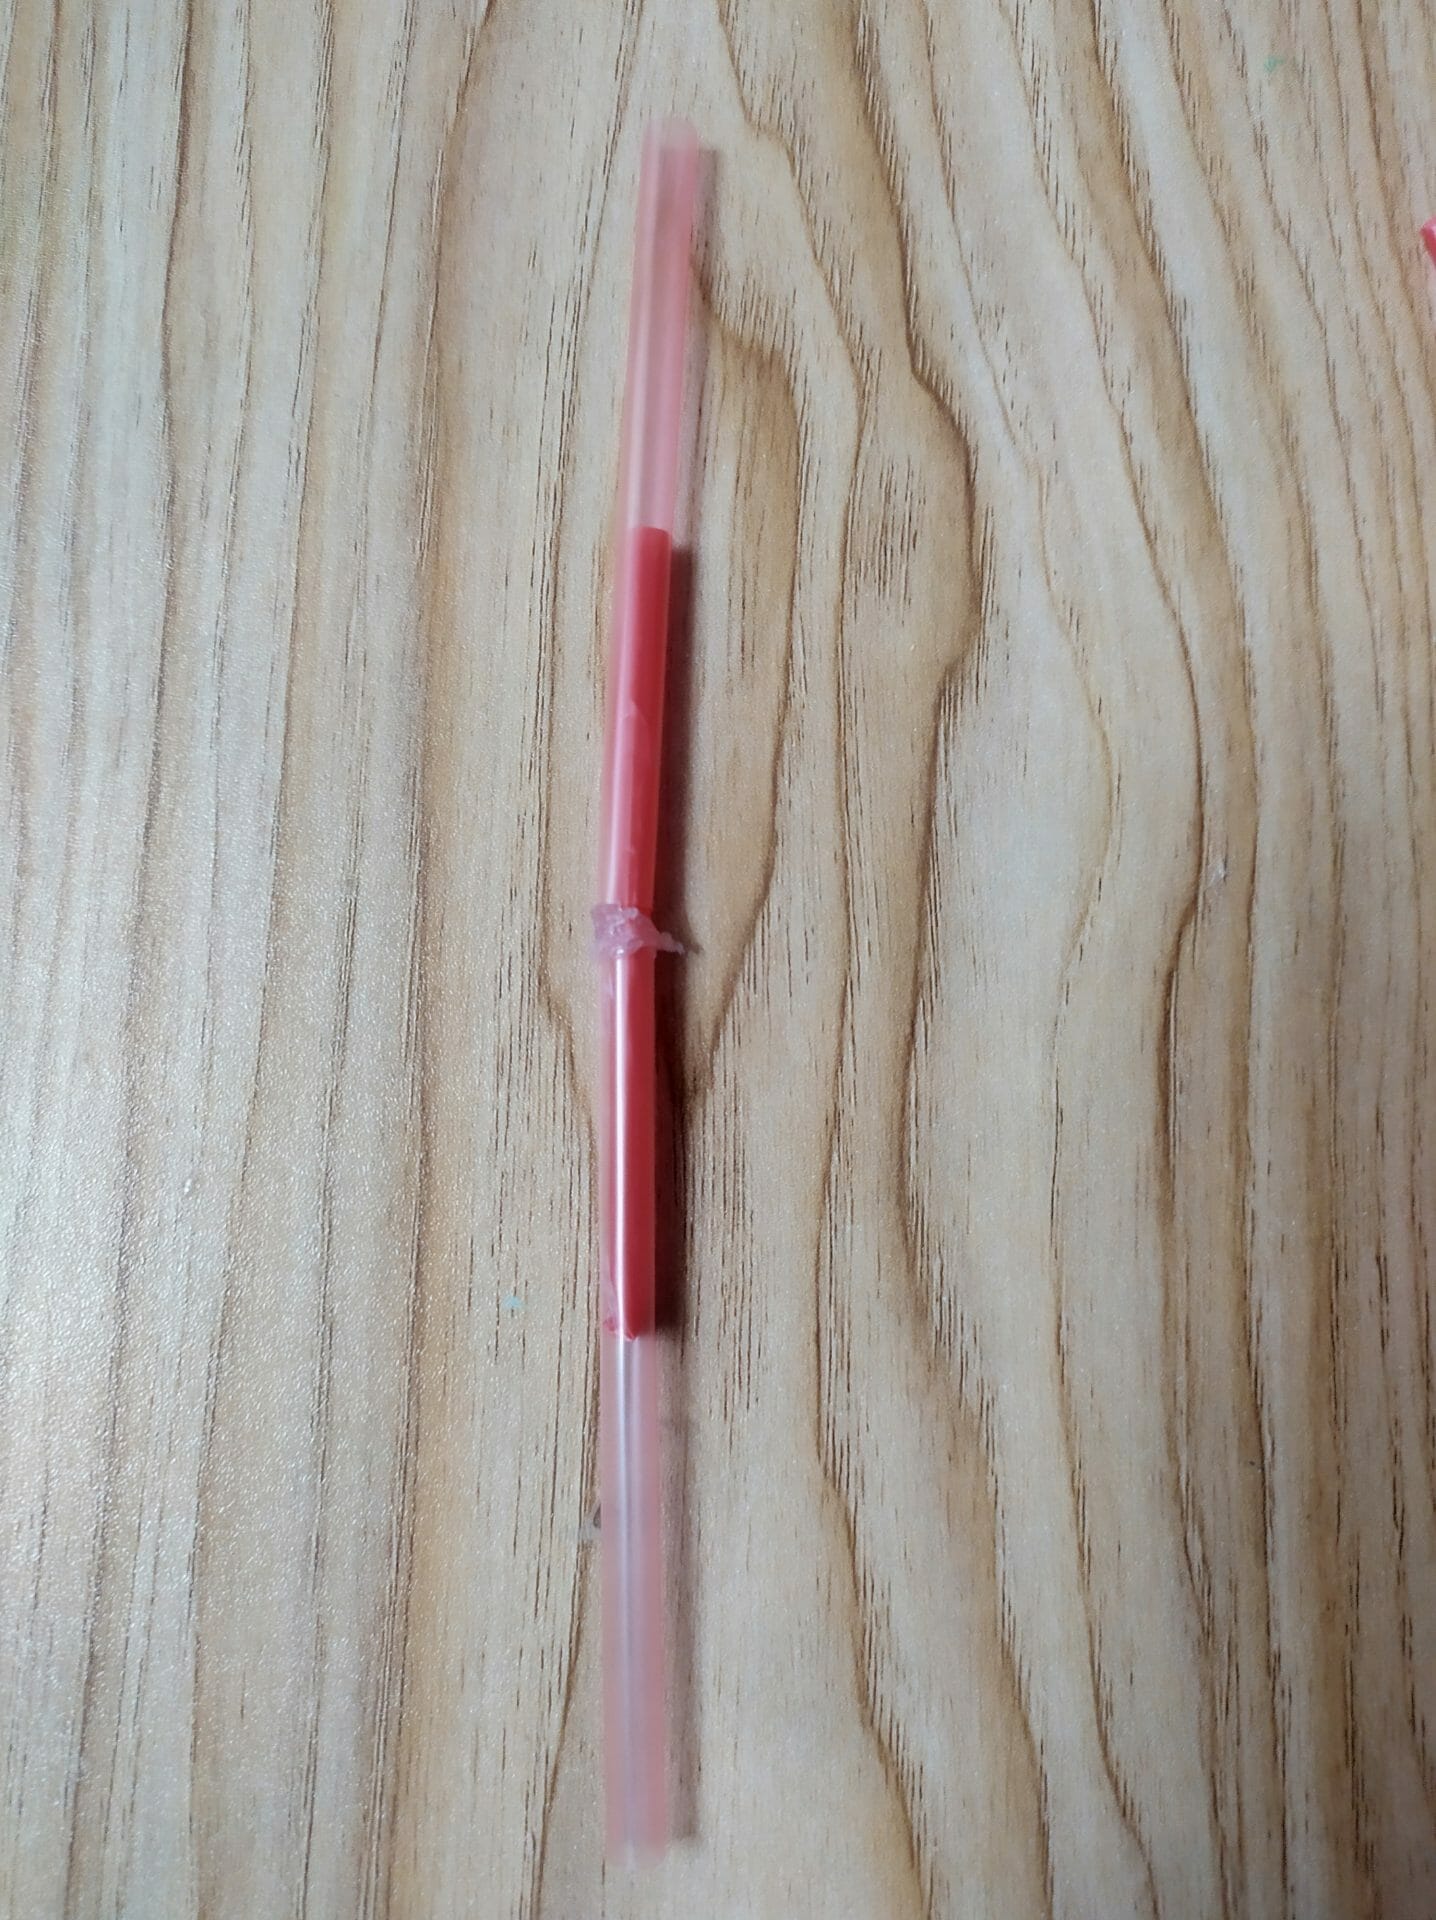
After attaching one pink and one red straw inside half of the pink straw, now attach another pink straw with the left-out red straw and seal the same edge again. With two pink straws and one red straw, the figure will look like the above picture. Moreover, note that- the diameter of the red straw must be less than the pink color straw.
Step 5: Bend the Straw

Straws are very flexible materials. It can be shaped as you want. Now previously attached straw should be bent like a V-shape like in the above picture. If it keeps fluctuating, just glued the inner side of the bending point.
Step 6: Put Into Another Red Straw
Previously, two pink straw and one red straw was attached and bent in a V-shape. Now, take another red color or the smaller straw and put half through the pink straw. Then, seal the edge of the pink straw so that the red straw can be attached permanently to the mid-point with the pink straw. It’ll look like the above picture.
Step 7: Attach Another Pink Straw
In the previous part, two red and two pink straws were used. At last, half of the red straw was outside. Now using another pink straw put the left-out red straw inside the pink one. It’ll more look like the above picture.
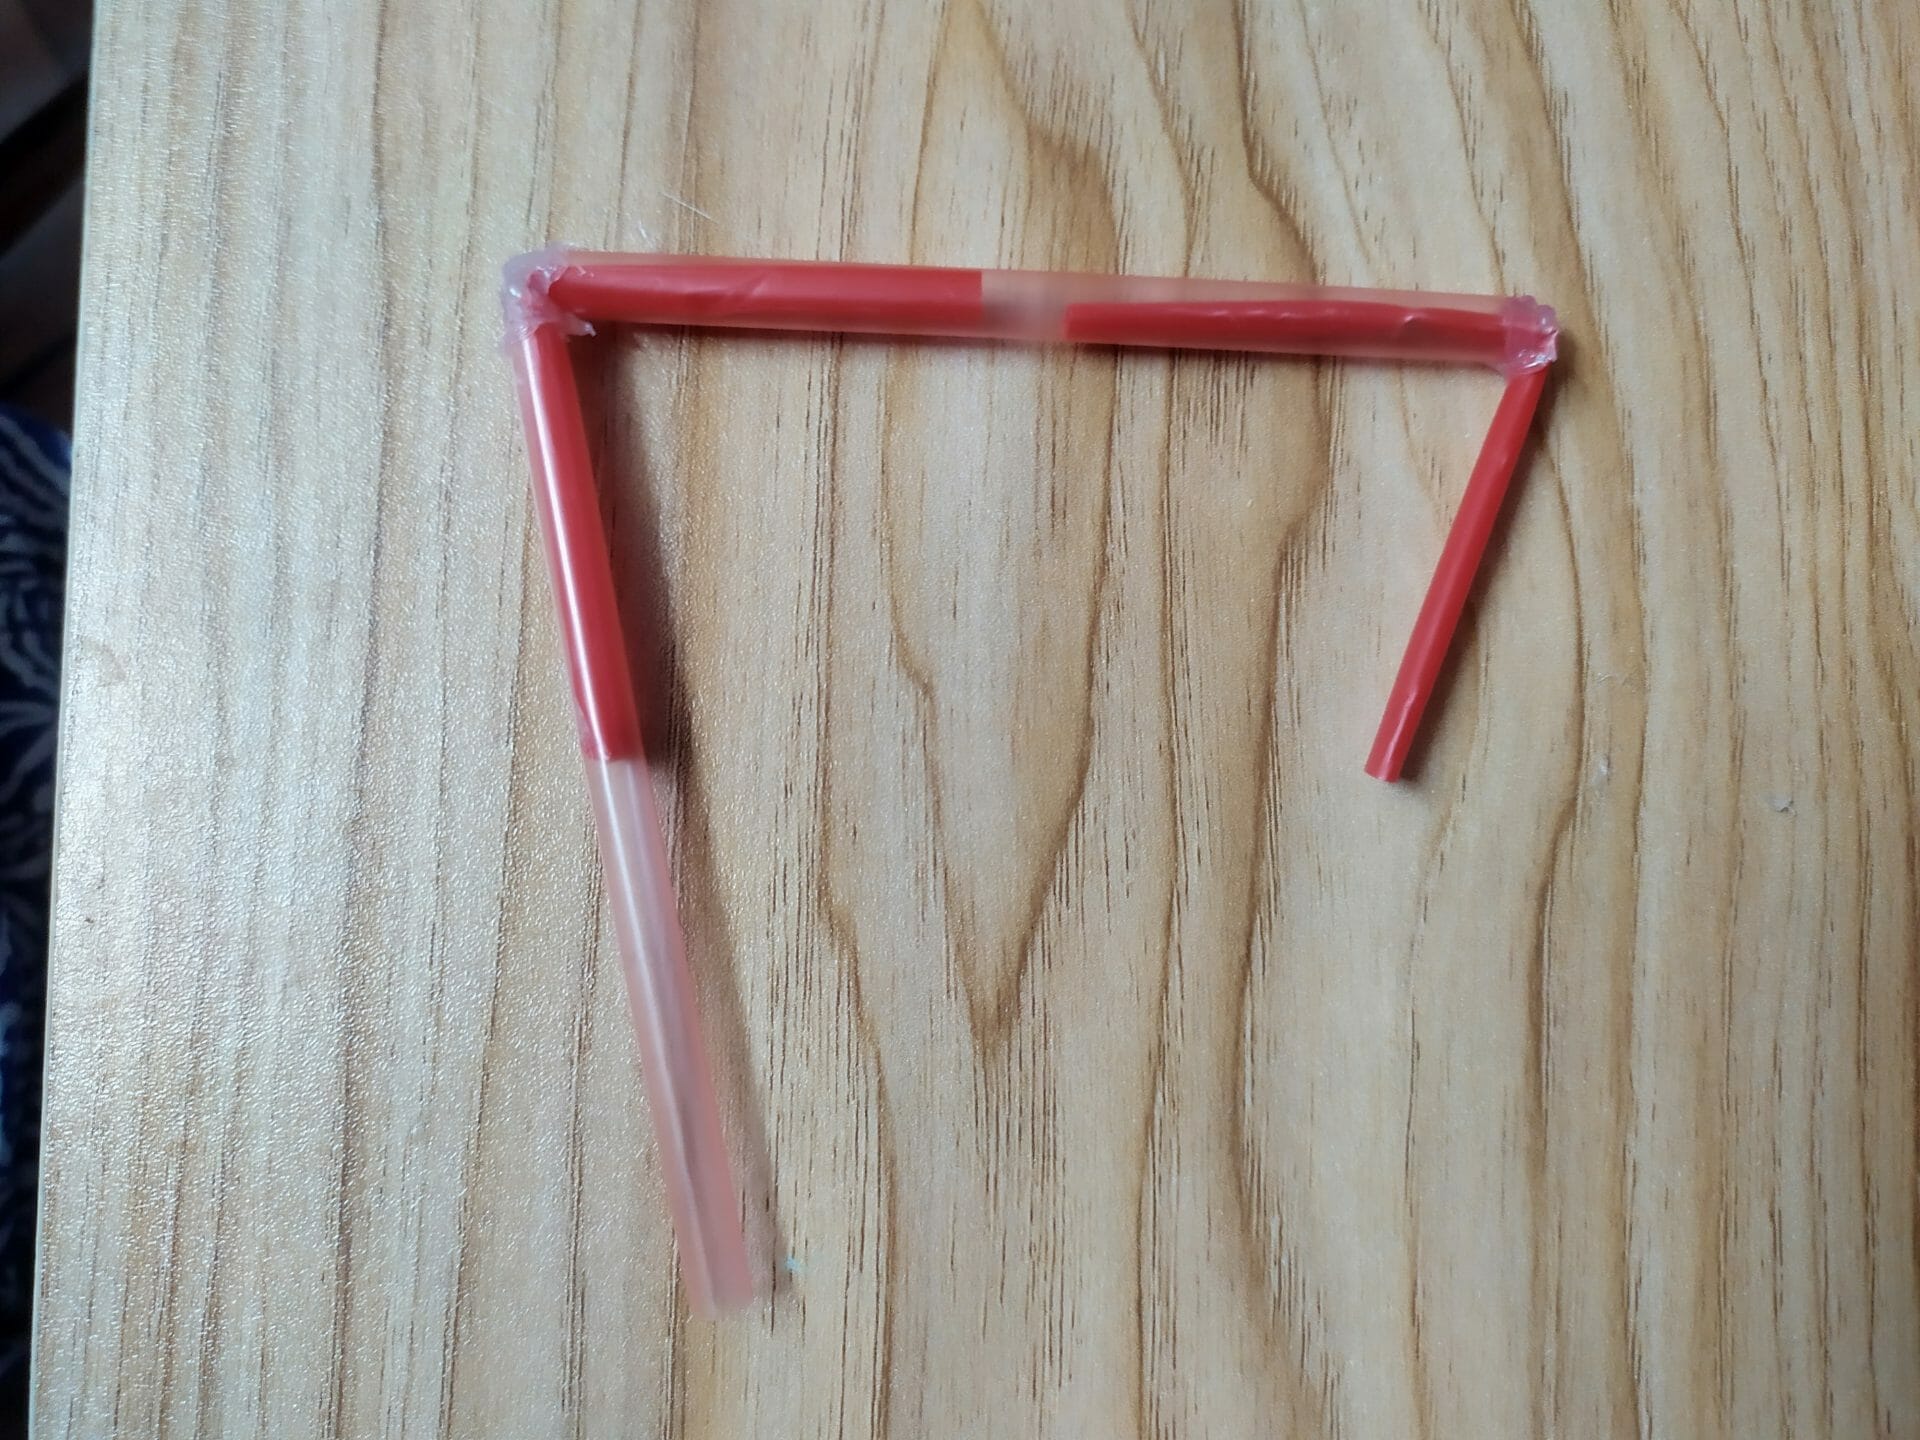
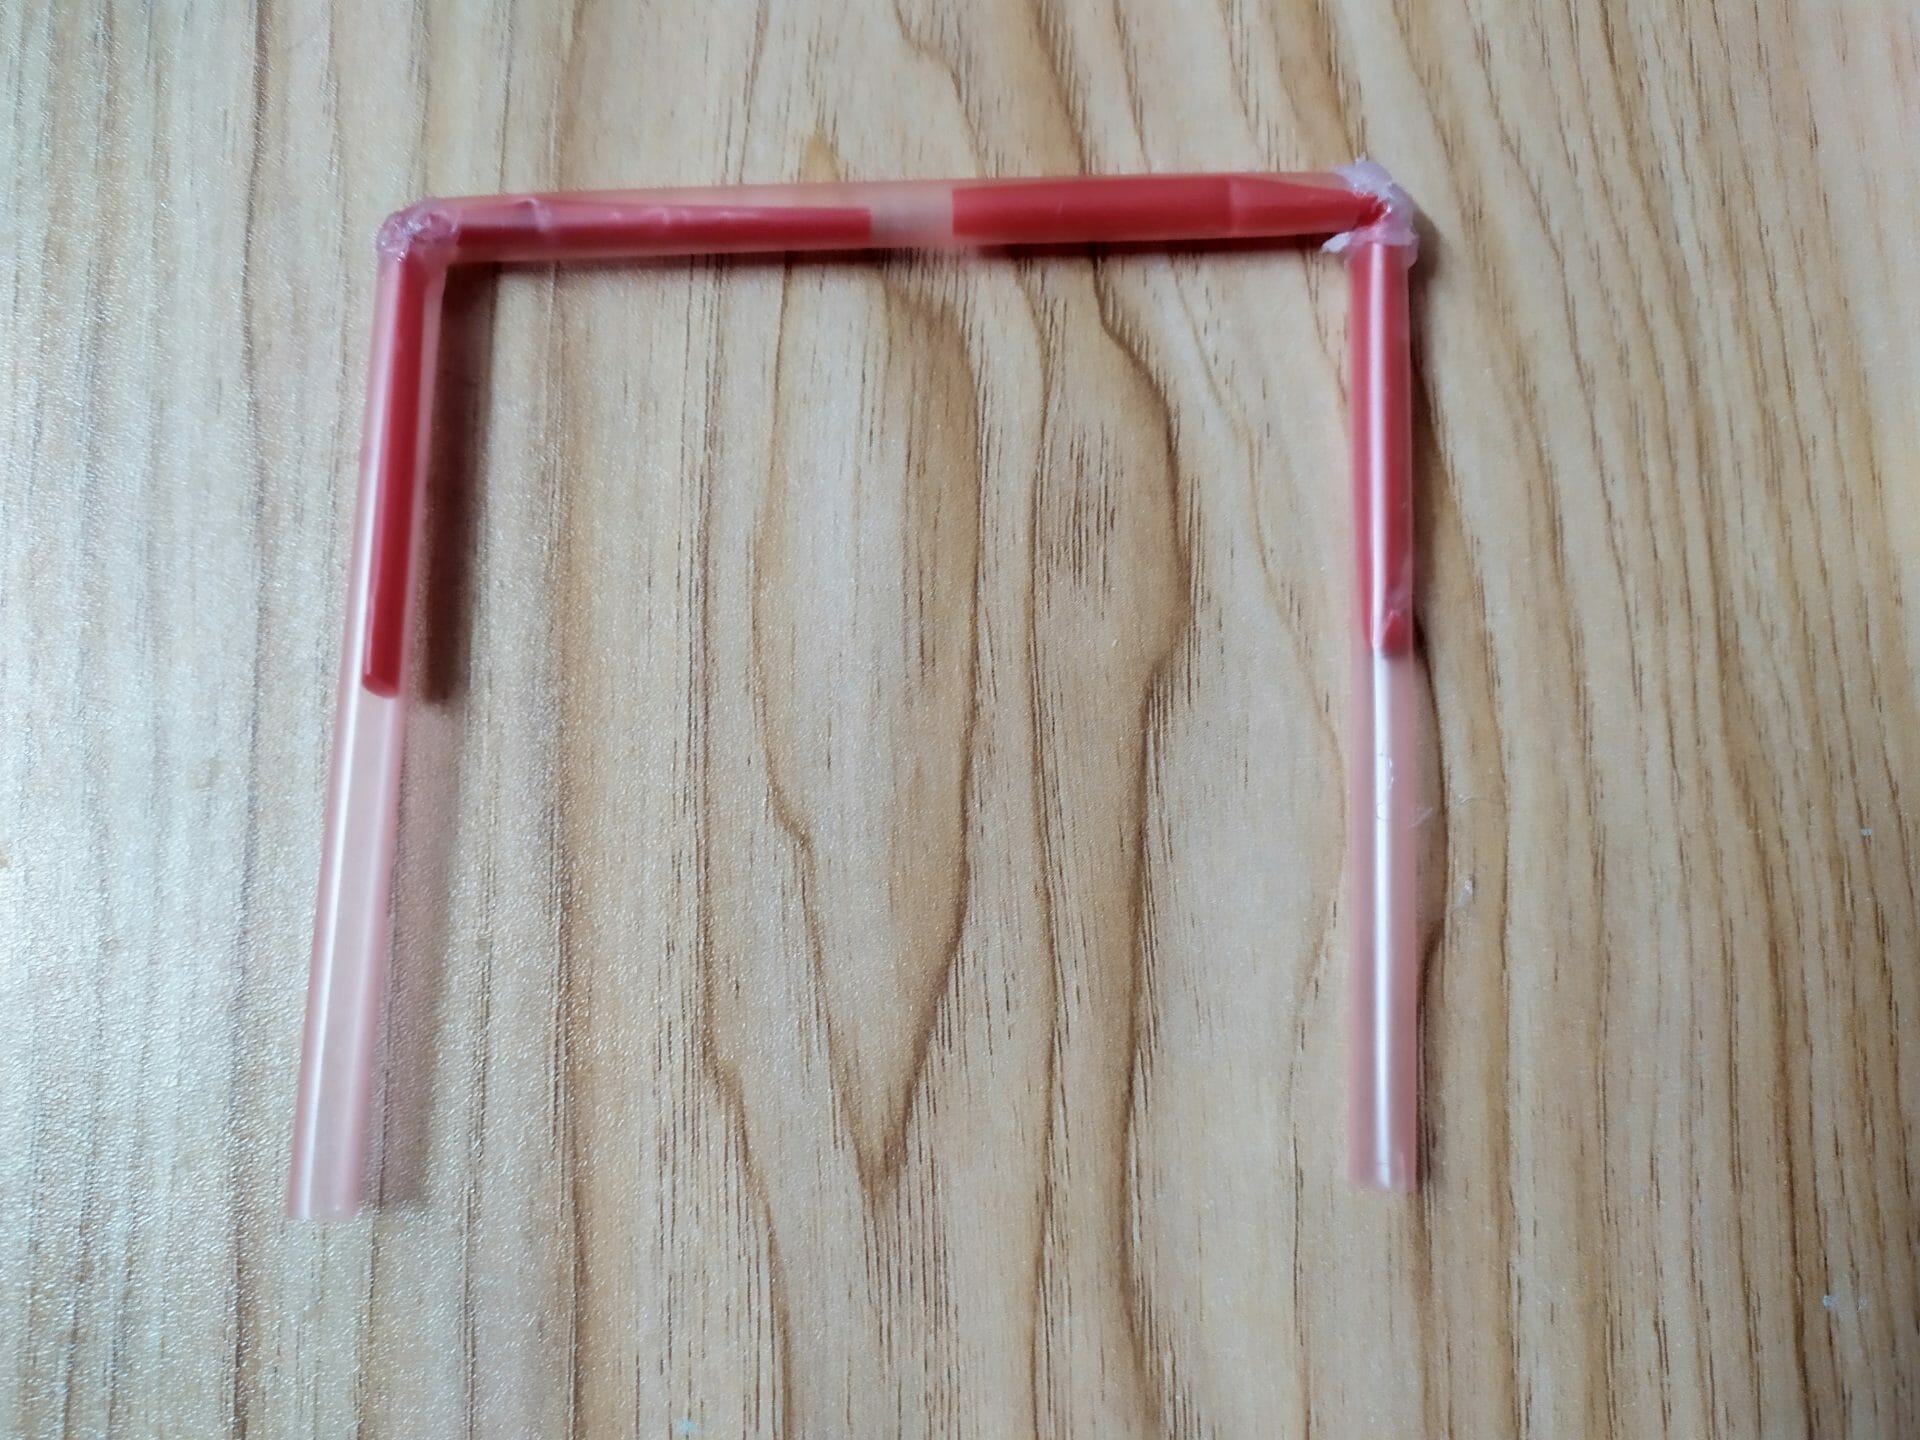
Step 8: The Triangle Shape

In the previous step, there was used three pink straws and two red straws made the shape look upside down ‘U’. Now, using another red straw, put inside the vacant portions of the two pink straws. Afterward, seal the edges using silicon glue.
Step 9: Making the Holder
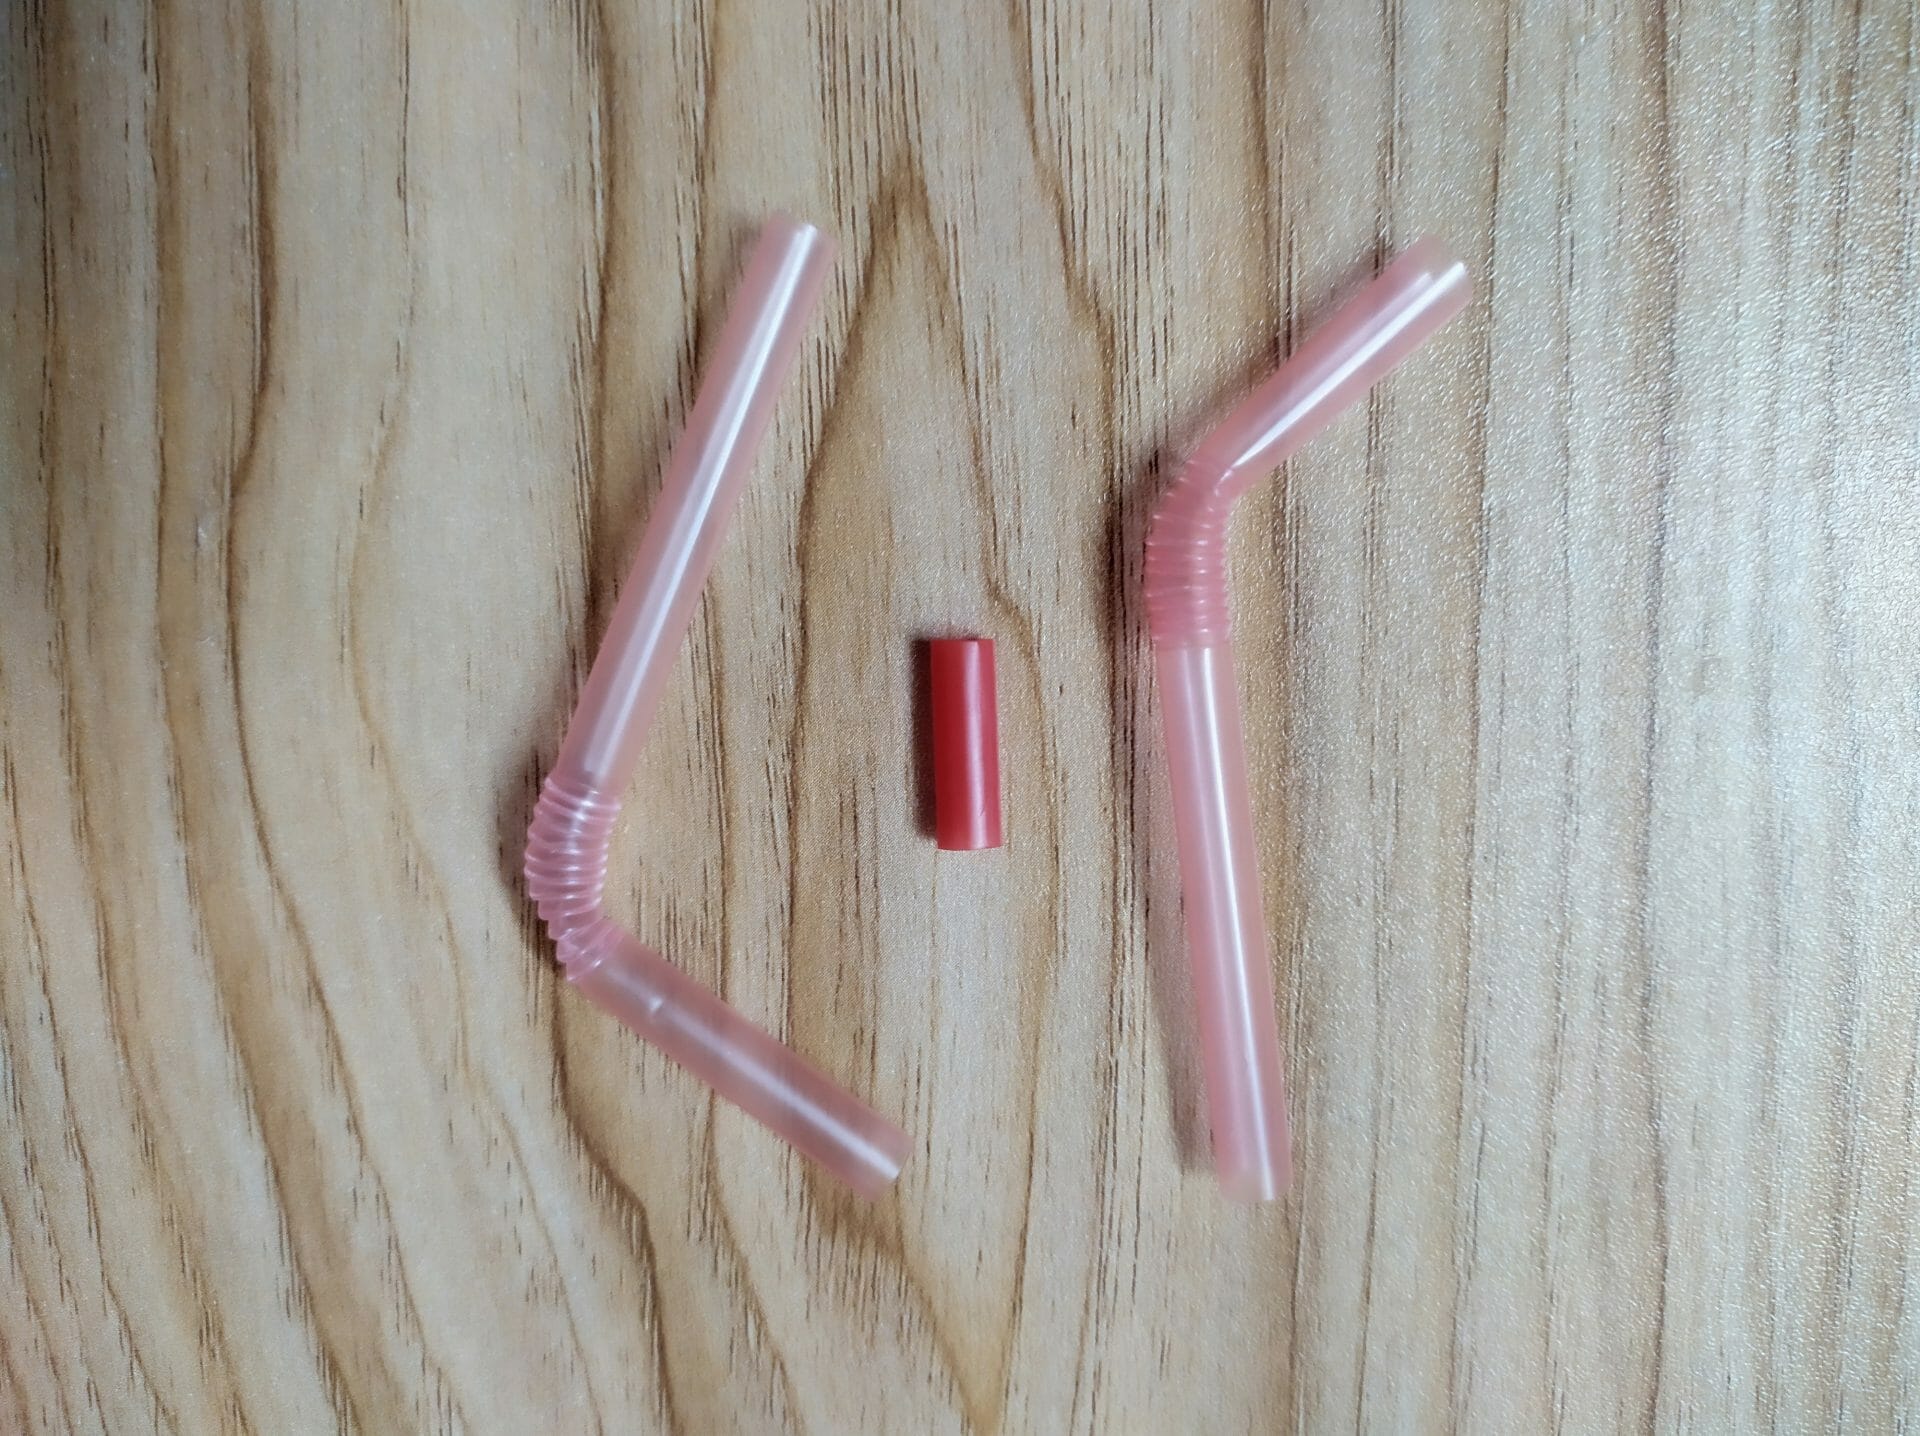
Need to take extra two straws for the holder of the feeding ring. Now, using glue, bend the straw and permanently fix it through the inside corner. This will look more like the above picture. These two straws will be used to make the holder of the square feeding ring of the betta fish. The holder will be attached to one side glass of the aquarium and will hold the Triangle ring. Also, take a small cut red straw for the joint.
Step 10: Glue the Edge of the Red & Pink Straw
Now, using a small cut-through red straw and glue, seal one edge of the straw. Check twice if it’s attached properly. This is the left straw that had been cut for the holder.
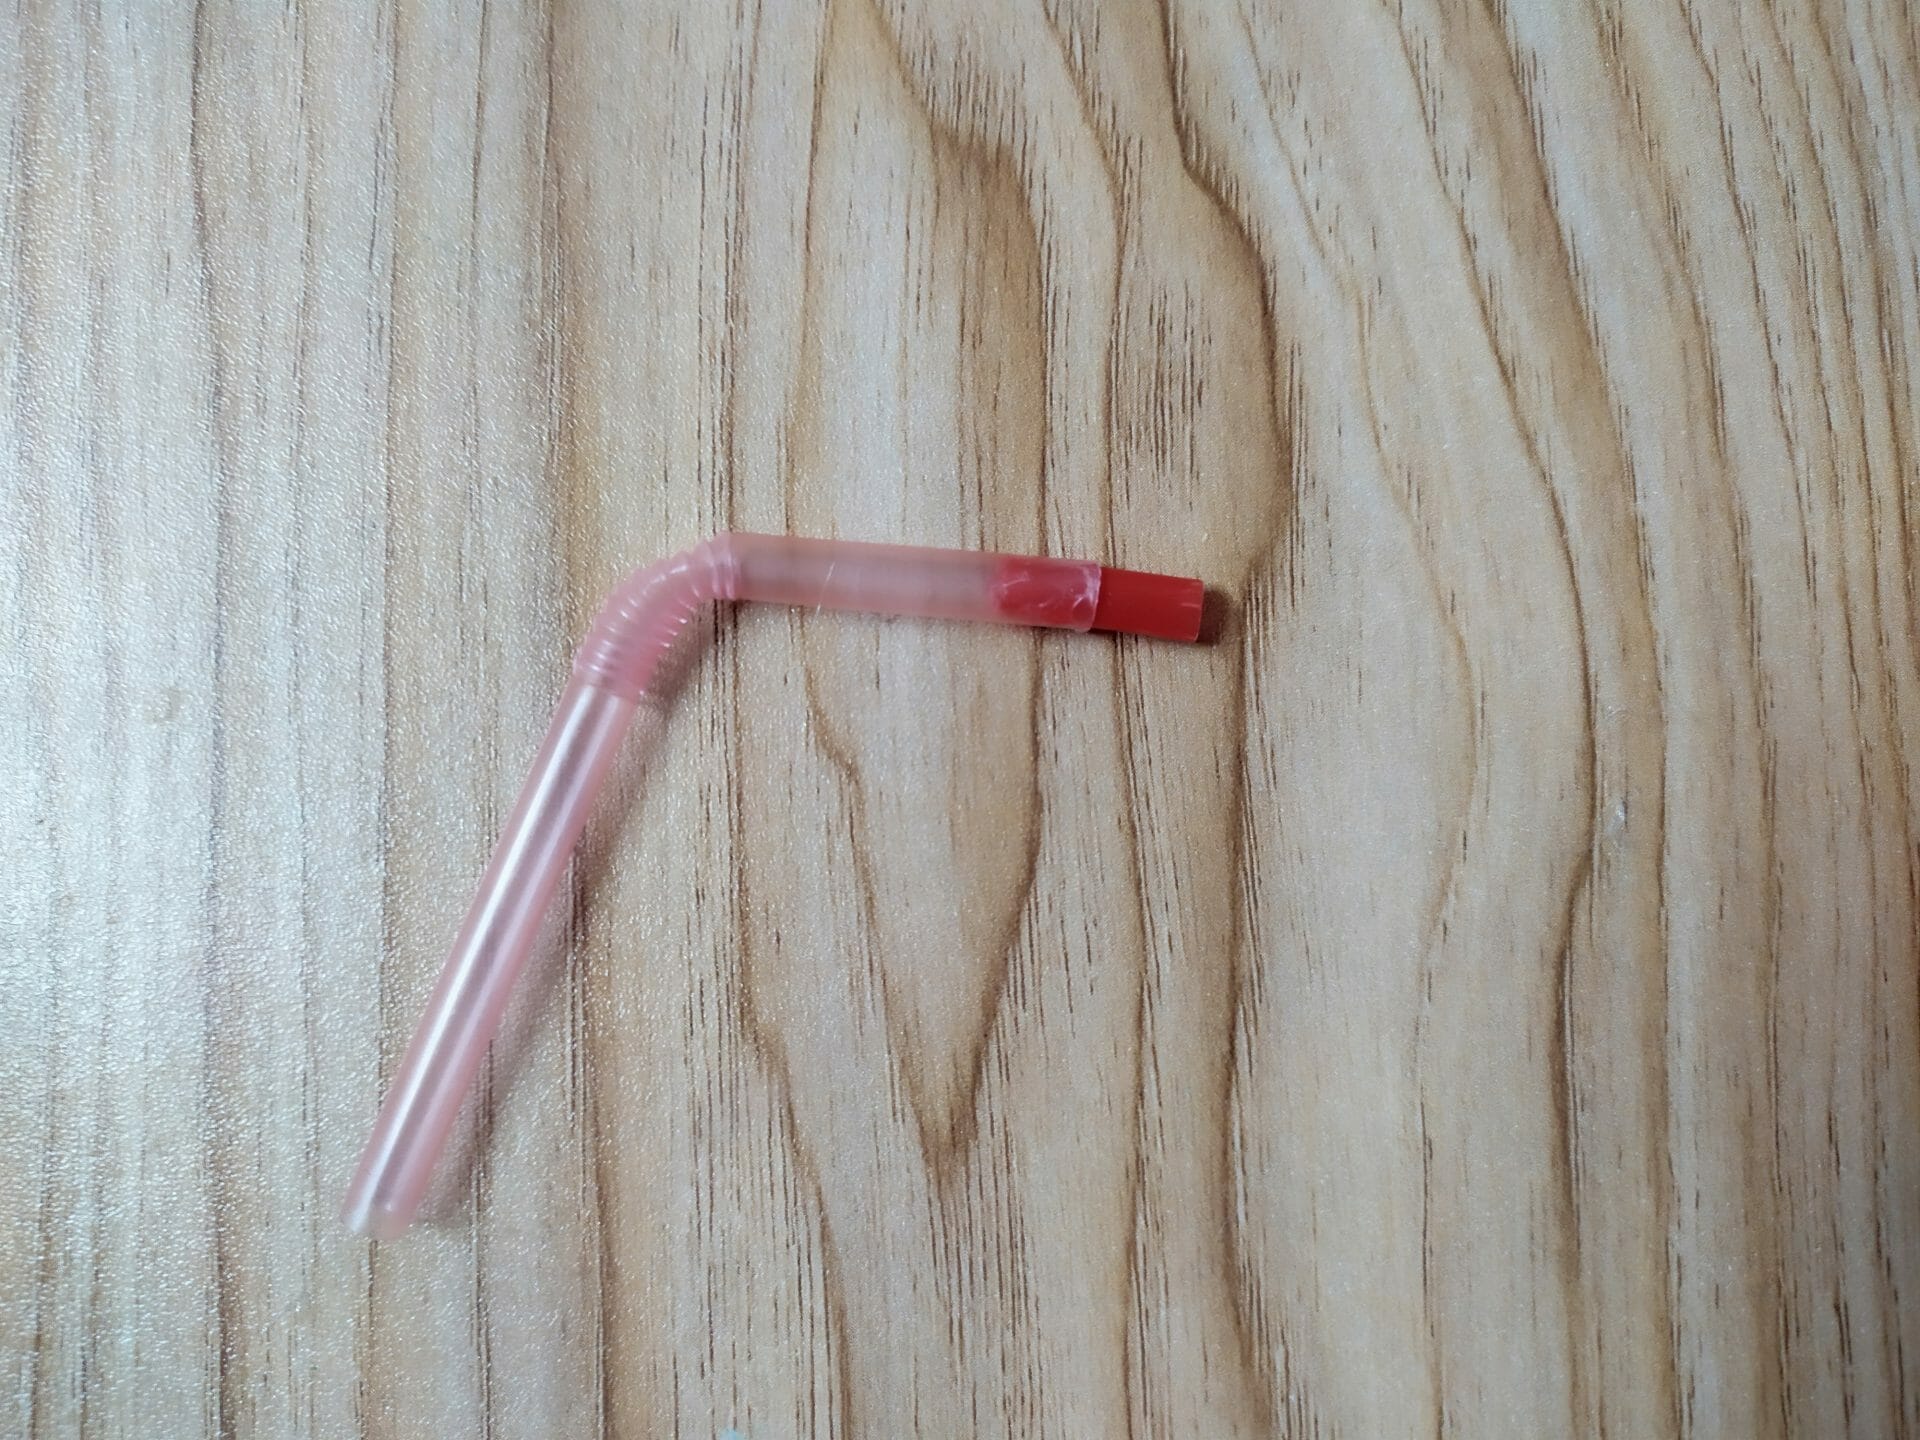
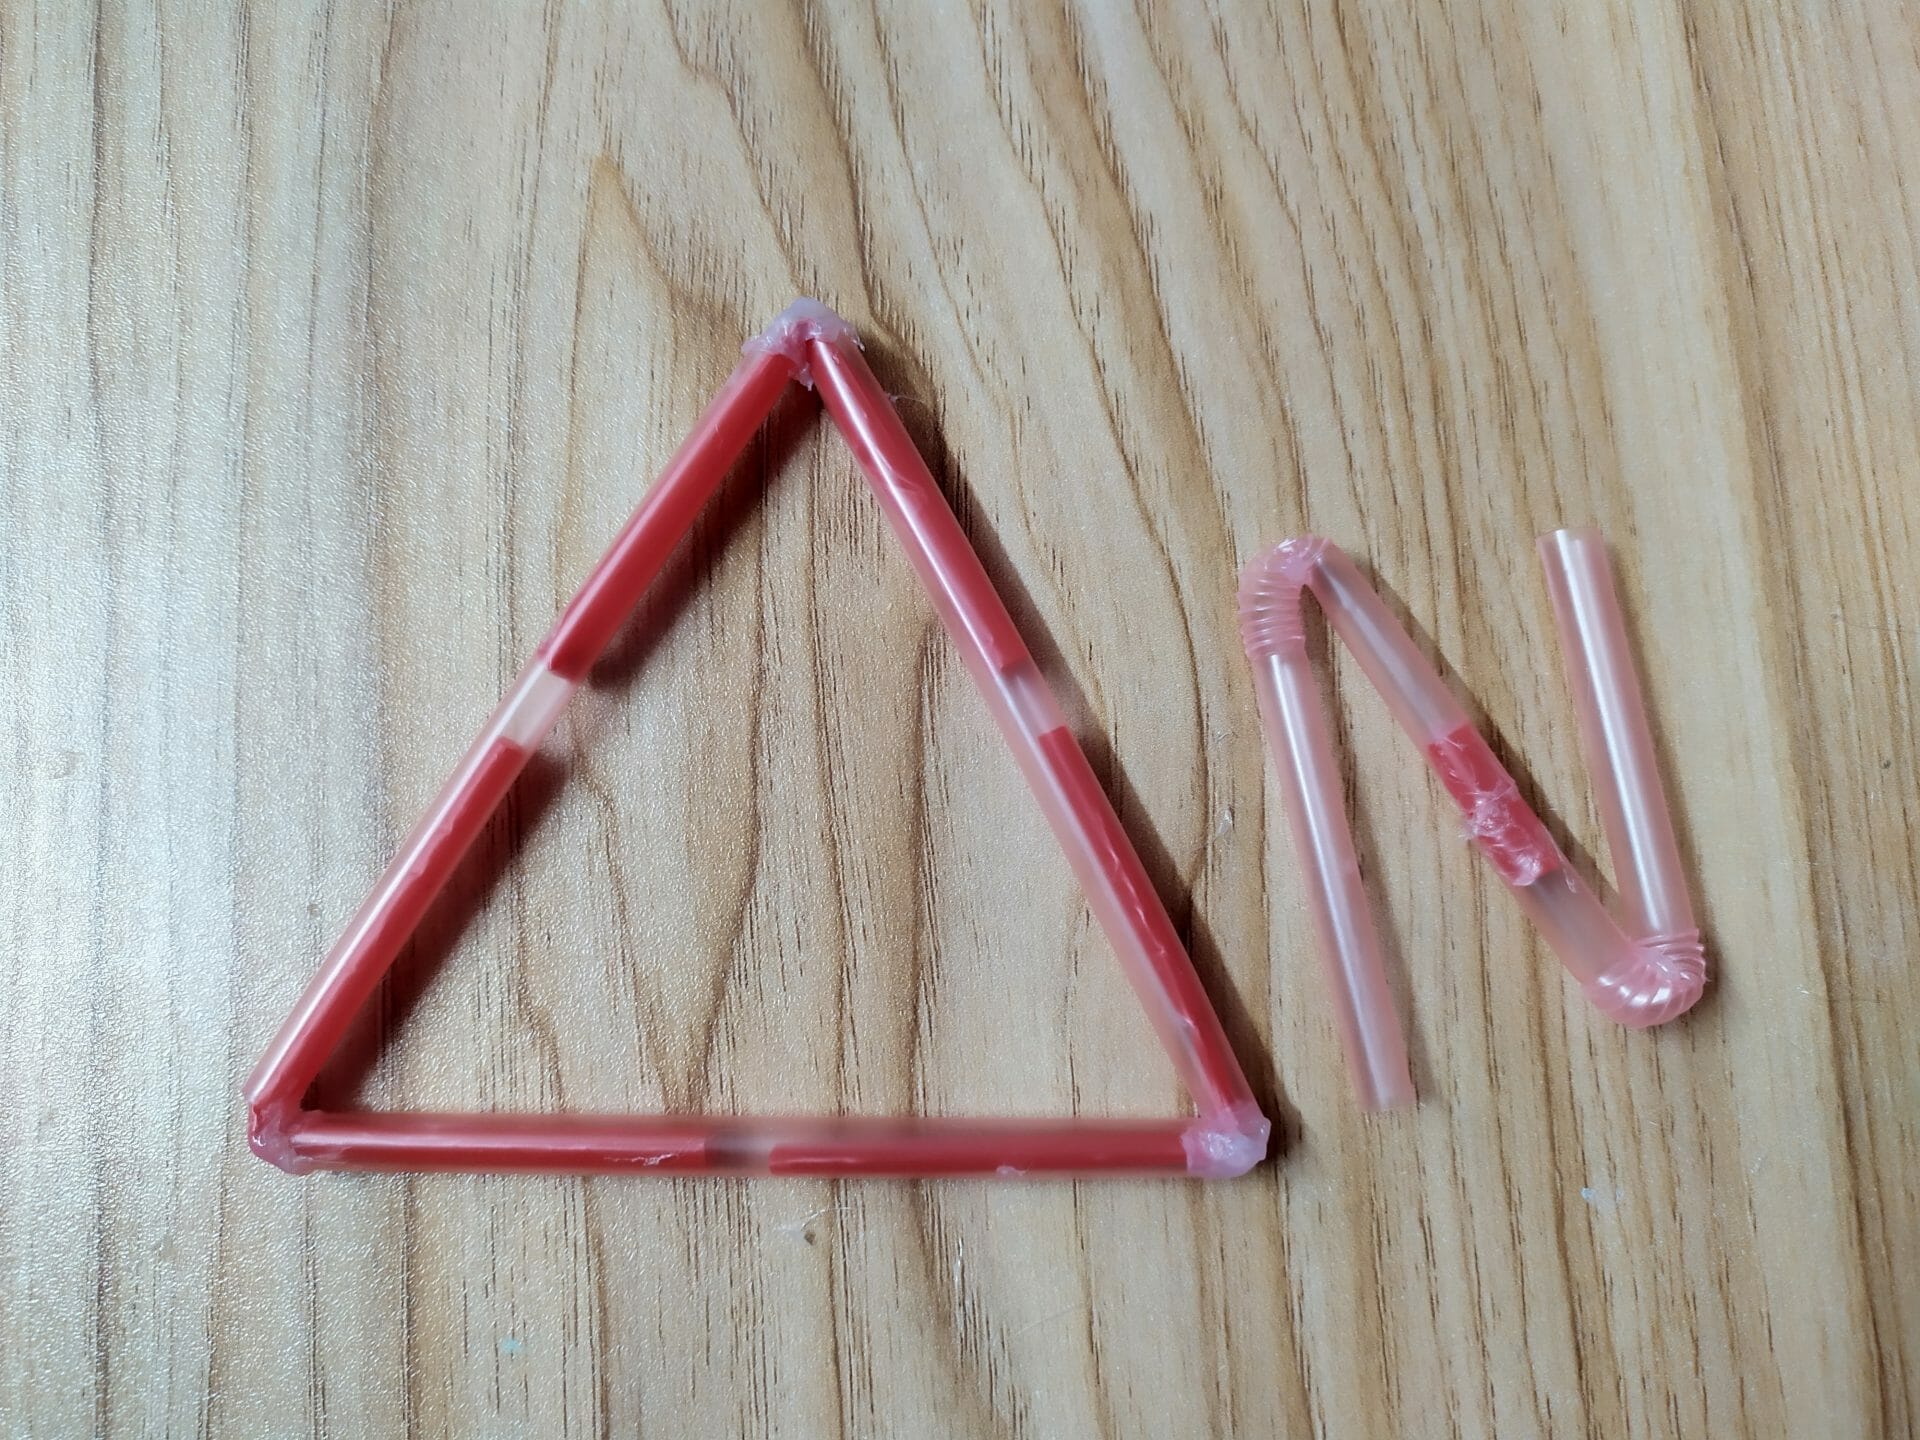
Step 11: Attach the Two Straw of the Holder

Now, use another left straw to seal the other edge of the red straw. It’ll look more like the letter ‘N’. This will work as the holder of the feeding ring. Preciously cut the straw and attach it, as it’ll play an important role in the feeding ring.
Step 12: The Final Equipment of the Feeding Ring
So, this is the two parts of the feeding ring. One is the triangle body which will float on the surface of the aquarium and will hold the food for the fish. The fish will come to the surface for finding food. The other one is the holder of the feeding ring. This will be attached to the aquarium glass. This will hold the feeding ring on the surface.
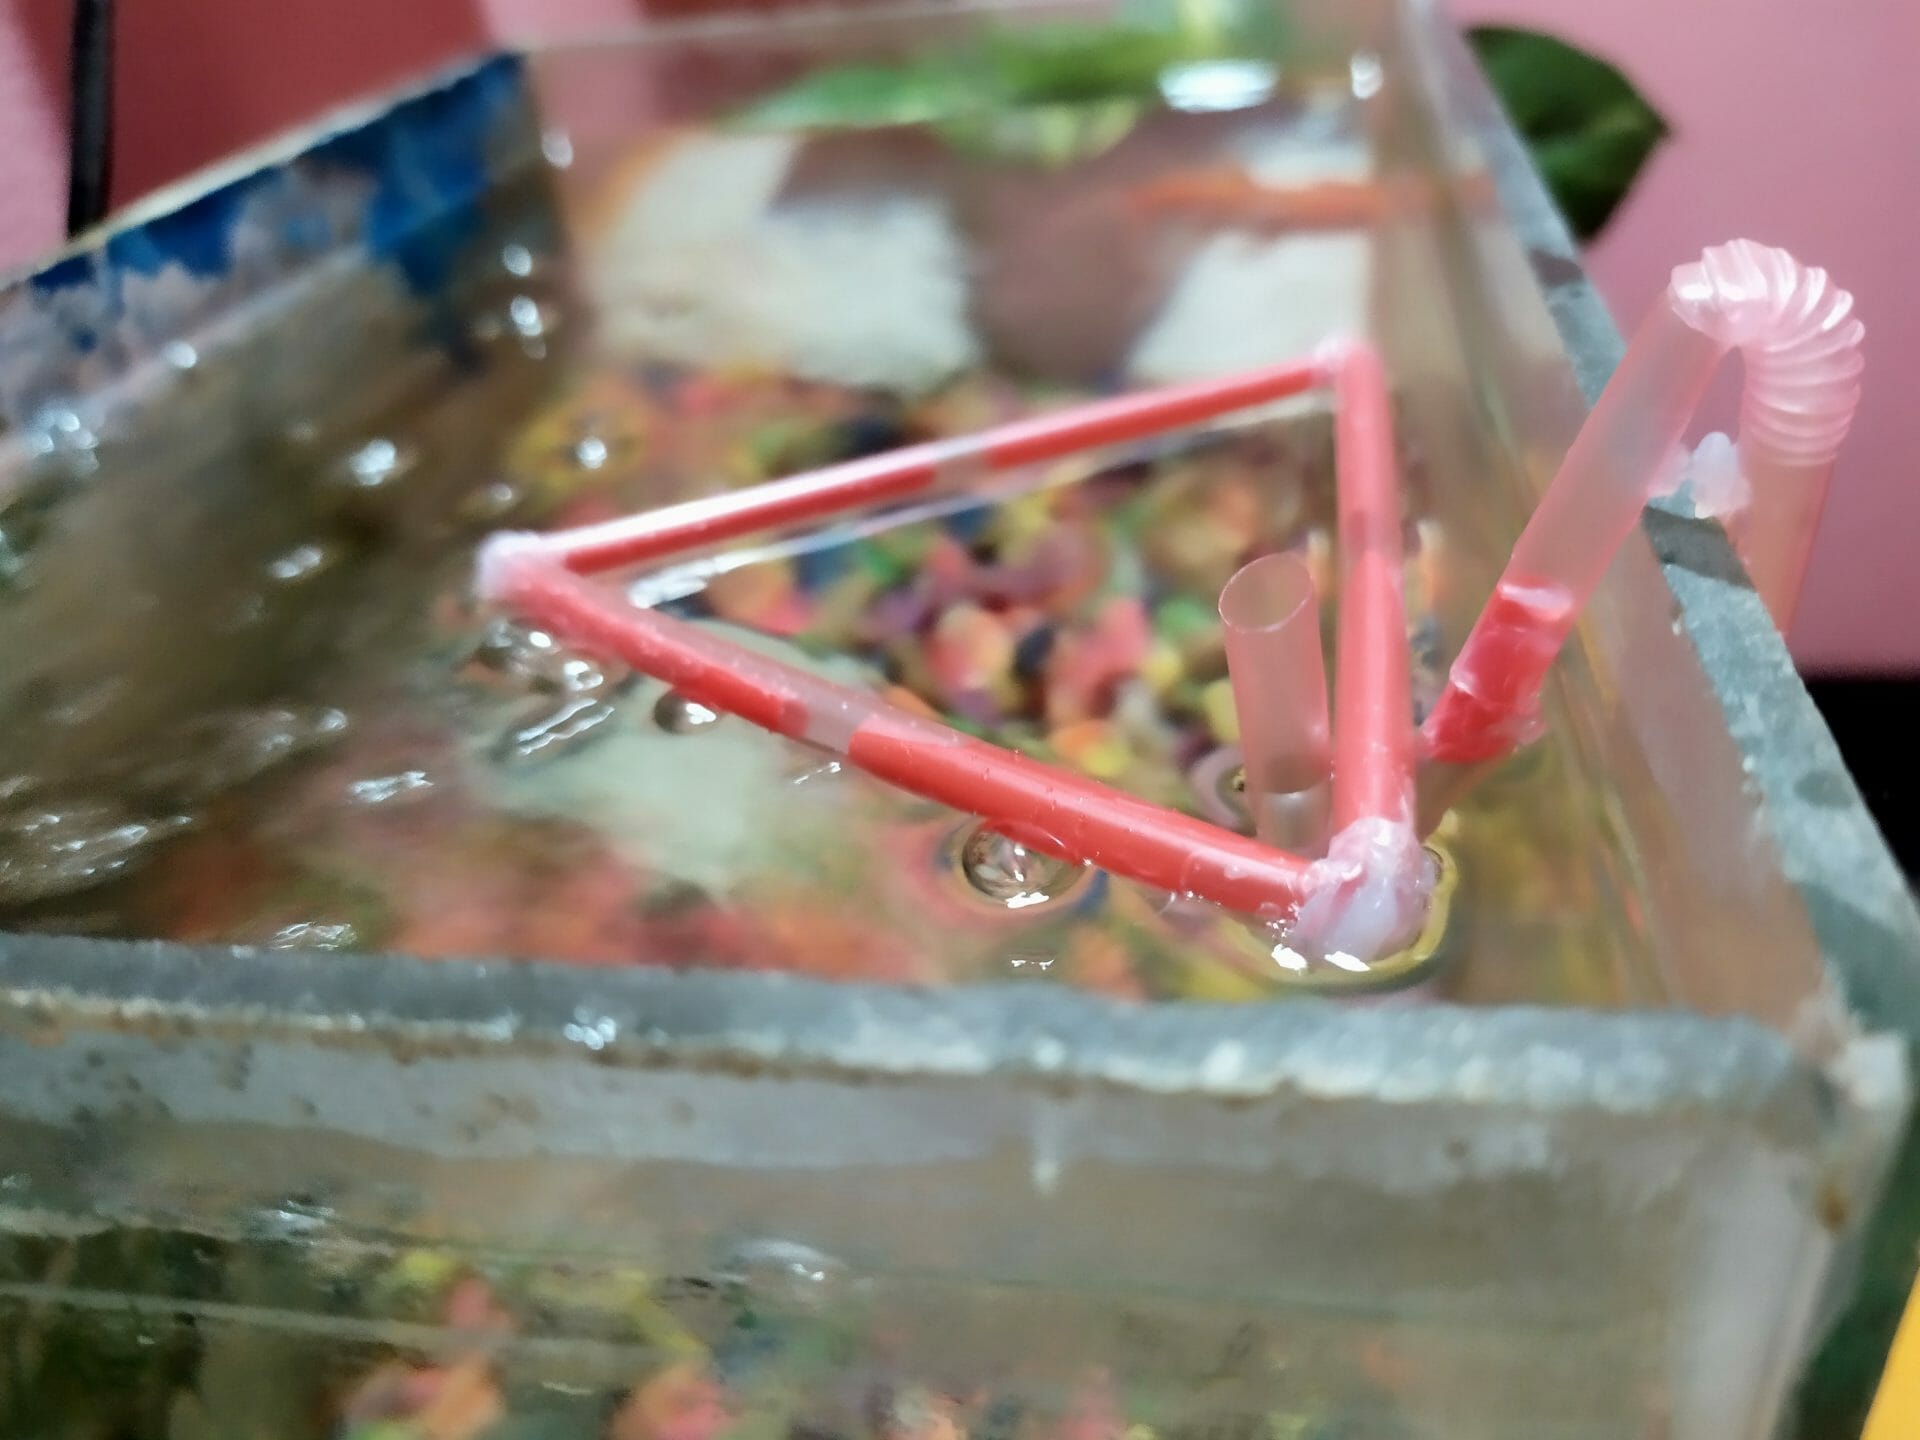
Step 13: Right Side Look in the Aquarium

This is the triangle feeding ring that will look in the aquarium. This is the right side of the look. So, here the holder is holding the feeding ring on the surface of the aquarium.
Step 14: Left Side Look in the Aquarium
This is the triangle feeding ring that will look in the aquarium on the left side. This is the left side of the look. So, here the holder is holding the feeding ring on the surface of the aquarium.
Step 15: the Upper Side Look
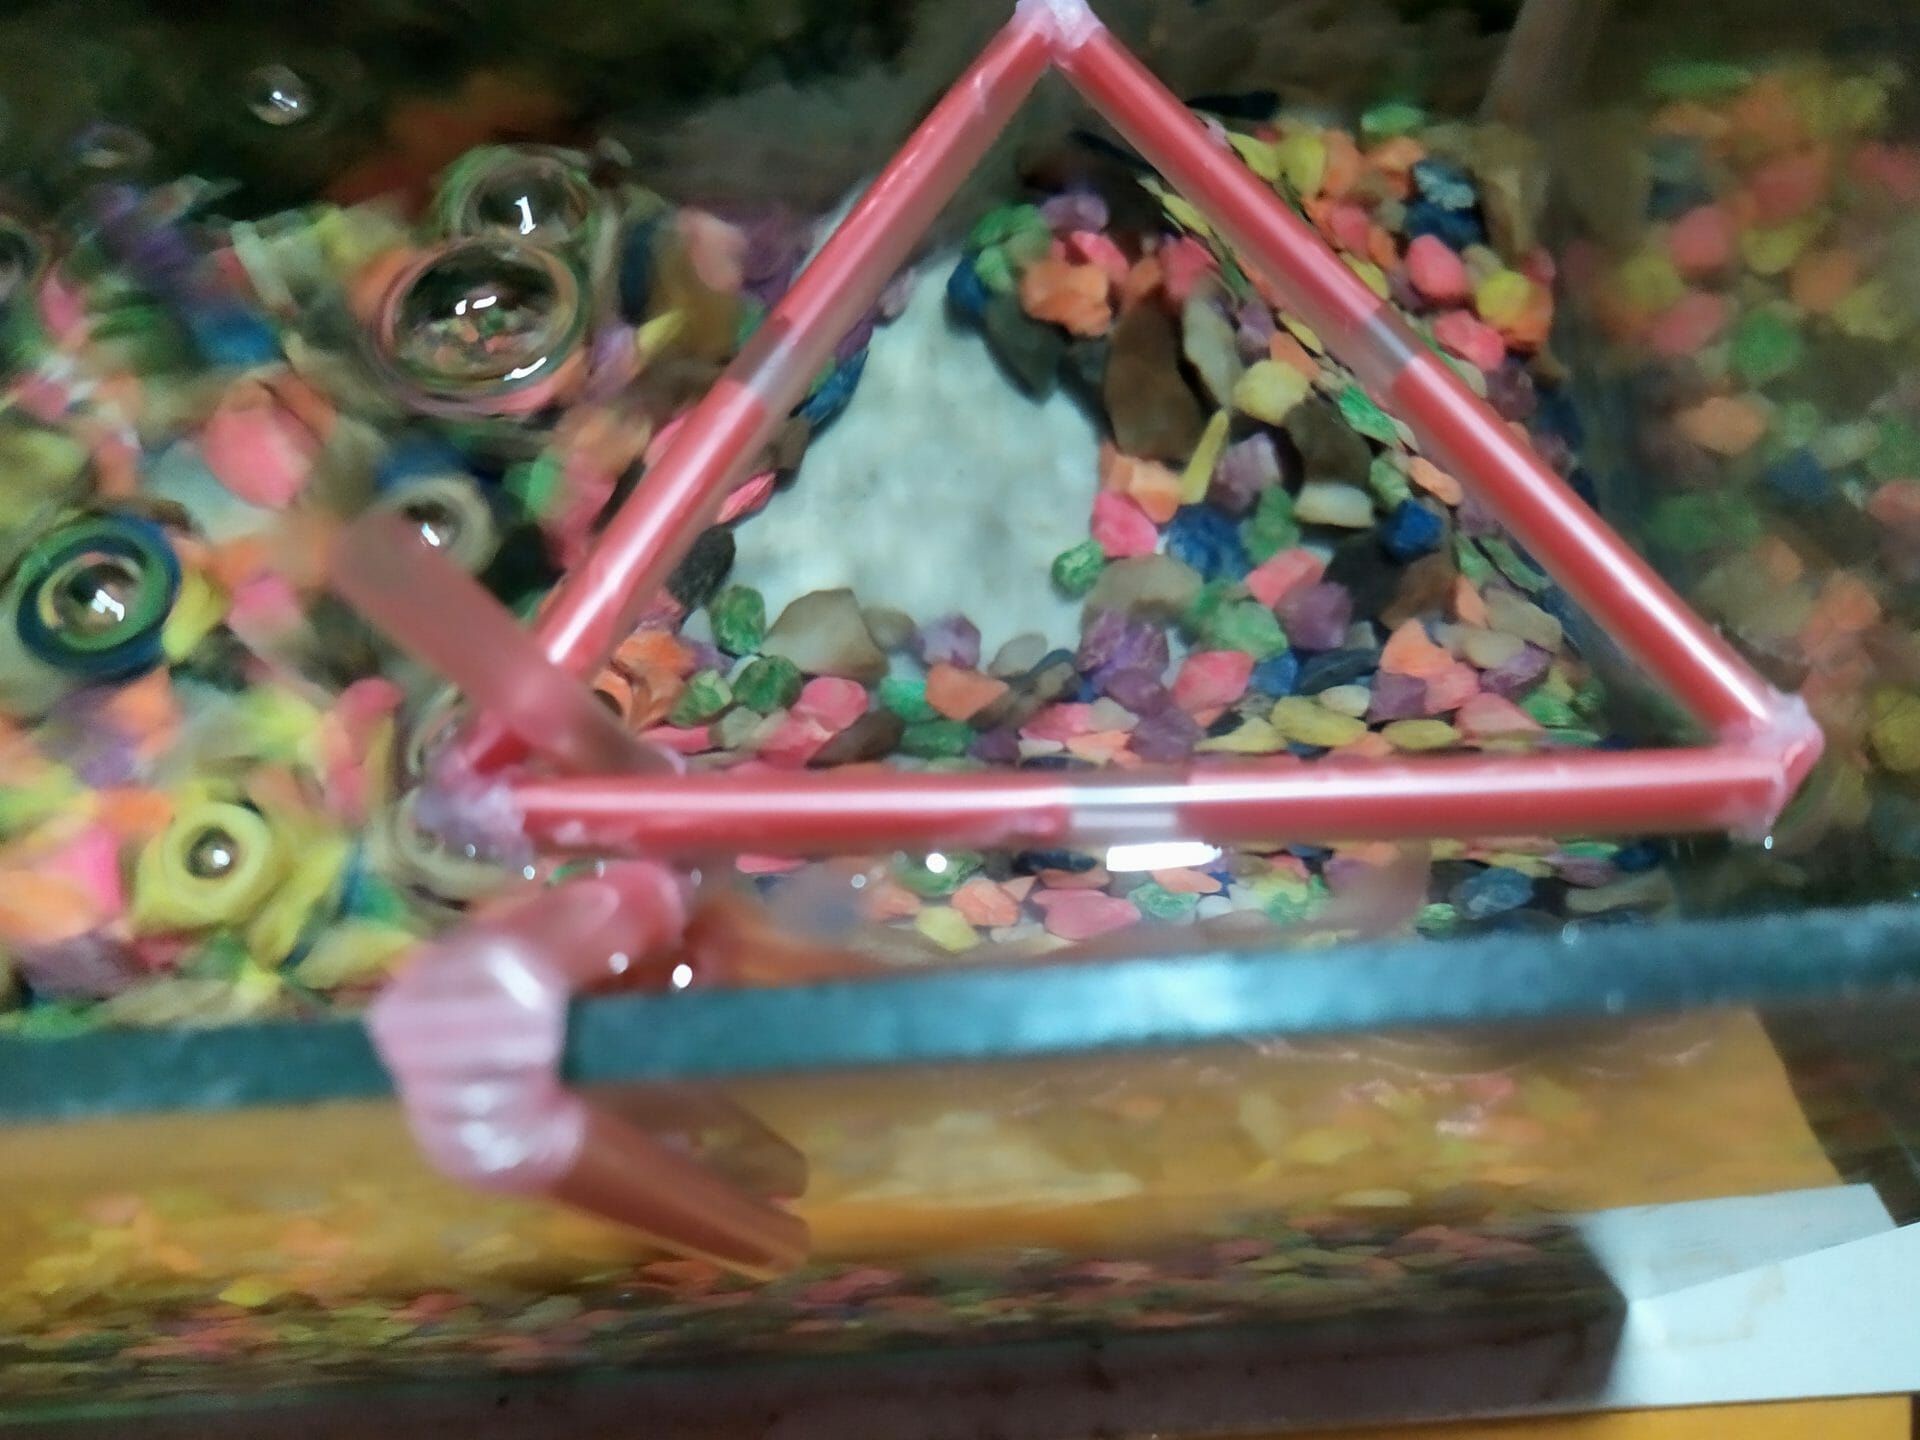
So, this is the upper side look of the feeding ring. The holder is perfectly holding the ring on the surface of the aquarium. The feeding ring can be successfully used for the feeding of the betta fish.

About Author
Hello, I’m Muntaseer Rahman, the owner of AcuarioPets.com. I’m passionate about aquarium pets like shrimps, snails, crabs, and crayfish. I’ve created this website to share my expertise and help you provide better care for these amazing pets.
Disclaimer
This site is owned and operated by Muntaseer Rahman. AcuarioPets.com is a participant in the Amazon Services LLC Associates Program, an affiliate advertising program designed to provide a means for sites to earn advertising fees by advertising and linking to Amazon.com. This site also participates in other affiliate programs and is compensated for referring traffic and business to these companies.