
This post was created with help from AI tools and carefully reviewed by a human (Muntaseer Rahman) . For more on how we use AI on this site, check out our Editorial Policy.
Check Out These FREE Tools We Made JUST For You!
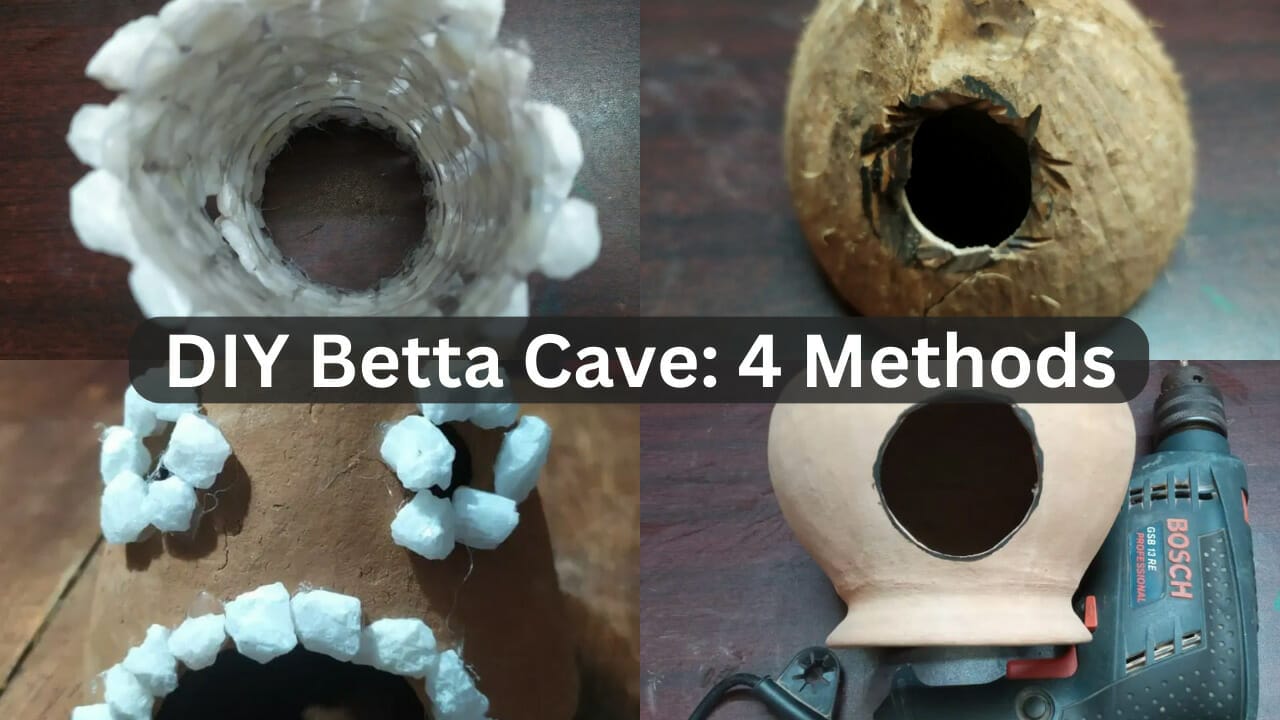
DIY Betta Cave: 4 Methods (Stone, Terracotta, Coconut)
A Betta cave, also known as Betta hideout, is a small structure or decoration used in aquariums to provide shelter and hiding spots for Betta fish. Betta caves come in various designs, but they typically mimic natural hiding spots found in the wild, such as crevices, caves, or rock formations.
They can be made from various materials, including ceramic, resin, plastic, or natural materials like coconut shells or rocks.
In this article, I am going to show you 4 methods for making a DIY Betta Cave. These are the caves we’ll be making:
- DIY Stone Betta Cave
- DIY Coconut Shell Beta Cave
- DIY Terracotta Small Pot Betta Cave
- DIY Terracotta Large Pot Betta Cave
You can choose whichever one you prefer. Also, don’t forget to email me the pictures of your DIY betta cave if you want them to be featured in this article!
DIY Stone Betta Cave
Supplies You’ll Need

- An empty plastic bottle
- Small stone
- Cutter
- A Glue Gun
- Silicon Glue
Step 1: Remove The Plastic Foil
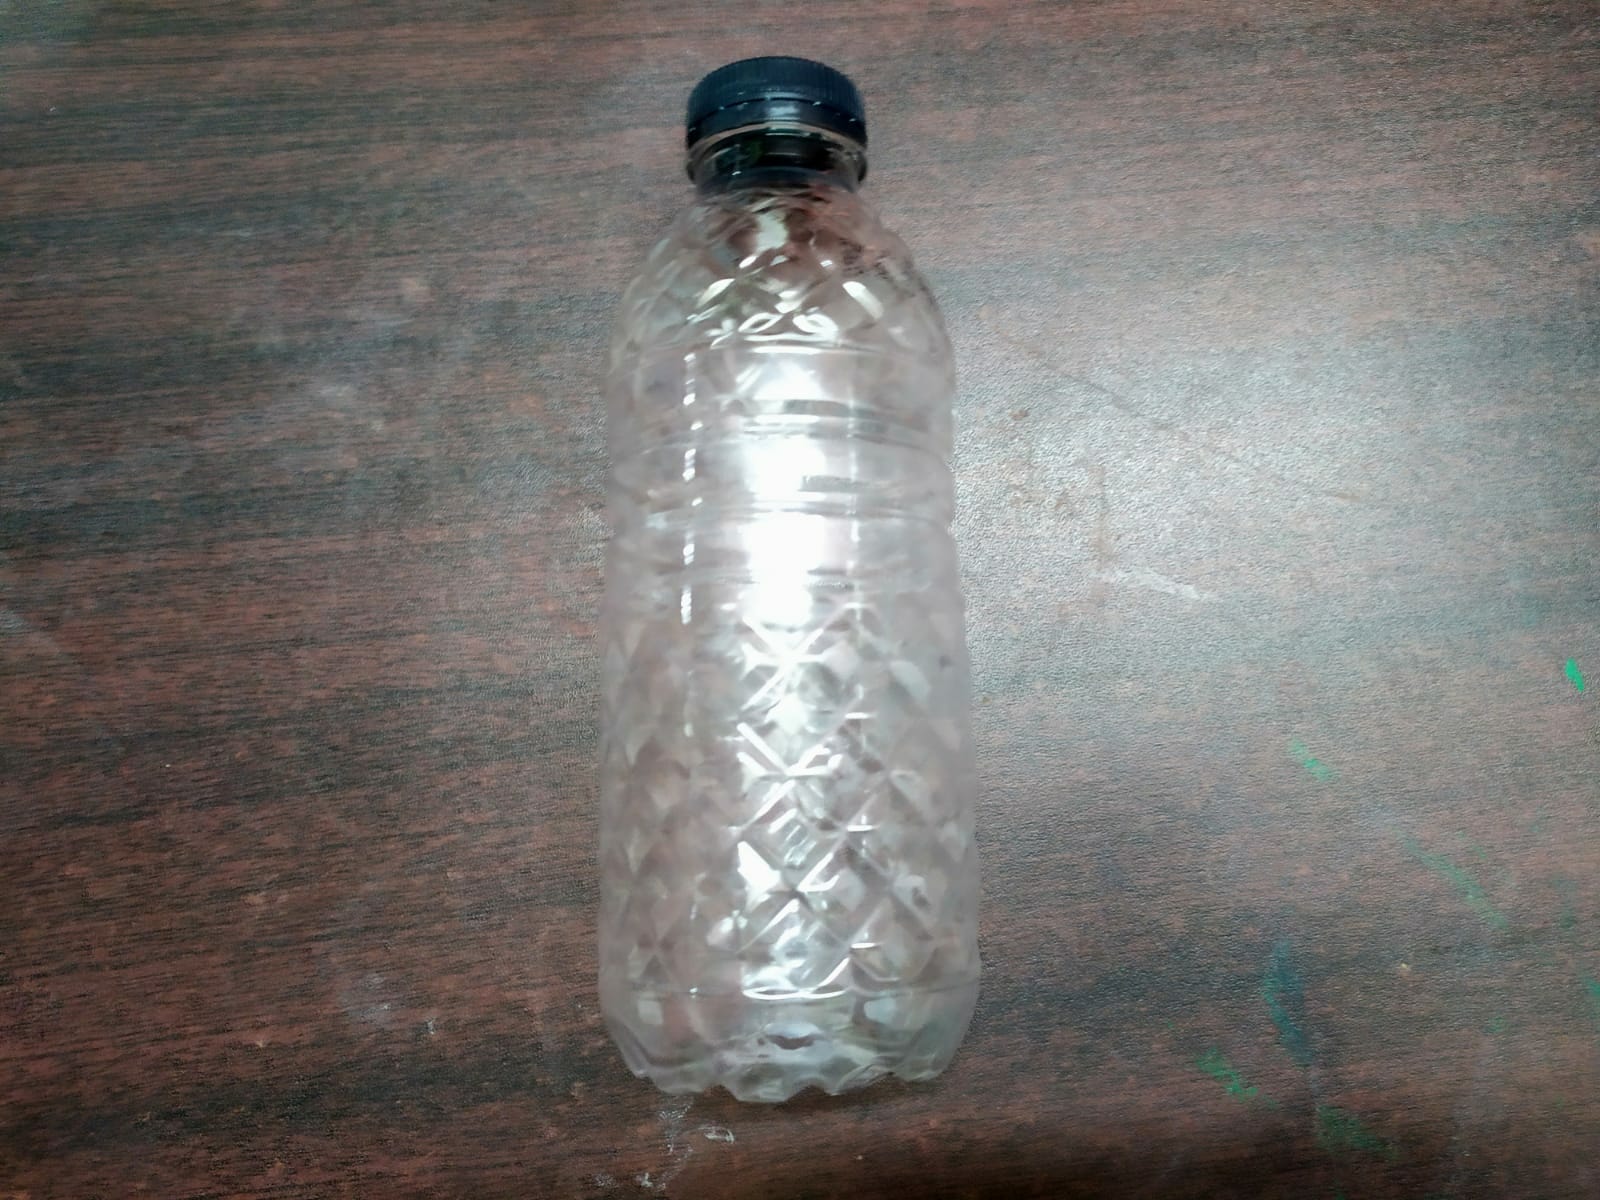
No matter which kind of bottle you use, remove the plastic foil from the upper body and make the bottle bare like the above picture.
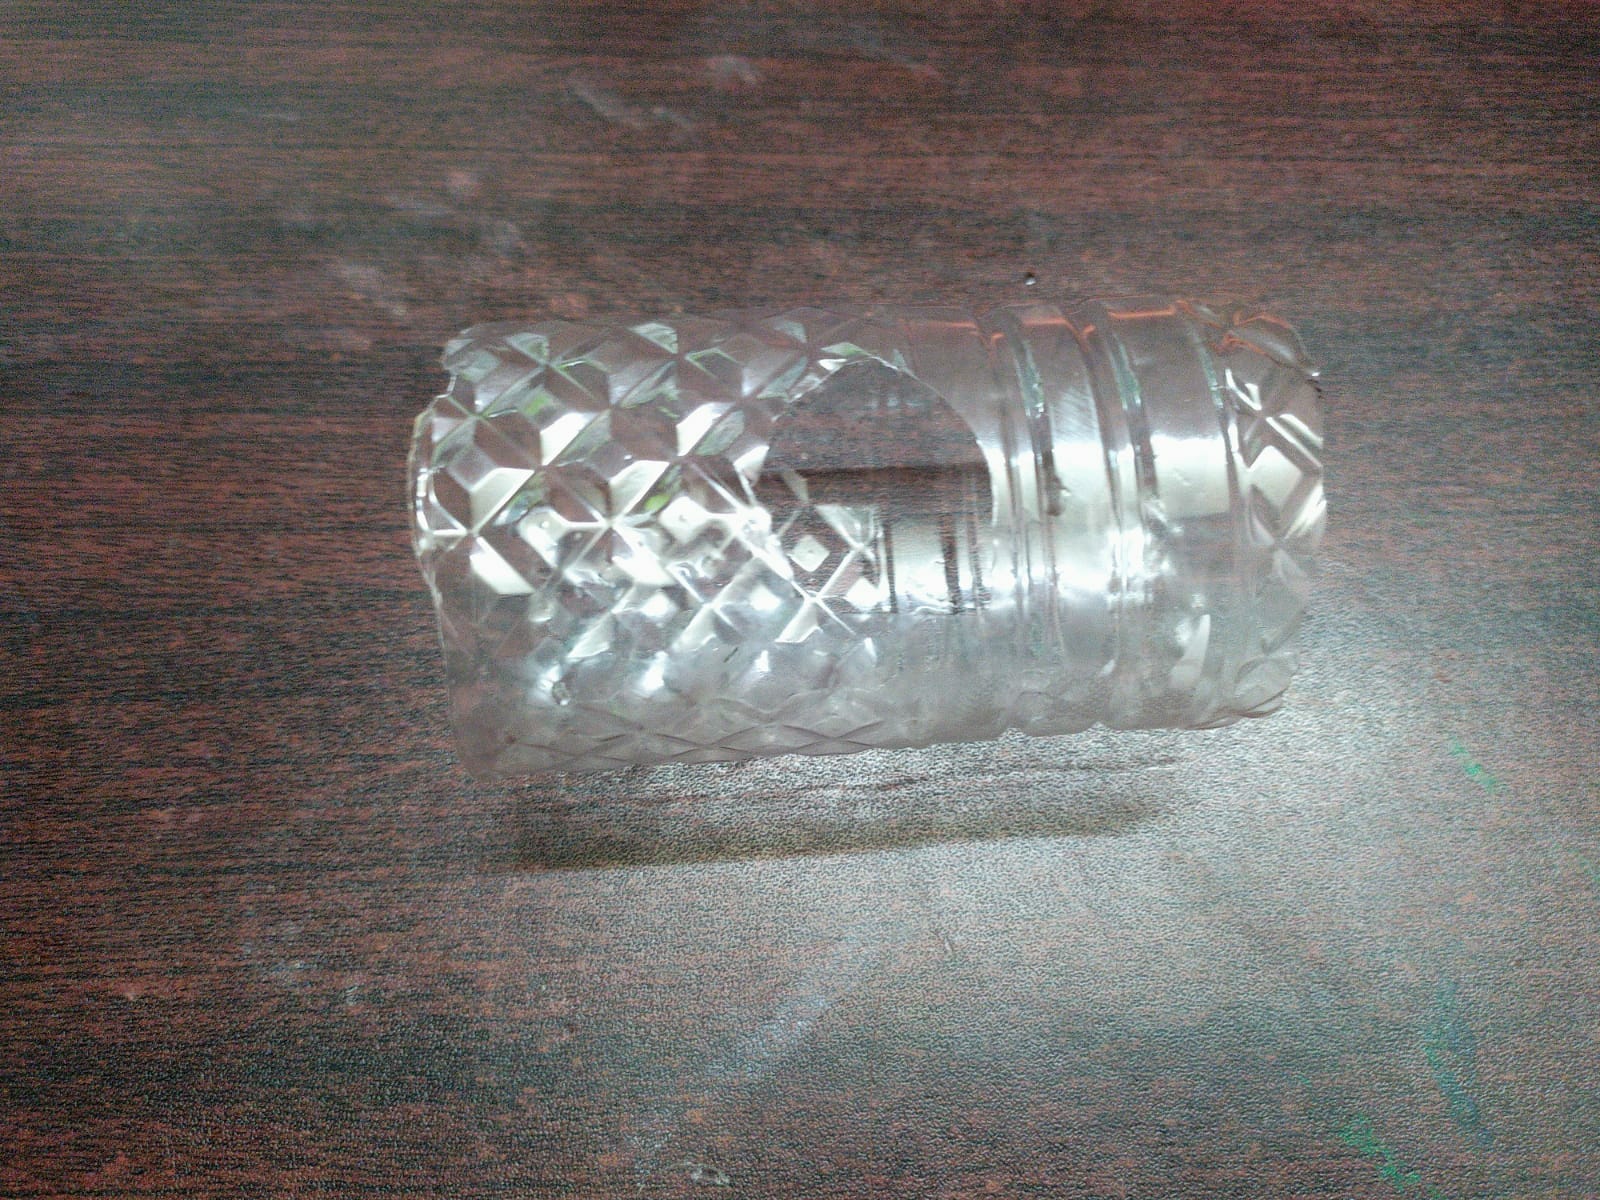
Step 2: Cut the Bottle Using Cutter

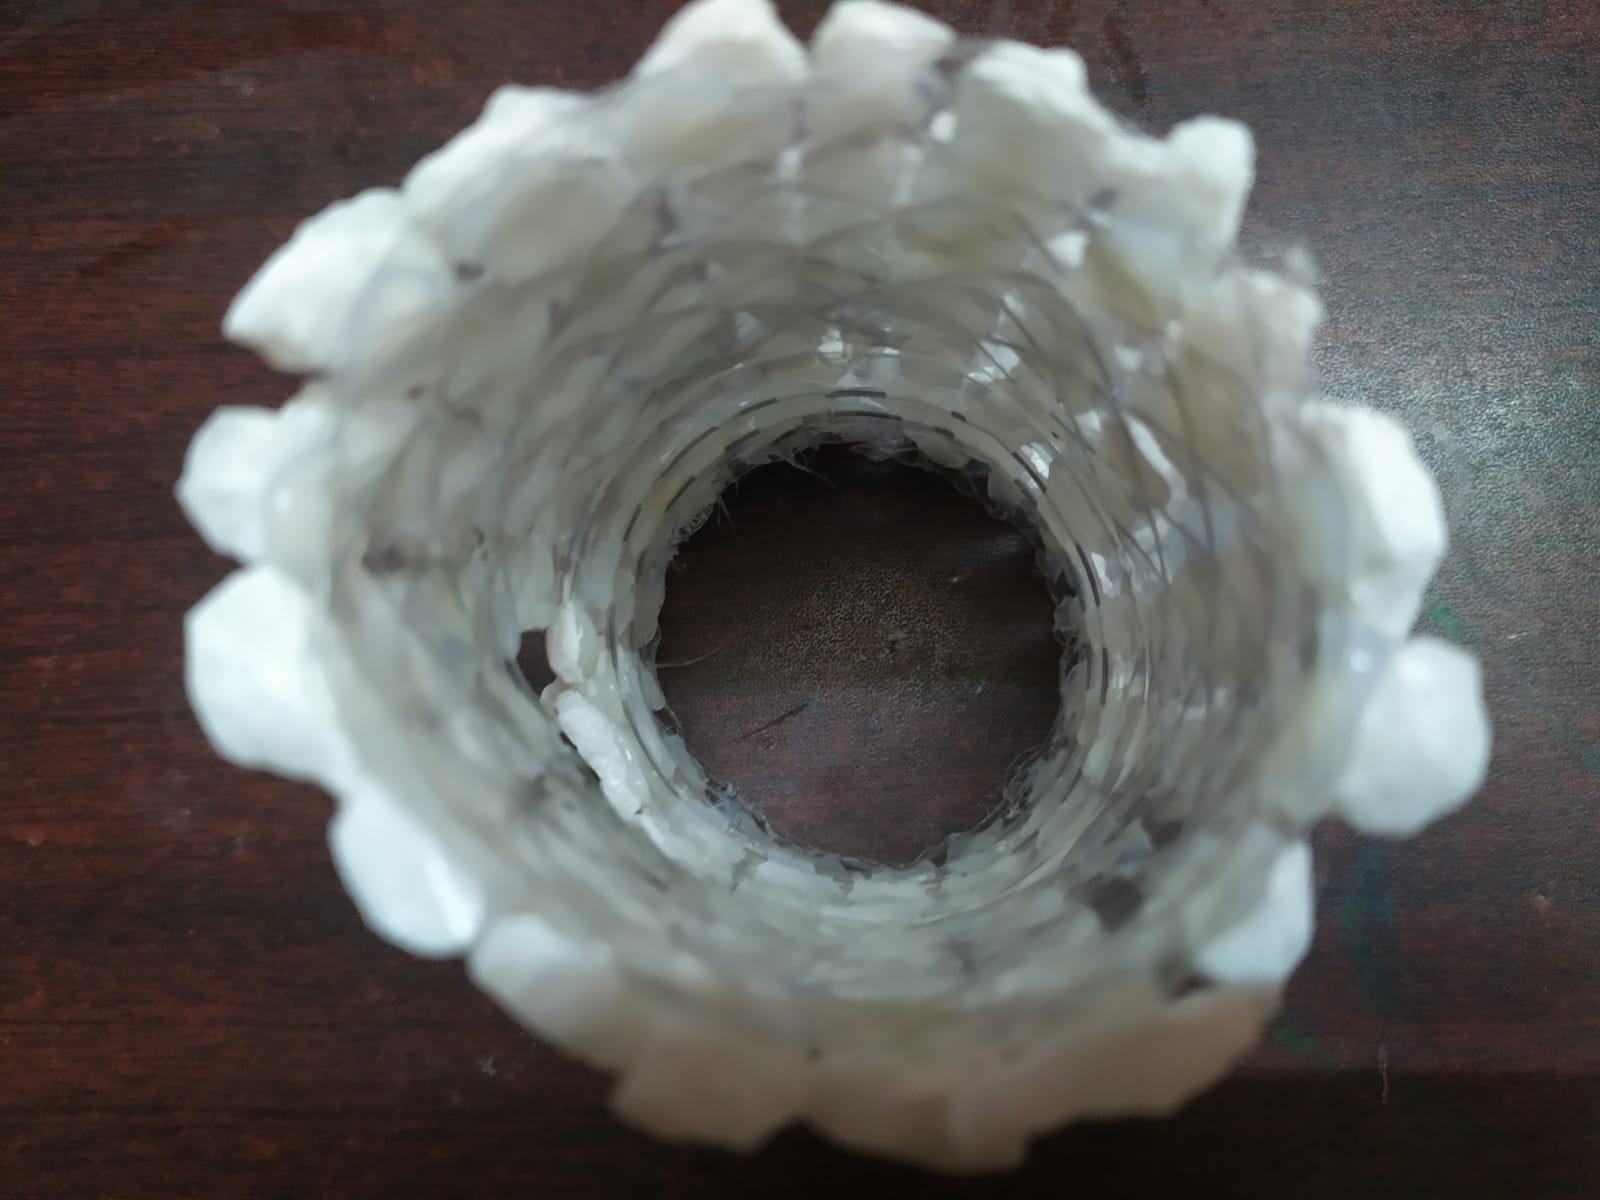
After removing the foil from the upper body, cut the bottle on both sides using the cutter. This is a very crucial part. Make sure the bottle is cut evenly on both sides. If it’s a 250 ml bottle, it’ll look like the above picture.

Want to make your betta’s tank actually fun?
Your betta isn’t lazy — he’s bored. And you can fix that with stuff already lying around your house. Soda bottles, ping pong balls, toilet paper rolls, cork, straws — all of it works.
This book has 20 step-by-step DIY projects that turn a boring tank into a playground.
No money spent. No pet store runs. Just 10 minutes and a little creativity.
Step 3: Cut the Bottle in Round Shape in the Middle
Afterward, using the cutter very finely, cut through the middle in a round shape. Having a round shape will be a bit challenging. But make sure to do it with patience & and consciousness.
Step 4: Glue the Stones on the Round Edge
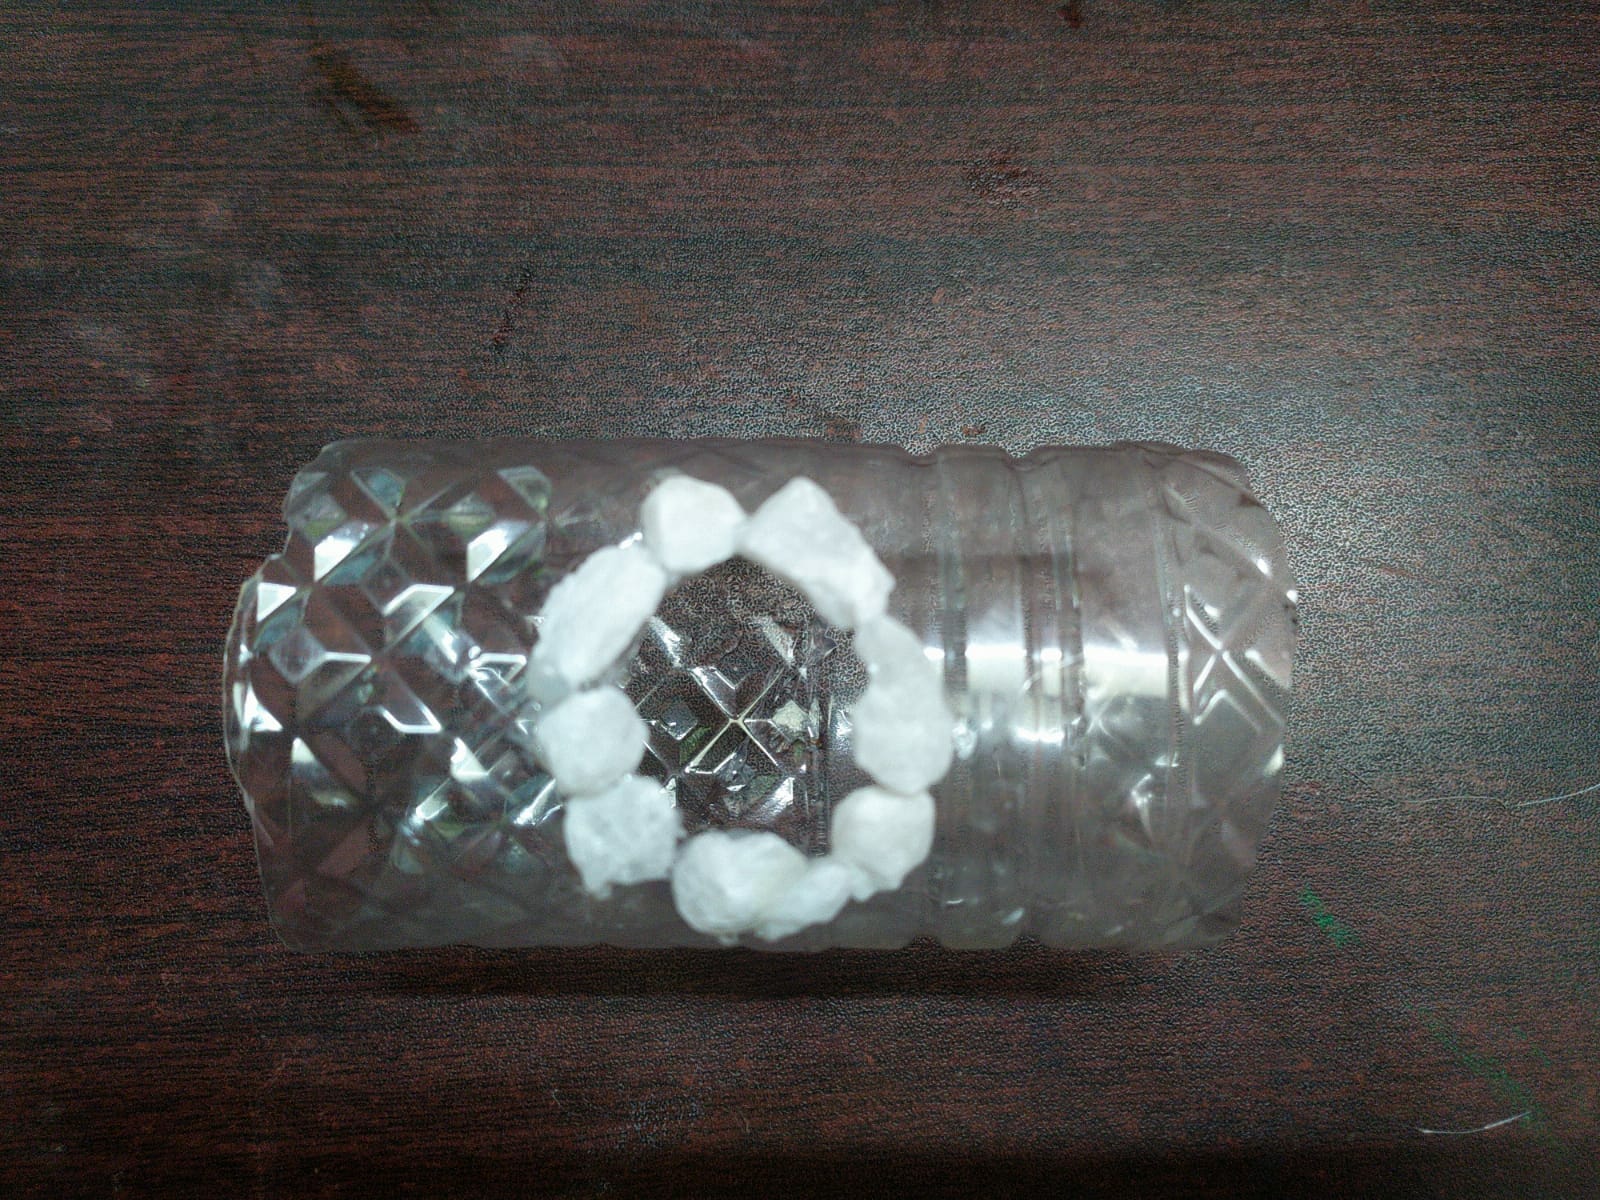
As the cutting part has been done, using the glue gun, silicon glue, and the stones are now glued like the above picture. Glued the stones carefully, otherwise, they’ll be ripped off. Stick the stones as soon as you apply glue to the surface to make them permanent glues.
Step 5: Glue the Stones on the Bottle
Start gluing the stones at the surface of the bottle. From the backside, it’ll look more like the above picture.
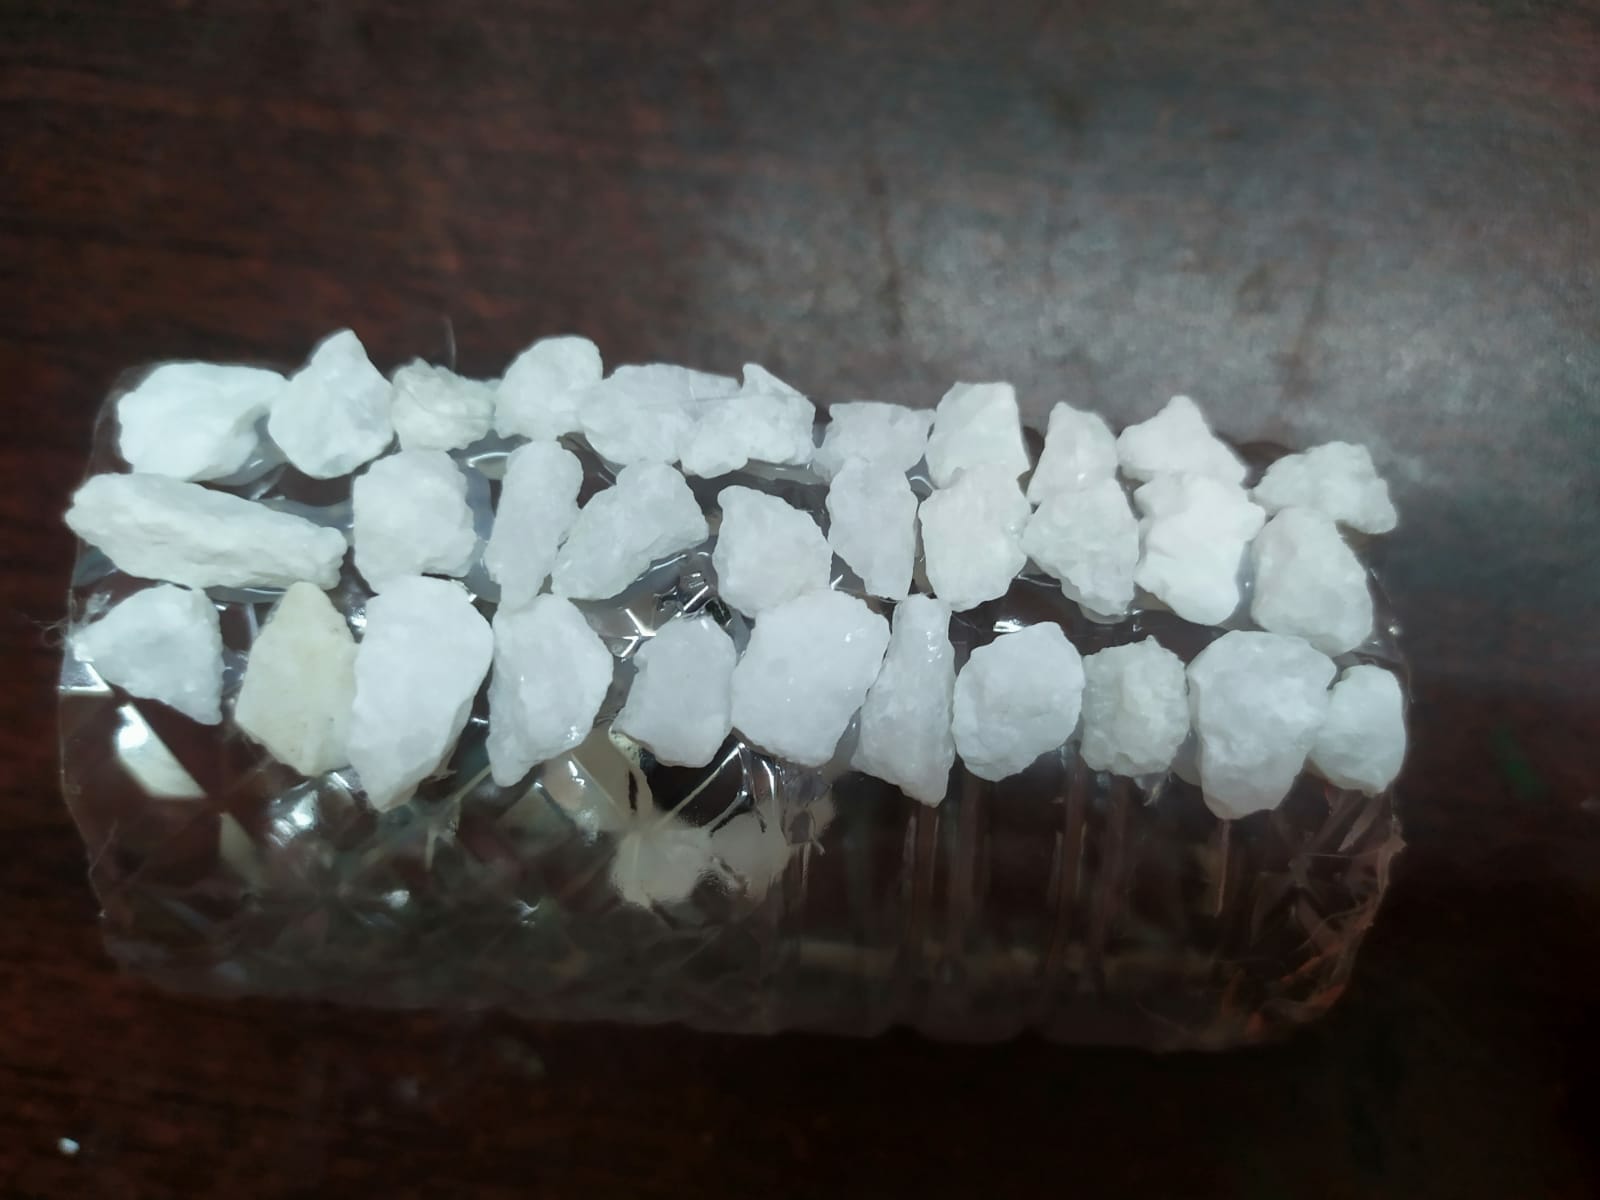
Step 6: Glue the Stones on the Rest of the Body
When you start gluing the stones on the outer surface of the bottle, halfway through it’ll look more like the above picture. Make sure to glue the stones very close to each other so that no place goes vacant.
Step 7: Final Look of Stone Cave
After gluing the whole body with stones, it’ll look as mesmerizing as the picture and a cave for the betta fish.
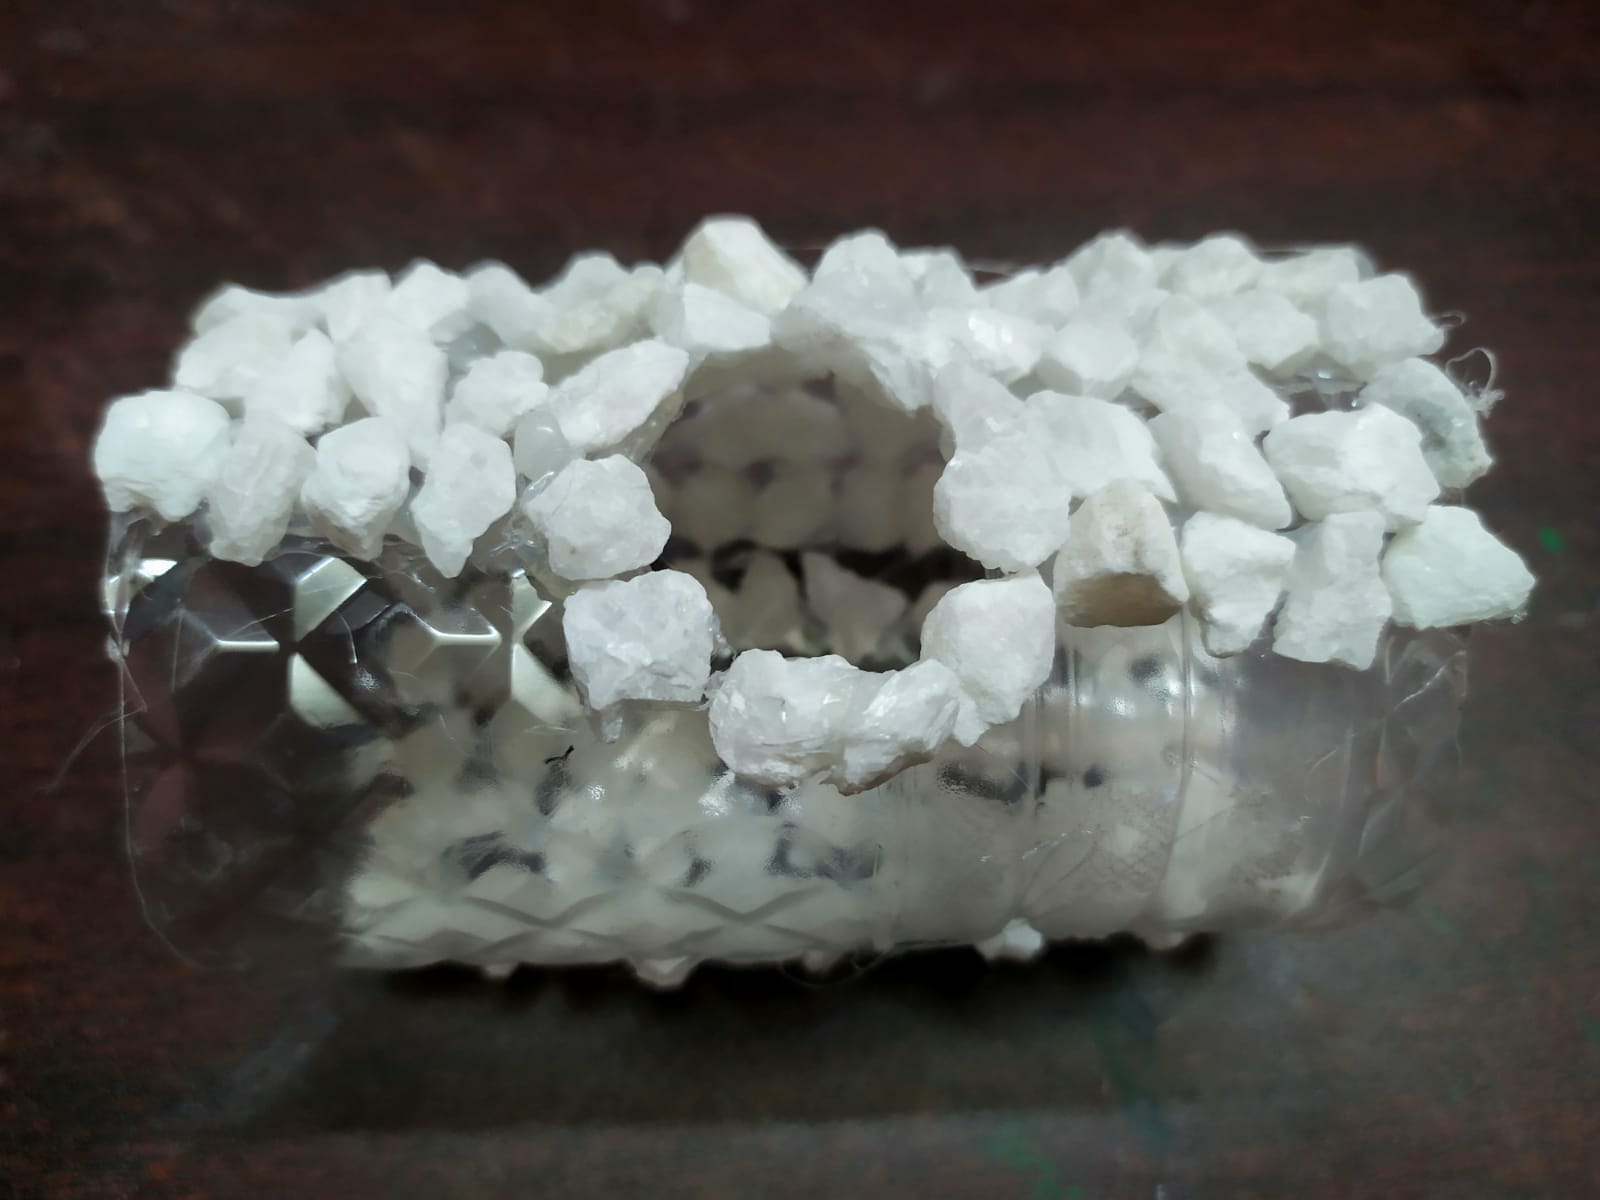
Step 8: Side View of the Stone Cave

So, this is the side view of the stone cave. Bettas are territorial so provide them with hiding places and caves in their tank is very essential. This is one of the best options for a DIY cave where bettas can rest.
DIY Coconut Shell Beta Cave
Supplies You Will Need:

- Coconut Shell
- Knife
- Marker Pen
- Drill Machine
- Cutting Tool of Metal
Step 1: Clearing the Outer Shell
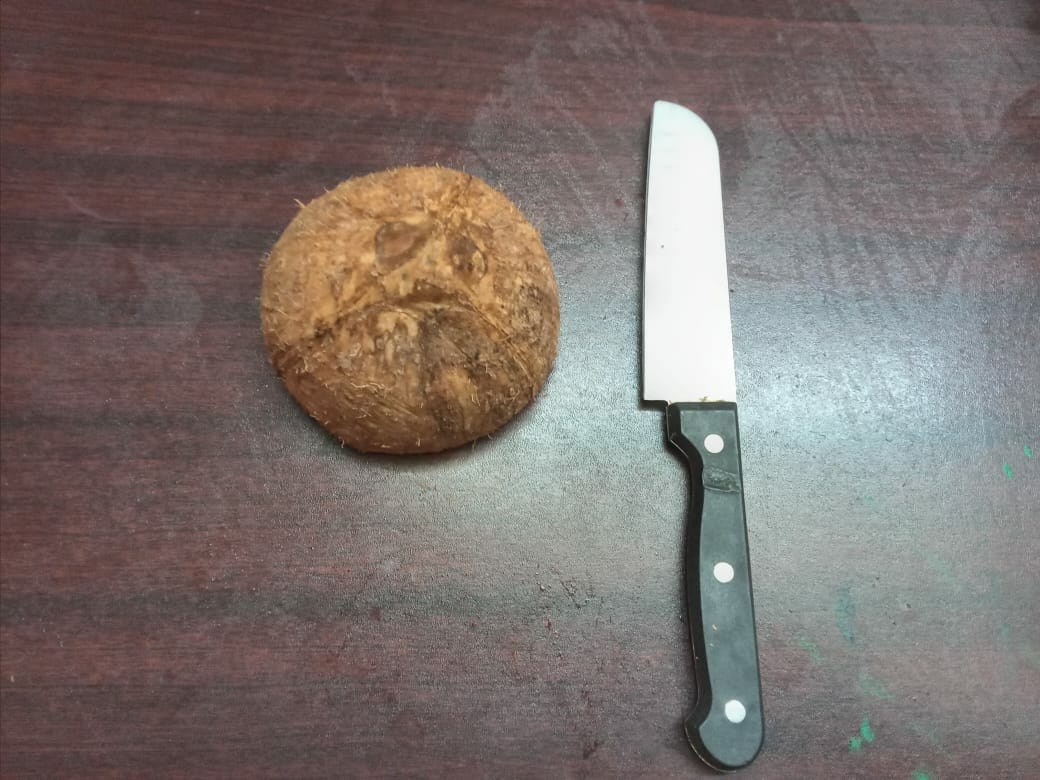
Raw coconut shells are the hard outer layer or husk of a mature coconut fruit. They are typically brown in color and have a fibrous, woody texture.
So, for a coconut cave, firstly we have to clear out the outer uneven surface from the shell using a knife. It can’t be cleared out fully but it’ll smoothen the skin from the raw body. Otherwise, it’ll be harmful to betta fish.
Step 2: Mark a Circle on the Surface
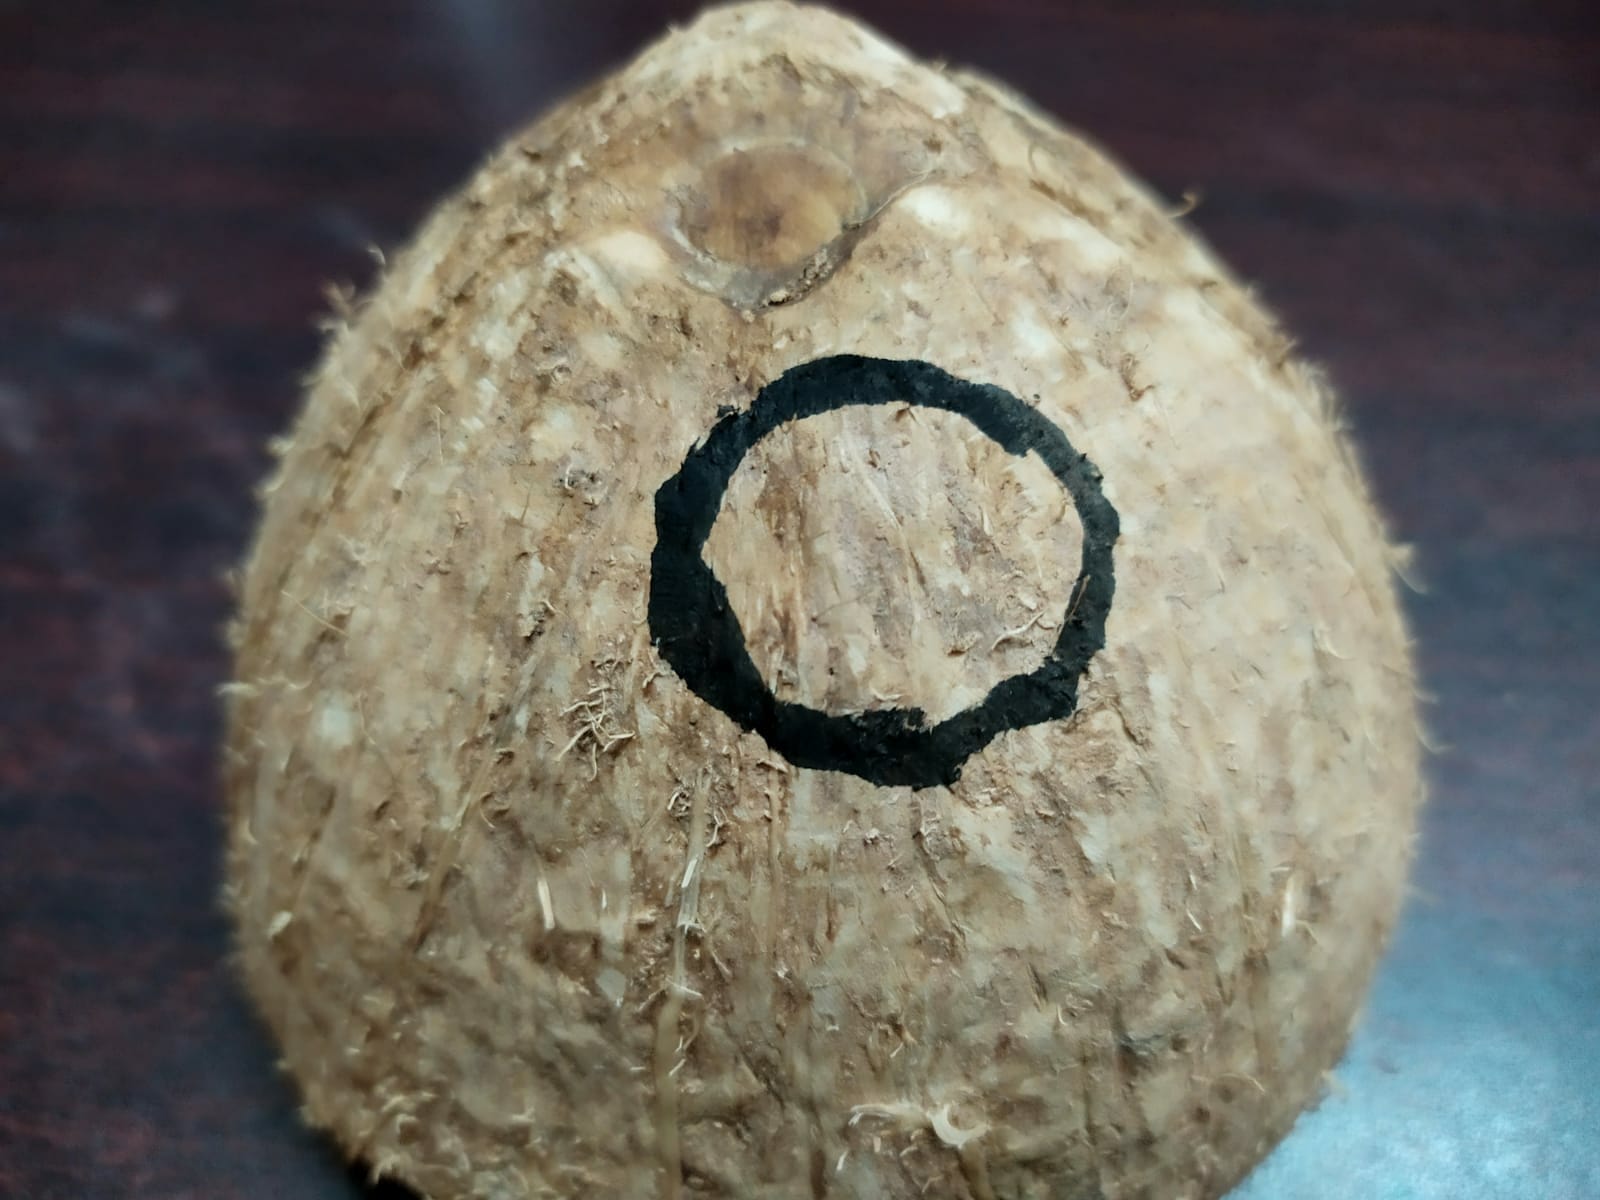
After smoothening the skin as much as possible, mark the cycle using a marker pen. The size of the circle can be someone’s personal choice.
Step 3: Drill and Cut the Marked Area
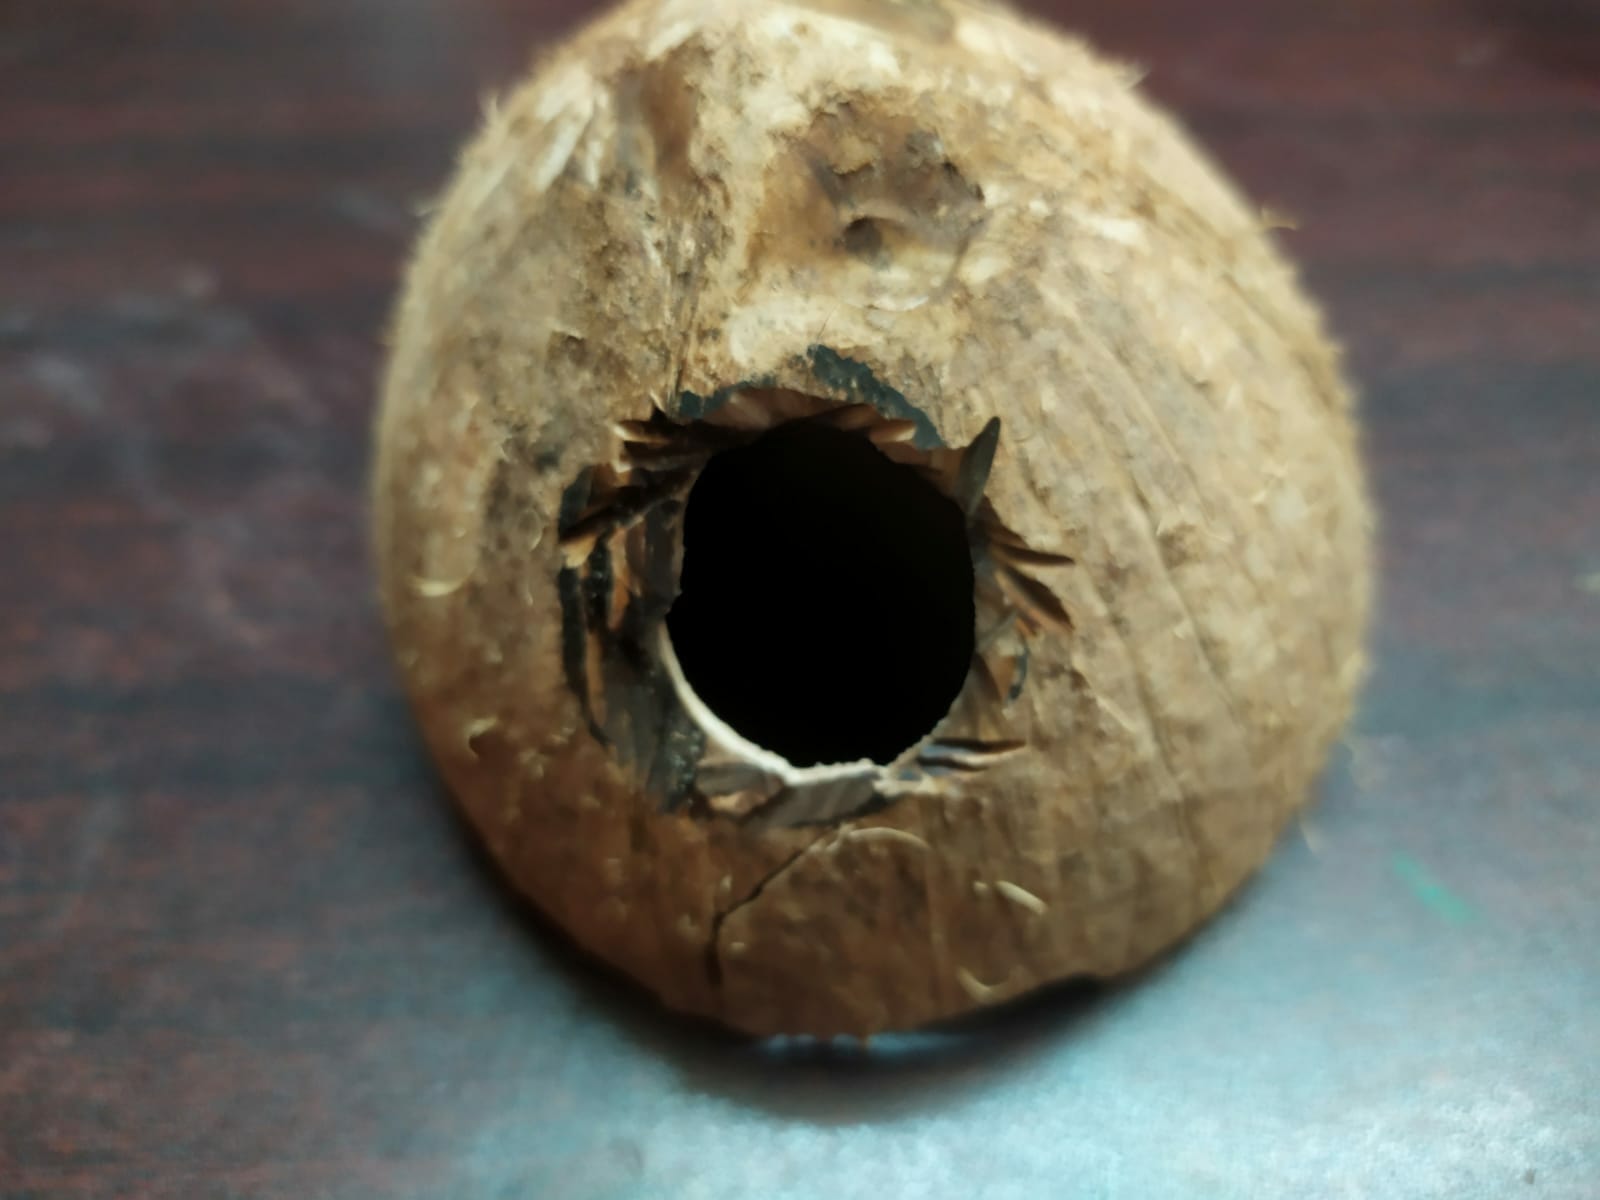
For making a coconut shell cave, it’s important to drill out the marked part of the surface. Drilling is the most sensitive part here. Only drilling isn’t enough. So we have to use another cutting tool alongside the drill machine.
After constantly drilling and cutting, the marked area of the coconut shell will look like the above picture. This cave will work as the resting place for the betta fish.
DIY Terracotta Small Pot Betta Cave
Supplies You Will Need:

- Terracotta Small Pot
- Small stone
- Marker Pen
- Cutting Tool of Metal
- Silicon Glue
- Glue Gun
Step 1: Mark the Pot Surface

Terra cotta is a Latin word that means ‘baked earth’. It is glazed or unglazed fired clay that is used to make earthenware articles such as pots, bricks, statuettes, and for architectural purposes like roofing etc. This terracotta small pot is an art that is used in aquarium tanks these days. This can be a very useful cave for betta fish.
To make this a beautiful cave, first mark the surface of the pot using a marker pen. Any shape can be drawn. To look more intense, a human face cave is mostly used.
Step 2: Cut the Drawn Mouth

First, the pot was marked like a human face using a marker pen. Afterward, using the cutting tool of metal, the mouth shape is cut preciously. After cutting it, it’ll look more like the above picture.
Step 3: Drill the Drawn Eyes

The mouth shape has been cut down using a cutting tool. Now using the drill machine, drill the marked eyes which will make the pot a more human-looking face.
Step 4: Glue the Stones
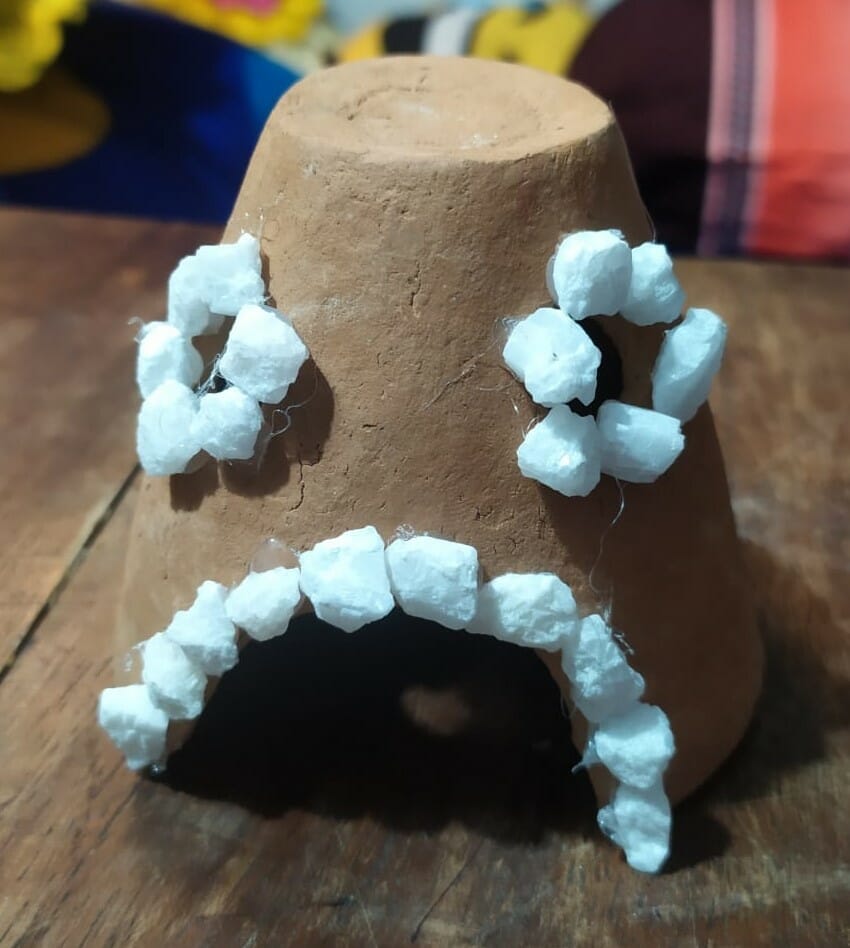
Now using the glue, glue the stones on the edge of the drilled eyes and cut through the mouth shape. The final look of the terracotta small port betta cave is this. This will be the resting place for betta fish.
DIY Terracotta Large Pot Betta Cave
Supplies You Will Need:
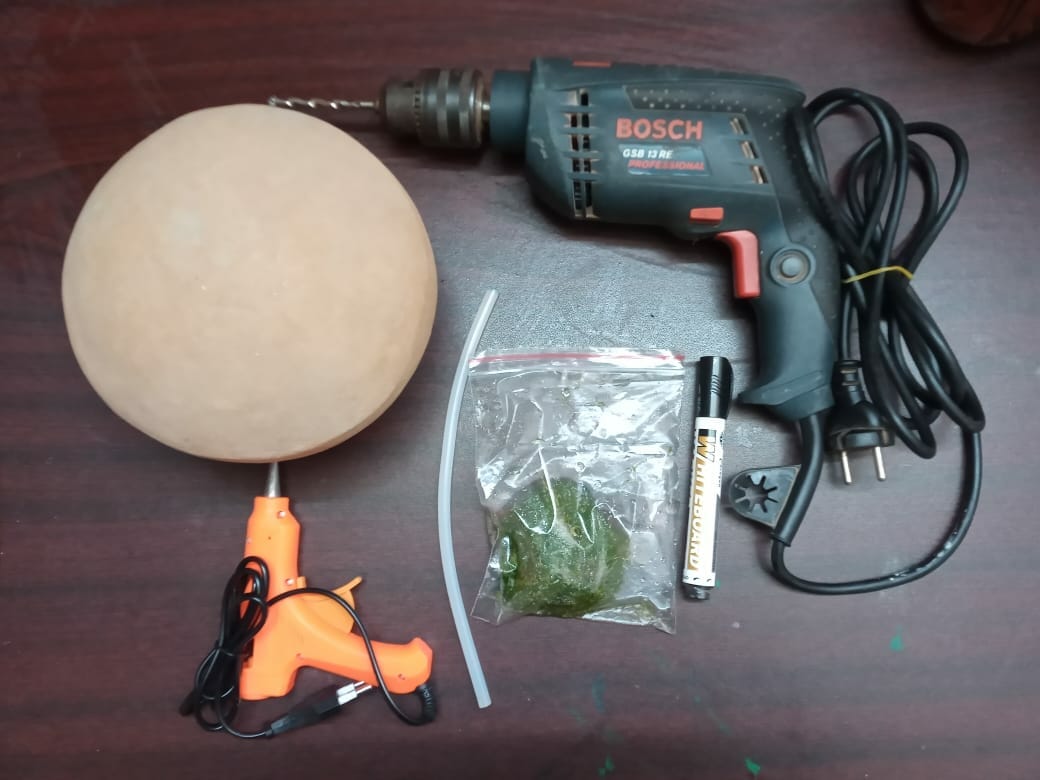
- Terracotta Pot
- Drill Machine with Pin
- Riccia Moss
- A Glue Gun
- Silicon Glue
- Marker Pen
Step 1: Draw the Circle
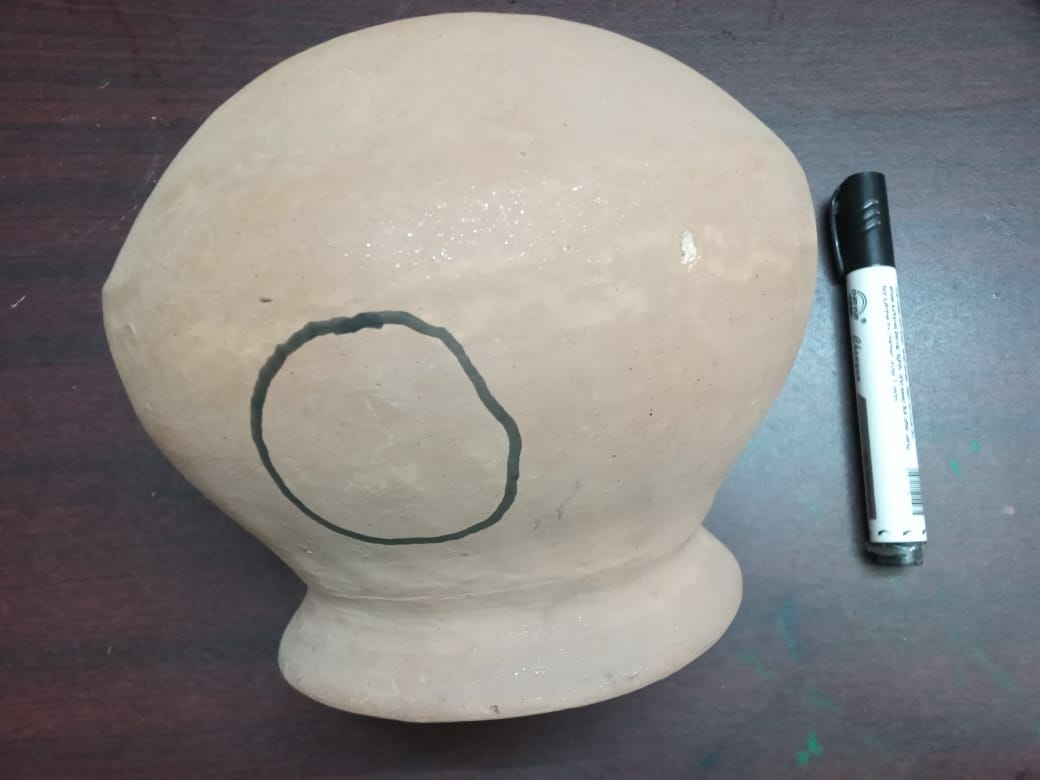
The terracotta pot is made out of soil. It’s mainly hardened soil structure. So, for the terracotta cave, firstly draw a center using the marker on the surface of the pot. You can draw the size as any size you want.
Step 2: Drill on the Marked Area
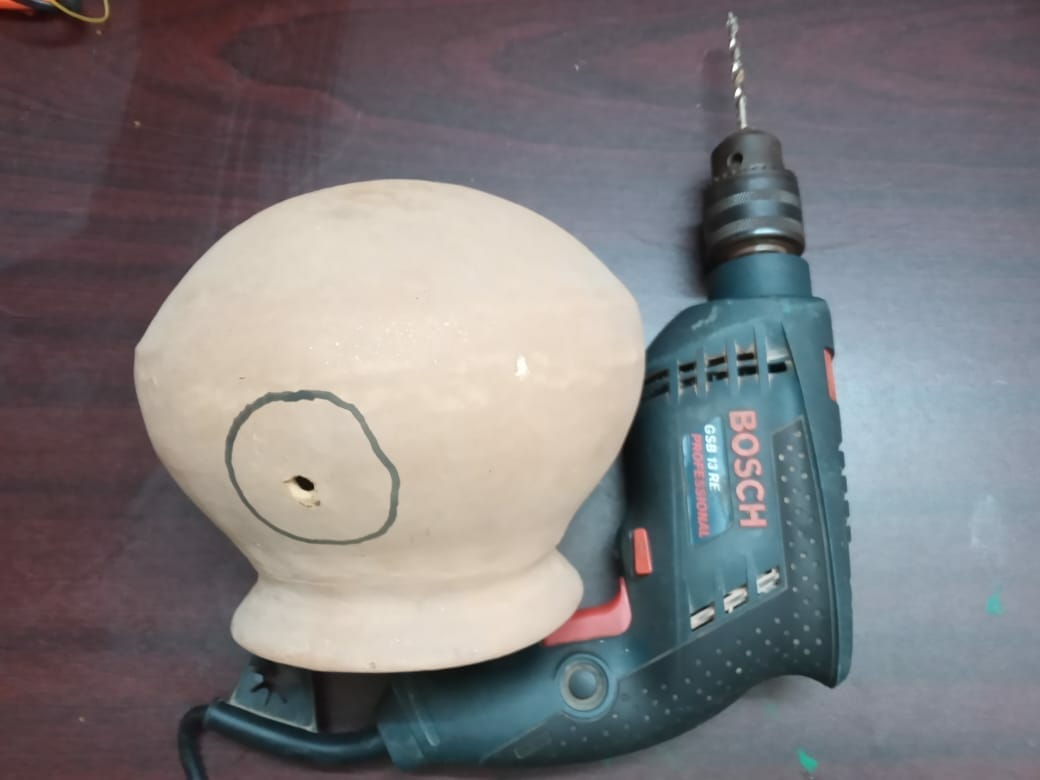
Secondly, Using the drill machine, we have to drill out the entire marked part of the terracotta pot. So, drill the inner part of the marked pot. The drilling is the most sensitive part of the whole procedure. Carefully drill the pot.
Step 3: Keep Drilling (1/2)
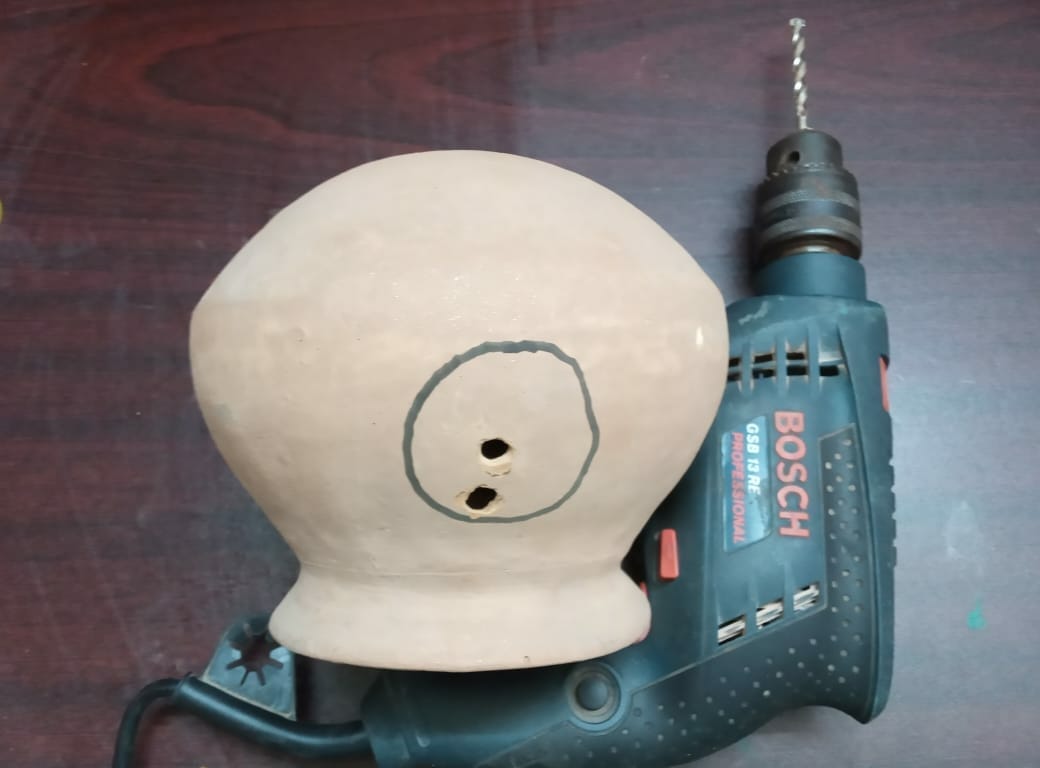
After drilling for the first hole, keep drilling on the marked place of the pot.
Step 4: Keep Drilling (2/2)
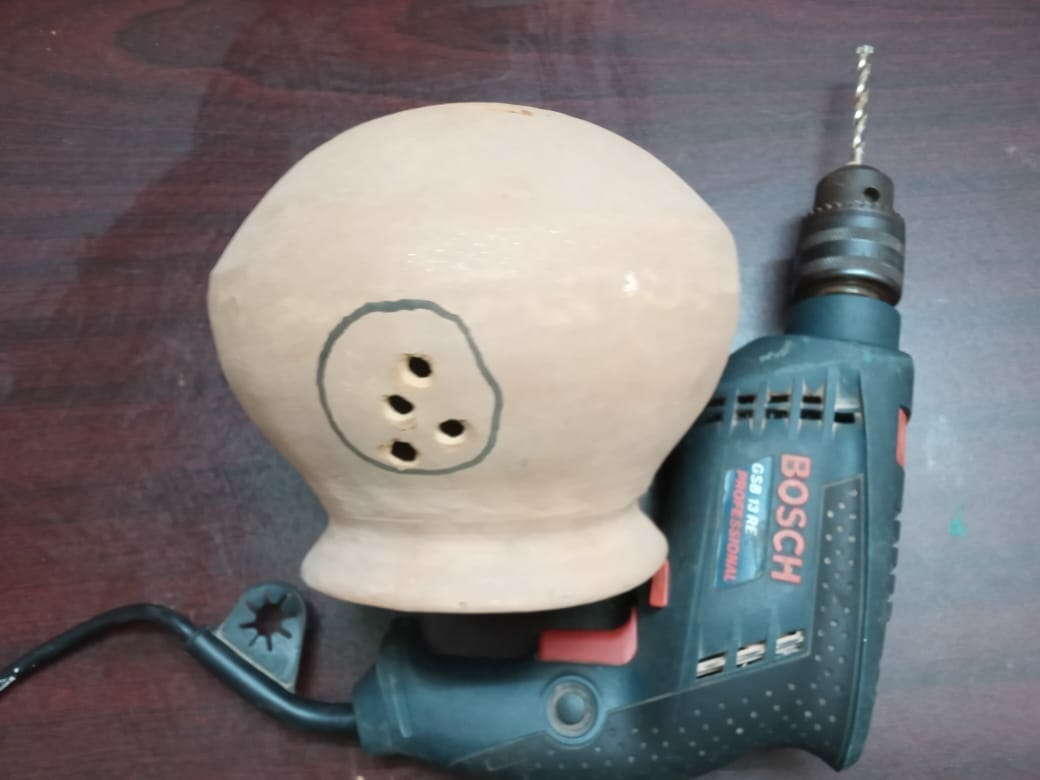
Drilling is the most important part of this terracotta cave-making. So, drill continuously on the marked part of the pot. Don’t stop drilling until the entire marked spot is fully drilled through.
Step 5: After Drilling
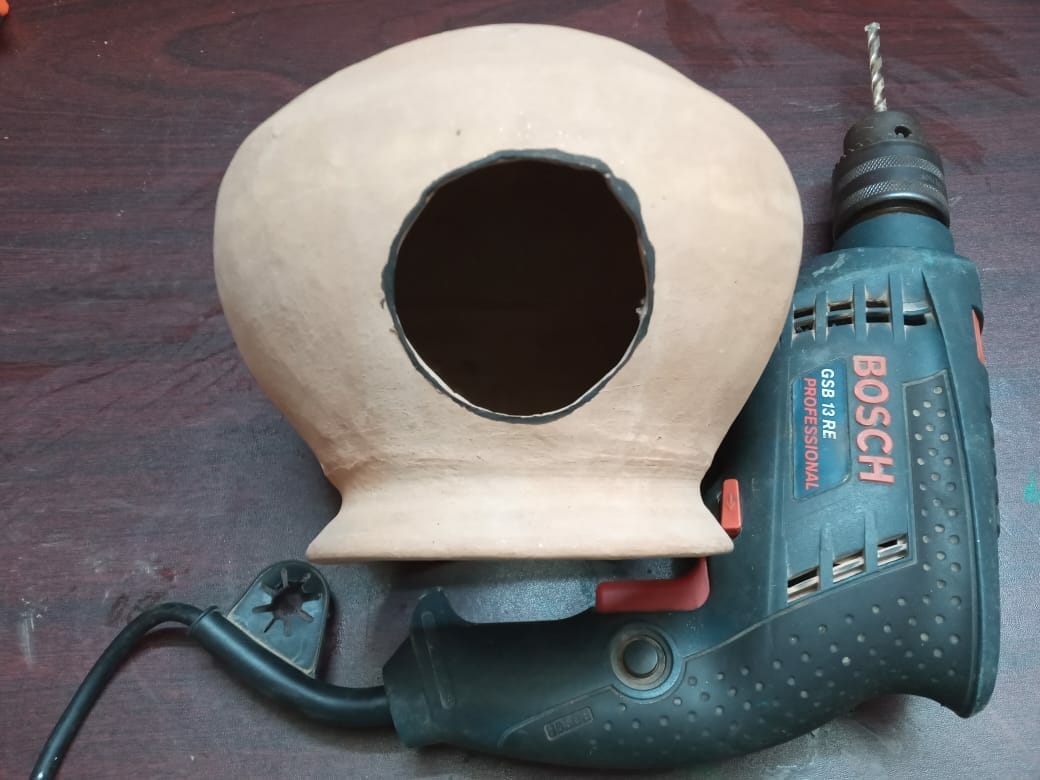
Furthermore, drilling continuously will lead to this picture where the entire marked part is see-through. This now more looks like a terracotta cave.
Step 6: Gluing the Riccia Moss

The liverwort genus Riccia is well known for its use in aquascaping Nature and Iwagumi aquariums. One of its member species, Riccia fluitans/Moss, is also known as floating Crystalwort.
Bright green floating plants called riccia fluitans are frequently used to accent planted tanks, shrimp tanks, and breeding tanks. It has the ability for rapid development and can produce bright green tufts in various aquarium regions. Since the species is appropriate for all skill levels, beginning aquarium hobbyists won’t have any trouble raising Riccia fluitans in their tanks.
Using the glue gun, glued the Riccia moss on the top of the terracotta pot. It’ll look more like the above picture.
Step 7: The Final Look
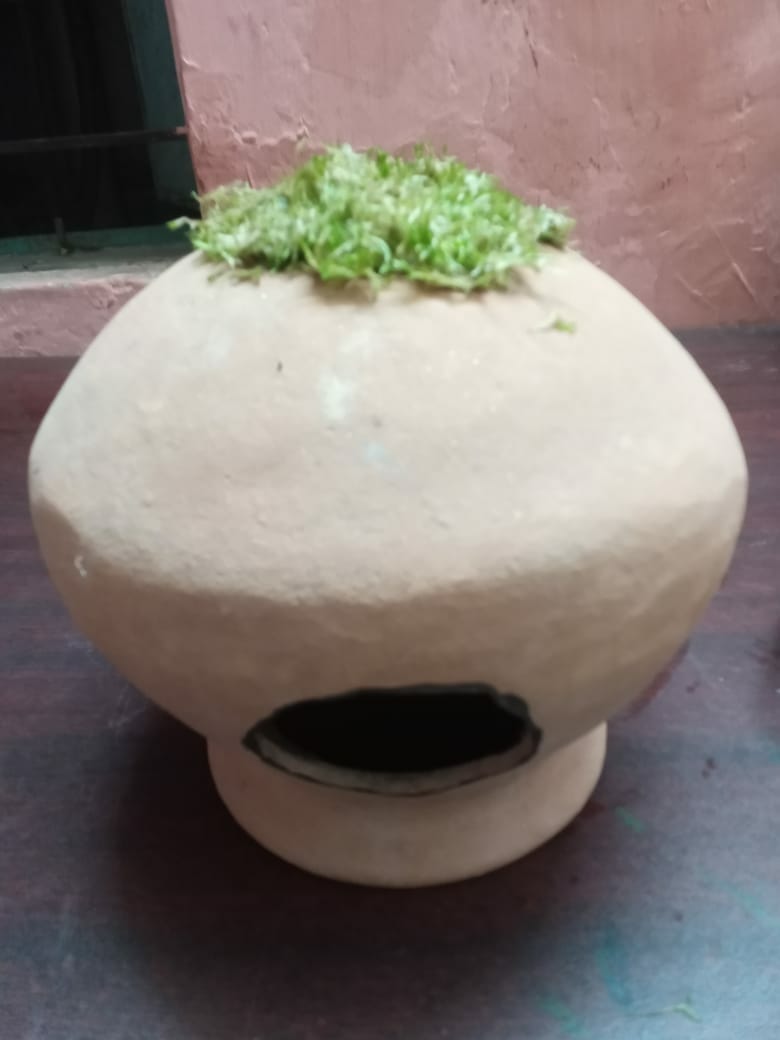
The final look of the terracotta cave with Riccia moss will look like this. This is one of the best cave options for betta fish to rest. A cave is the resting place for the betta fish.

About Author
Hello, I’m Muntaseer Rahman, the owner of AcuarioPets.com. I’m passionate about aquarium pets like shrimps, snails, crabs, and crayfish. I’ve created this website to share my expertise and help you provide better care for these amazing pets.
Disclaimer
This site is owned and operated by Muntaseer Rahman. AcuarioPets.com is a participant in the Amazon Services LLC Associates Program, an affiliate advertising program designed to provide a means for sites to earn advertising fees by advertising and linking to Amazon.com. This site also participates in other affiliate programs and is compensated for referring traffic and business to these companies.