
This post was created with help from AI tools and carefully reviewed by a human (Muntaseer Rahman) . For more on how we use AI on this site, check out our Editorial Policy.
Check Out These FREE Tools We Made JUST For You!
5 Leopard Gecko Wooden Crafts That’ll Lizard-Up Your Living Room
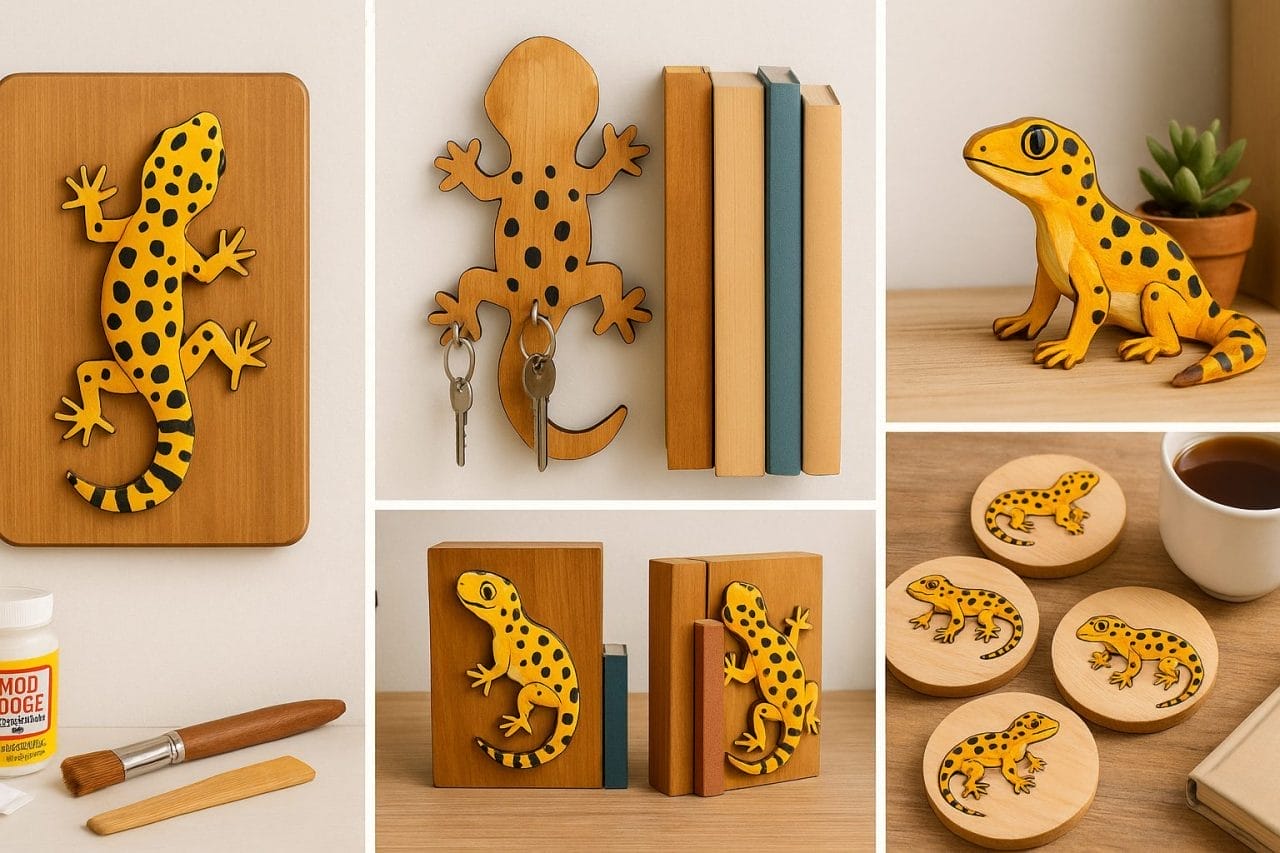
If you’re a leopard gecko fan and love working with your hands, this is for you. Wooden crafts are easy to start, fun to make, and look great in any room.
In this post, I’ll show you five wooden craft ideas that celebrate the charm of leopard geckos. Whether you want to decorate your space or gift something unique to a fellow reptile lover, these ideas will spark your creativity—no fancy tools needed.
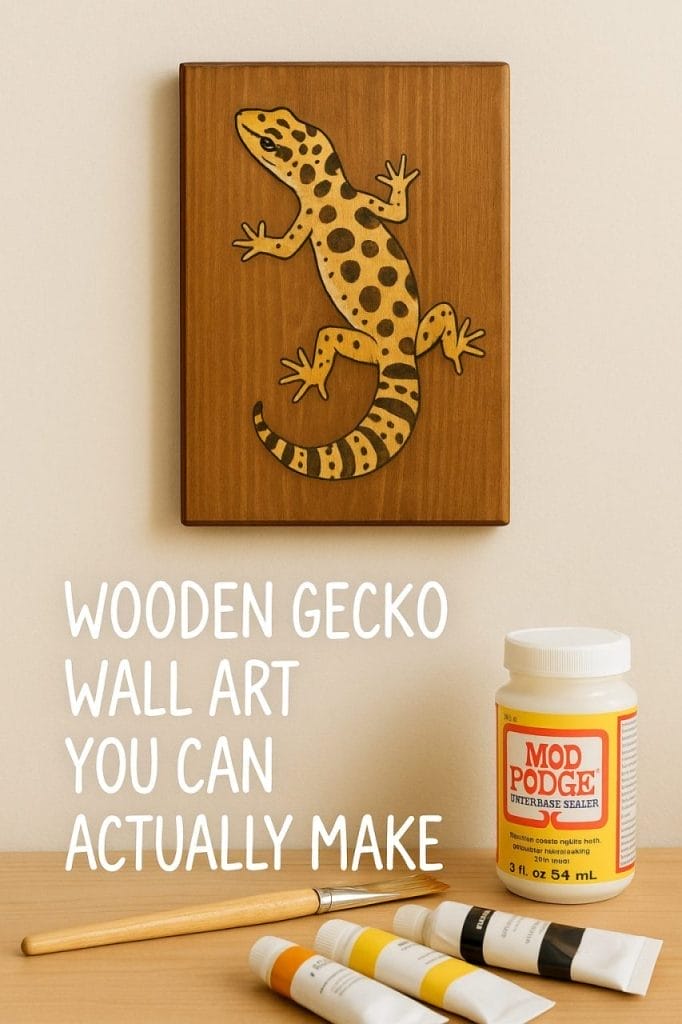
1. Leopard Gecko Wall Plaque
This is one of the easiest ways to bring your love for leopard geckos into your home. A wooden wall plaque with a leopard gecko design can be hung on any wall—bedroom, living room, or even a reptile room. You don’t need power tools or fancy skills for this. Just a little patience and some creativity.
What You’ll Need:
- A flat wooden board (reclaimed wood, plywood, or craft wood – around 8×10 inches)
- Sandpaper (medium grit)
- Leopard gecko silhouette printed on paper
- Pencil or tracing paper
- Acrylic paints (earth tones or gecko colors)
- Small paintbrushes
- Mod Podge or clear wood sealer (optional)
- Hanging hardware (sawtooth hanger or wall hook)
- Scissors and tape
- Optional: Wood burning pen if you want a burnt outline look
Step-by-Step Instructions:
Step 1: Prepare the Wood
Lightly sand the surface of your wooden board to smooth out any rough spots. Wipe off any dust with a cloth.
Step 2: Choose Your Gecko Design
Find a silhouette of a leopard gecko online or draw a simple one yourself. Keep it large enough to be the focus of the plaque. Print and cut out the outline.
Step 3: Transfer the Design
Tape the gecko silhouette onto the center of your wooden board. Use a pencil to trace around the edge, pressing firmly so the outline marks the wood. You can also use tracing paper to transfer the shape.
Step 4: Add Details (Optional)
Lightly sketch in some gecko spots or markings inside the silhouette if you want to paint or burn in those details.
Step 5: Paint the Gecko
Use acrylic paint to fill in the gecko. You can stick to natural colors like yellow, brown, and black—or go wild with a fantasy color scheme. Let the first layer dry before adding spots or stripes.
Step 6: Seal the Surface
Once the paint dries, brush a layer of Mod Podge or clear wood sealer over the surface. This helps protect the colors and gives a clean finish.
Step 7: Attach the Hanger
Flip the plaque over and attach the hanging hardware to the back. A simple sawtooth hanger is enough. You’re now ready to hang it up.
This craft is perfect for a weekend project. You can even make a few with different gecko poses and hang them as a set. Each one will feel personal and handmade—because it is!
2. Gecko-Shaped Key Holder
This wooden gecko key holder is a fun and practical way to add personality to your entryway. It’s simple enough for beginners and only needs a few basic tools and supplies. Plus, it keeps your keys in one spot—no more morning chaos!

What You’ll Need:
- A wooden gecko shape (can be hand-cut or store-bought from a craft store)
- Sandpaper
- Acrylic paints or wood stain
- Small hooks (2 to 5 depending on size)
- Screwdriver or drill
- Wall hanging hardware (sawtooth hanger or command strips)
- Pencil
- Optional: Clear sealer or Mod Podge
Step-by-Step Instructions:
Step 1: Get the Gecko Shape
You can buy pre-cut wooden gecko shapes online or at a craft store. If you have a jigsaw, you can print a gecko silhouette and cut one yourself from a wooden board (about ½ inch thick).
Step 2: Smooth the Surface
Sand all sides of the wooden gecko to remove any rough edges or splinters. Wipe clean with a cloth.
Step 3: Paint or Stain
Use acrylic paint to give the gecko a lifelike look—like yellow and black for a classic leopard gecko. Want a rustic look? Use a wood stain instead. Let it dry completely.
Step 4: Seal the Paint (Optional)
If you want the colors to last longer, brush on a layer of clear sealer or Mod Podge.
Step 5: Attach the Hooks
Use a pencil to mark where you want the hooks. Keep them spaced evenly across the gecko’s belly or tail area. Screw in the hooks by hand or use a drill if the wood is thick.
Step 6: Add Hanging Hardware
Flip it over and attach a sawtooth hanger. You can also use command strips if you don’t want to drill your wall.
Step 7: Hang and Use
Mount it near your door and start hanging your keys, leashes, or light bags. It’ll be your favorite new spot.
This one makes a perfect gift for any gecko lover. You can even personalize it by adding a name or fun phrase like “Keys Go Here, Human!”
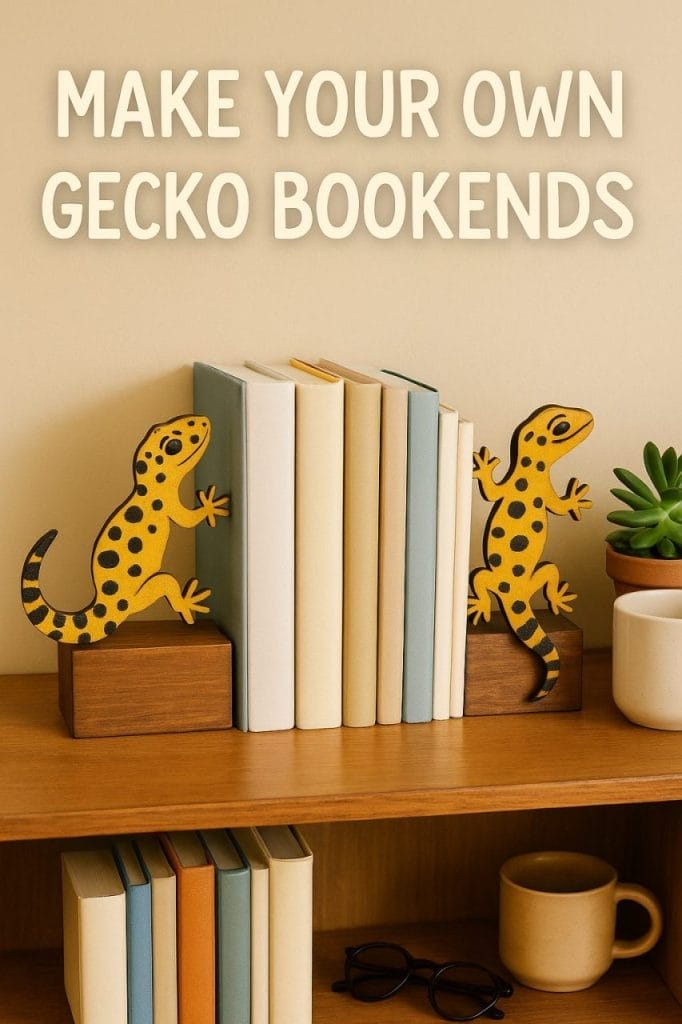
3. Leopard Gecko Bookends
If your bookshelf feels a bit bland, these leopard gecko wooden bookends are just what you need. They’re sturdy, functional, and have that perfect touch of reptile charm. This craft is beginner-friendly but gives a polished, high-impact result once done.
What You’ll Need:
- Two small solid wooden blocks (around 6x4x4 inches each)
- Two thin wooden leopard gecko shapes (buy or cut yourself)
- Wood glue or strong adhesive
- Sandpaper
- Acrylic paints (for gecko detailing)
- Paintbrushes
- Optional: Wood stain or clear sealant
- Felt pads (for the bottom of each block)
Step-by-Step Instructions:
Step 1: Prep the Wood Blocks
Sand the edges and surfaces of your wooden blocks so they’re smooth and splinter-free. These will be the base of your bookends.
Step 2: Get or Make Gecko Shapes
You can use pre-cut wooden geckos or print a gecko outline, trace it on a thin board, and cut with a jigsaw. Keep them around 5–6 inches long.
Step 3: Paint the Geckos
Use acrylic paint to add color and details to the gecko cutouts. You can go realistic—yellow with black spots—or try fantasy colors. Let dry fully.
Step 4: Attach Geckos to Blocks
Use wood glue to stick one gecko to each block. Place them slightly off-center for a dynamic look. Hold firmly or use clamps until they set.
Step 5: Add Finishing Touches
Stain or paint the wooden block itself if you want a cleaner finish. Then seal everything with a clear coat.
Step 6: Stick Felt Pads
To protect your shelf, attach felt pads to the bottom of each block.
Now place your new bookends on your shelf and slide in your favorite reptile reads or sketchbooks. They look handmade—but not in the messy way.
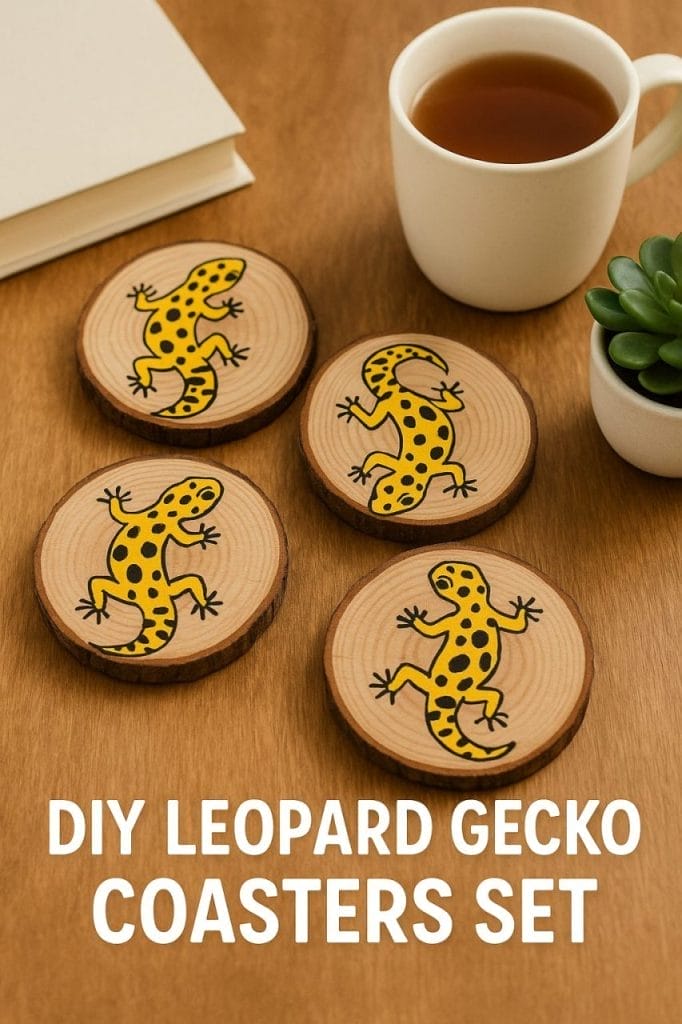
4. Gecko Coasters Set
This craft is small, simple, and seriously fun to make. Wooden coasters with leopard gecko designs add a personal touch to your coffee table. They also make great handmade gifts. And the best part? You don’t need any power tools.
What You’ll Need:
- Wooden coaster blanks (round or square, around 4 inches wide)
- Sandpaper (medium grit)
- Pencil
- Leopard gecko stencil or silhouette (printout)
- Acrylic paints or wood burner
- Small paintbrushes
- Clear sealer (Mod Podge or waterproof varnish)
- Optional: Cork pads for backing
Step-by-Step Instructions:
Step 1: Sand the Coasters
Start by sanding the surface and edges of your wooden blanks. This makes the paint or burn lines go on smoother. Wipe away any dust.
Step 2: Transfer the Gecko Design
Place your printed gecko outline on the coaster and trace the shape using a pencil. You can make each coaster a little different—change the pose or the tail shape.
Step 3: Add the Details
Now it’s time to paint. Use a fine brush to fill in the gecko design. Go for spotted patterns and bold colors to mimic a real leopard gecko. If you’re using a wood burning pen instead of paint, slowly trace the lines for a rustic, engraved effect.
Step 4: Let it Dry or Cool
Let the paint dry completely—or if you’re using a burner, give the wood a minute to cool.
Step 5: Seal the Surface
Brush on a waterproof sealer to protect the design from heat and moisture. This step is key if you actually plan to use them for drinks.
Step 6: Stick on the Cork Pads
To stop the coasters from sliding, attach cork backing or small rubber feet. These also protect your furniture.
These gecko coasters are the perfect mix of cute and practical. Stack a few and tie them with a ribbon—you’ve got a thoughtful handmade gift ready to go.
5. Leopard Gecko Wooden Figurine
This one’s a showstopper. A small hand-painted wooden leopard gecko figurine can sit on your desk, shelf, or reptile tank ledge. It’s a decorative piece with personality—perfect for leopard gecko lovers who want to bring their favorite lizard to life in wood form.

What You’ll Need:
- A small block of wood (or a precut lizard shape around 5–7 inches long)
- Jigsaw (if cutting the shape yourself)
- Sandpaper (medium and fine grit)
- Pencil and printed gecko outline
- Acrylic paints (yellow, black, white, orange)
- Fine-tipped paintbrushes
- Optional: Clear acrylic sealer spray
- Optional: Wood carving tools for added detail
Step-by-Step Instructions:
Step 1: Cut the Gecko Shape
Print a leopard gecko silhouette. Trace it onto a small piece of wood (around ½ inch thick). Use a jigsaw to carefully cut out the shape. If you’re not into cutting, grab a precut lizard shape from a craft store.
Step 2: Sand it Smooth
Use sandpaper to smooth all the edges and surfaces. Round the corners slightly for a more lifelike look.
Step 3: Add Carved Details (Optional)
If you have small carving tools, you can lightly carve in the toes, eyes, or tail ridges. If not, don’t worry—paint can do the job.
Step 4: Paint Your Gecko
Start with a base coat of yellow. Once dry, add the leopard spots, eyes, and tail bands using black and orange. Use photos of real leopard geckos for reference. Let each layer dry before moving to the next.
Step 5: Seal the Figurine (Optional)
To protect the paint and give it a slight shine, spray a clear acrylic sealer. Let it dry completely.
Step 6: Display It Proudly
Place your little gecko on a bookshelf, next to your real gecko’s tank, or give it as a gift. It adds character wherever it sits.
This figurine looks like it came from a cute craft shop—but nope, you made it. And it’s one-of-a-kind.

About Author
Hello, I’m Muntaseer Rahman, the owner of AcuarioPets.com. I’m passionate about aquarium pets like shrimps, snails, crabs, and crayfish. I’ve created this website to share my expertise and help you provide better care for these amazing pets.
Disclaimer
This site is owned and operated by Muntaseer Rahman. AcuarioPets.com is a participant in the Amazon Services LLC Associates Program, an affiliate advertising program designed to provide a means for sites to earn advertising fees by advertising and linking to Amazon.com. This site also participates in other affiliate programs and is compensated for referring traffic and business to these companies.