
This post was created with help from AI tools and carefully reviewed by a human (Muntaseer Rahman) . For more on how we use AI on this site, check out our Editorial Policy.
Check Out These FREE Tools We Made JUST For You!
Leopard Gecko Drawing Styles: 5 Ways to Sketch One

Leopard geckos aren’t just fun to care for—they’re also super fun to draw.
In this post, I’ll show you five cool ways to sketch one, from cute cartoons to clean minimalist lines.
1. Cartoon Style
Drawing a leopard gecko in cartoon style is super fun and great for beginners. You don’t need fancy tools—just a bit of patience and creativity.
Materials You’ll Need:
- Pencil (HB or 2B)
- Eraser
- Black pen or marker (for outlines)
- Paper or sketchbook
- Optional: Colored pencils or markers

Step 1: Start With a Big Head
Draw a large oval for the head. Make it slightly wider than tall. Cartoon animals usually have big heads to look cute.
Step 2: Add the Body
Sketch a small, chubby bean shape attached to the head. This is the body. Don’t worry about making it realistic—keep it soft and round.
Step 3: Draw the Tail
Make a thick, curved tail that gets thinner at the end. Leopard geckos have fat tails, so don’t be shy with the size.
Step 4: Add Legs and Toes
Draw four short legs. Each leg should end in three or four little fingers. Keep them simple—think sausages or jellybeans.
Step 5: Big Eyes = More Cute
Draw two big circles for eyes, close to the top of the head. Inside them, add smaller black circles for pupils. Leave a tiny white dot in each pupil to make the eyes look shiny.
Step 6: Tiny Smile and Nostrils
Add a small curve for the mouth. Place two little dots above it for the nose.
Step 7: Outline and Color
Go over the drawing with a pen or marker. Erase the pencil marks after the ink dries. Then color it. Use light yellow for the body, orange for spots, and brown for the tail if you want to match real gecko colors—or get creative.
Tip:
Make the spots fun—don’t worry about being perfect. You can even give it tiny blush marks or a little tongue sticking out.
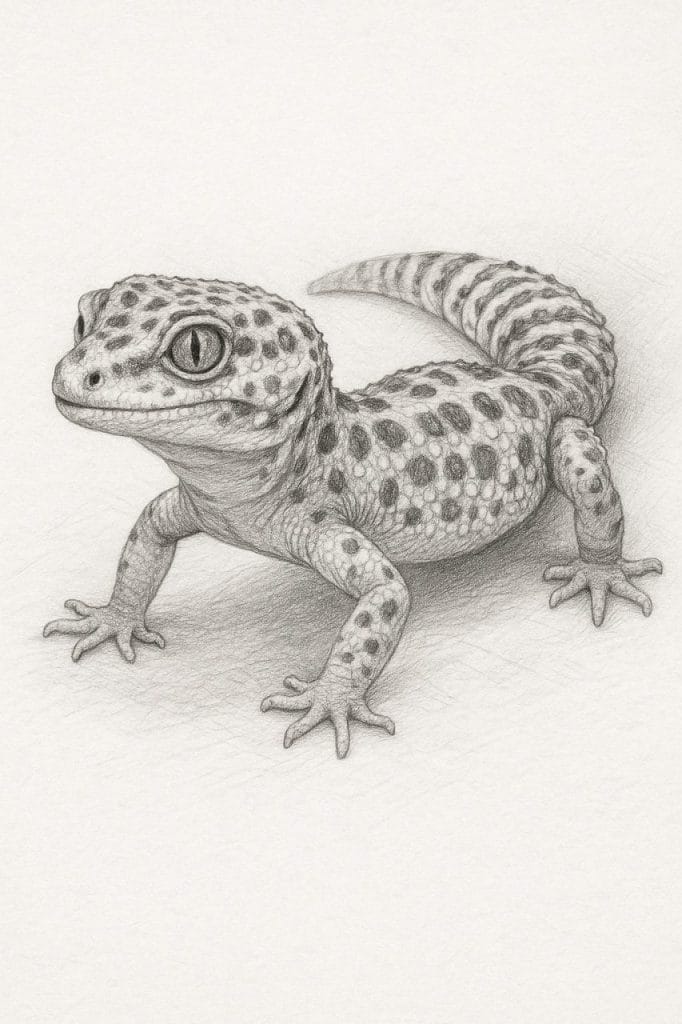
2. Realistic Style
If you want your leopard gecko to look lifelike, this is the style to try. It takes more time and focus, but the result is worth it.
Materials You’ll Need:
- Graphite pencils (HB, 2B, 4B, 6B)
- Eraser (regular and kneaded)
- Blending stump or cotton swab
- Good-quality sketch paper
- Reference photo of a real leopard gecko
Step 1: Use a Reference Photo
Pick a clear photo of a real leopard gecko. It helps you get the shape and details right. Keep the photo in front of you while sketching.
Step 2: Light Sketch of the Outline
Use an HB pencil to draw the gecko’s basic shape. Start with a rough oval for the head, a long curved body, thick tail, and short legs. Don’t add details yet.
Step 3: Refine the Shape
Now adjust the sketch to match your reference. Add the curves in the tail, the jawline, and the placement of toes. Make sure the head and eyes match the gecko’s pose in the photo.
Step 4: Add Facial Details
Draw the eyes, nostrils, and mouth carefully. Leopard geckos have bumpy, half-closed eyes and a slight smile. Use a 2B pencil to darken the eyes and make the pupil sharp. Leave a white highlight for that glossy look.
Step 5: Draw Skin Texture
Leopard geckos have bumpy skin. Add small dots, lines, and bumps around the face, back, and tail. Don’t overdo it—use a light hand. This step makes a big difference.
Step 6: Shade the Body
Use 2B and 4B pencils for shading. Start light and build up layers. Shade under the belly, behind the legs, and along the tail. Use the blending stump to smooth it out.
Step 7: Add Patterns
Now add the leopard spots. They’re darker, uneven shapes scattered on the back and tail. Use 4B or 6B to fill them in. Vary the size to make it feel natural.
Step 8: Final Touches
Darken the eyes, clean up edges with an eraser, and add highlights on the nose and toes. Step back and check if the drawing looks balanced.
Tip:
Don’t rush. Realism comes from patience. If something looks off, check your reference again.
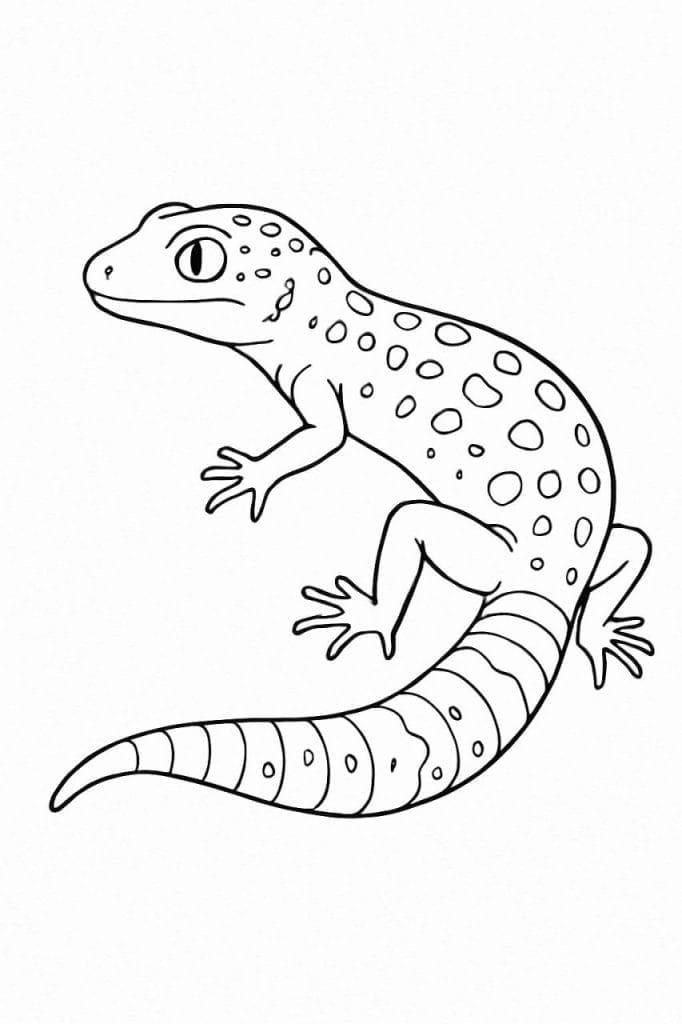
3. Line Art Style
Line art is all about clean outlines without shading. It looks simple but sharp—and it’s great for stickers, tattoos, or coloring pages.
Materials You’ll Need:
- Pencil (HB) for the base sketch
- Fineliners or ink pens (sizes 0.1 to 0.5)
- Eraser
- Smooth white paper or sketchbook
- Optional: Digital tablet if you want to do it digitally
Step 1: Sketch the Basic Shape
Start with a light pencil sketch. Use simple shapes to build the head, body, tail, and legs. Make the pose clear—side view or top-down are the easiest.
Step 2: Add the Details
Refine the shape of the head, draw the toes, and place the eye and mouth. Keep your lines smooth and not too messy. Don’t worry about textures or patterns—just focus on outlines.
Step 3: Start Inking
Use a fineliner to go over the pencil sketch. Start with the outer outline first. Keep your hand steady. Thicker lines can be used for the body, and thinner ones for small parts like toes and facial features.
Step 4: Add Line Details
Use short lines or dots to show bumps, toes, or claws. You can hint at patterns using dotted lines or small shapes. But avoid full shading—this style stays clean and open.
Step 5: Erase the Pencil Marks
Once the ink is dry, erase the pencil lines carefully. Now you’ve got a clean line art drawing.
Tip:
Keep the pressure light and the strokes steady. If you’re using digital tools, try a pen tool with pressure sensitivity for varied thickness.
4. Minimalist Style
This style is all about doing more with less. Just a few lines can capture the whole gecko. It’s great for logos, wall art, or anyone who loves clean designs.
Materials You’ll Need:
- Pencil (HB) for rough sketching
- Brush pen, ink pen, or fine marker
- Smooth white paper
- Optional: iPad or drawing tablet with a pressure-sensitive brush

Step 1: Plan the Pose
Decide on a clear, simple pose—side view works best. The tail should be curled or flowing to add movement. Think of how the gecko moves or rests naturally.
Step 2: Light Pencil Draft
Sketch one smooth curved line for the back and tail. Keep it flowing and clean. Add smaller lines for the legs and head if needed. You’re just blocking the shapes—don’t add too much.
Step 3: Define the Line Work
Use a brush pen or ink tool to draw the final lines. Keep it minimal—just enough to show the gecko’s shape. Sometimes one single line is enough to form the whole body.
Step 4: Add Small Touches
Add only what’s needed—a dot for the eye, a tiny curve for the mouth, maybe a bump for the tail base. Avoid any shading, patterns, or extra lines.
Step 5: Leave Space
Don’t try to fill the page. Minimalist art often looks best with lots of blank space around the subject.
Tip:
Imagine your pen is dancing. One elegant line is better than five messy ones. If you mess up—start fresh.
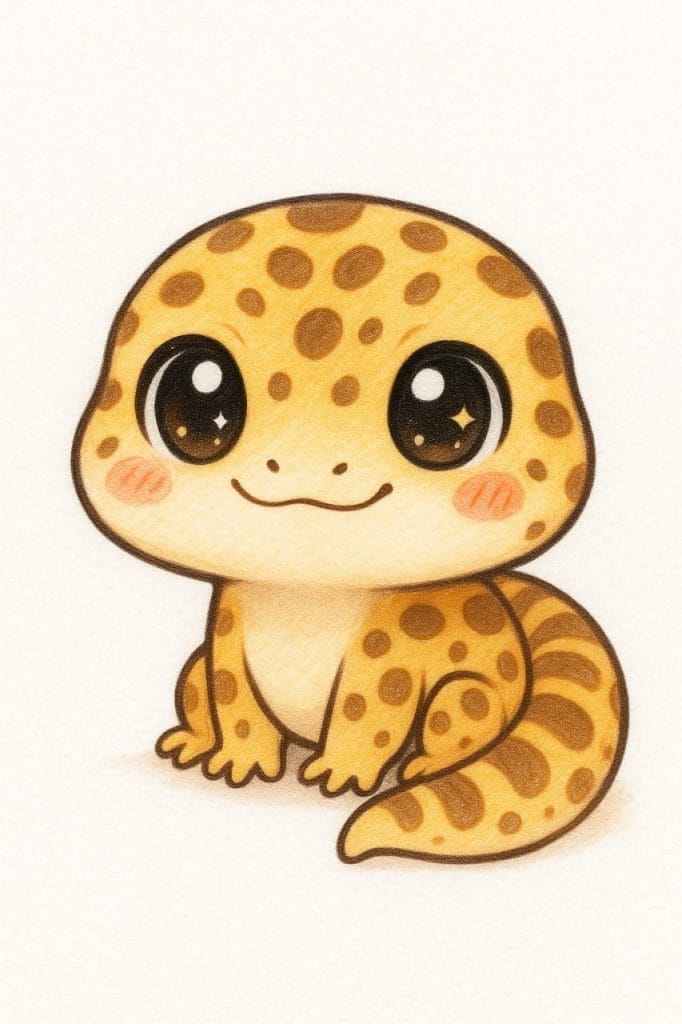
5. Chibi or Anime Style
This style is all about being cute and exaggerated. Think big heads, tiny bodies, and a ton of personality.
Materials You’ll Need:
- Pencil (HB or 2B)
- Eraser
- Fineliner or inking pen
- Colored pencils or markers
- Paper or digital drawing tablet
Step 1: Draw the Big Head
Start with a huge circle or oval for the head. Make it much bigger than the body—this is the main feature of chibi style.
Step 2: Add a Tiny Body
Under the head, sketch a short and stubby body. It can look like a soft bean or jellybean. Add a short thick tail curling around.
Step 3: Add Limbs
Draw tiny arms and legs—just little stubs. Keep them soft and rounded. No need for detailed toes.
Step 4: Big Eyes, Small Face
Place two huge eyes low on the head. Add a tiny smile in between. Inside the eyes, draw highlights and sparkles to give them life. Optional: blush marks on the cheeks.
Step 5: Add Patterns and Texture
Lightly sketch the leopard gecko’s spots, but keep them rounded and soft. You don’t need too many—just enough to suggest the real pattern.
Step 6: Ink and Color
Outline everything with a fineliner. Once it dries, erase the pencil. Use bright and soft colors—yellows, oranges, and browns work well. Add pink cheeks to boost the cuteness.
Tip:
Go for drama in the expression—happy, shocked, curious. Anime style shines when emotions are big.

About Author
Hello, I’m Muntaseer Rahman, the owner of AcuarioPets.com. I’m passionate about aquarium pets like shrimps, snails, crabs, and crayfish. I’ve created this website to share my expertise and help you provide better care for these amazing pets.
Disclaimer
This site is owned and operated by Muntaseer Rahman. AcuarioPets.com is a participant in the Amazon Services LLC Associates Program, an affiliate advertising program designed to provide a means for sites to earn advertising fees by advertising and linking to Amazon.com. This site also participates in other affiliate programs and is compensated for referring traffic and business to these companies.