
This post was created with help from AI tools and carefully reviewed by a human (Muntaseer Rahman) . For more on how we use AI on this site, check out our Editorial Policy.
Check Out These FREE Tools We Made JUST For You!
10 DIY Reptile Enclosure Ideas: Easy Builds for Terrariums, Cages & Habitats
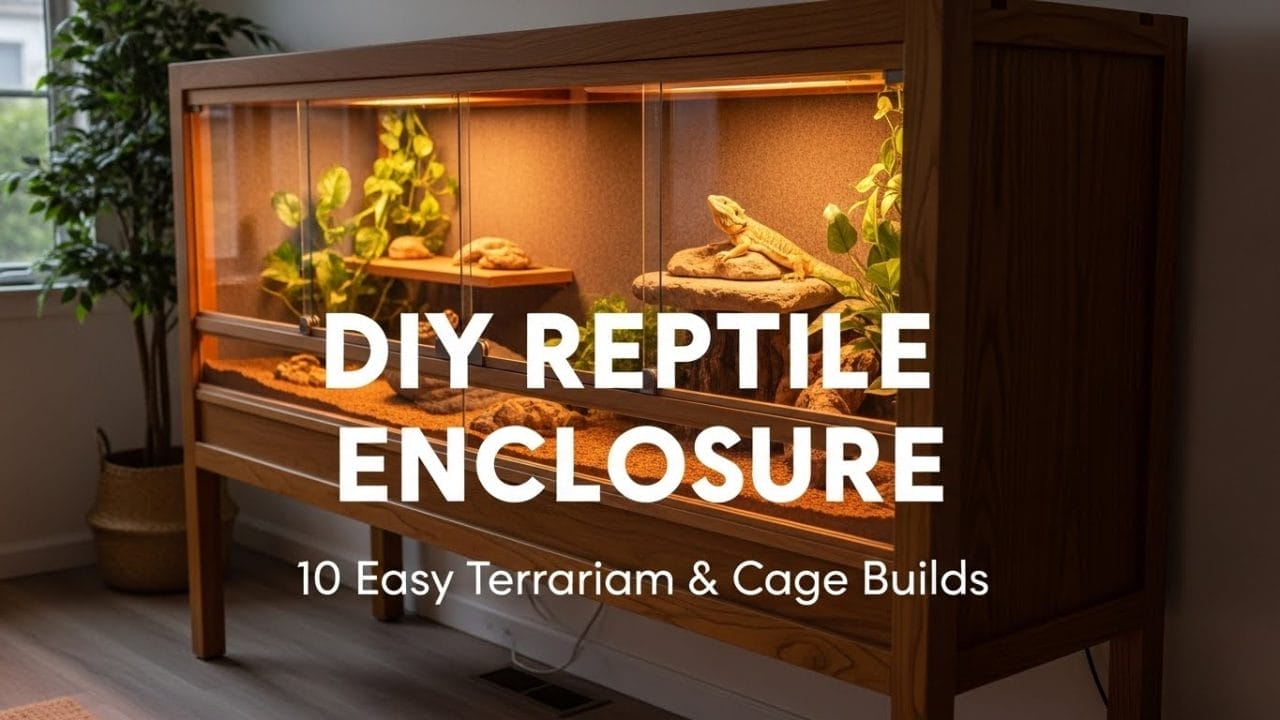
Building a DIY reptile enclosure isn’t just about saving money—it’s about creating a custom habitat perfectly suited to your pet’s needs. Whether you’re housing a bearded dragon, gecko, snake, or tortoise, a homemade enclosure gives you complete control over size, ventilation, heating, and aesthetics.
In this comprehensive guide, I’ll walk you through 10 different DIY reptile enclosure projects, from simple beginner builds to more advanced designs. Each project includes materials lists, step-by-step instructions, and specific considerations for different reptile species.
Why Build Your Own Reptile Enclosure?
Before diving into the projects, let’s talk about why DIY is worth considering:
Cost savings: Commercial reptile enclosures can cost $200-$800+. Building your own typically costs 40-60% less.
Customization: Create the exact dimensions you need. Most commercial tanks come in standard sizes that may not fit your space or your reptile’s requirements.
Better ventilation: Many store-bought enclosures have poor airflow. You can design custom ventilation that’s ideal for your species.
Quality materials: Choose durable materials like PVC, melamine, or sealed wood that will last for years.
Species-specific features: Add custom rock walls, drainage systems, or multi-level platforms that commercial enclosures don’t offer.
Now let’s explore 10 practical DIY enclosure ideas you can build at home.

1. Simple Wooden Reptile Enclosure
Difficulty: Beginner
Cost: $80-$150
Best for: Bearded dragons, blue tongue skinks, leopard geckos
Build time: 4-6 hours
This is the perfect starter project if you’ve never built an enclosure before. The basic wooden box design uses melamine-coated particleboard, which is water-resistant and easy to clean.
Materials Needed:
- 1 sheet melamine-coated particleboard (4′ x 8′)
- Sliding glass doors or acrylic panels
- Wood glue and screws (1.5″ and 2″)
- Aluminum screen mesh (36″ x 24″)
- Hinges for top access door
- Silicon sealant (aquarium-safe)
- LED light fixtures
Recommended Dimensions:
- Length: 48″
- Width: 24″
- Height: 24″
Step-by-Step Instructions:
Step 1: Cut your panels Using a circular saw or having the hardware store cut for you:
- Back panel: 48″ x 24″
- Bottom: 48″ x 24″
- Two side panels: 24″ x 24″
- Top: 48″ x 24″
- Front frame pieces
Step 2: Create ventilation Before assembly, cut ventilation holes in both side panels. Use a jigsaw to cut 10″ x 6″ rectangles, positioned in the upper third of each panel. Cover these from the inside with aluminum screen mesh, secured with small screws and washers.
Step 3: Assemble the frame Apply wood glue to edges and join panels with screws every 6-8 inches. Start with the back panel, attach sides, then add the bottom and top. Pre-drill holes to prevent splitting.
Step 4: Seal the interior Run a bead of silicon sealant along all interior seams. This prevents moisture from penetrating the particleboard and makes cleaning easier. Let it cure for 24 hours.
Step 5: Install front access For sliding glass doors, install tracks at the top and bottom of the front opening. Glass doors should overlap by 2-3 inches in the center. Alternatively, frame the front with wood strips and attach hinged acrylic doors.
Step 6: Add top access Cut a section of the top panel (about 16″ x 20″) and reattach it with hinges. This allows easy access for maintenance without disturbing your reptile through the front.
Pro Tips:
- Paint the exterior with non-toxic paint for a finished look
- Line the interior bottom with pond liner before adding substrate
- Install an under-tank heating mat before placing in the enclosure location
- Add a basking platform at different heights to create temperature gradients
Species-Specific Modifications:
- For bearded dragons: Make this 48″ x 24″ x 24″ minimum
- For leopard geckos: 36″ x 18″ x 18″ works well for one adult
- For blue tongue skinks: Increase length to 60″ if possible

2. PVC Reptile Enclosure
Difficulty: Intermediate
Cost: $150-$250
Best for: Ball pythons, corn snakes, rainbow boas
Build time: 6-8 hours
PVC (polyvinyl chloride) boards are becoming the gold standard for reptile enclosures. They’re lightweight, waterproof, retain heat well, and never warp. This material is especially popular for snake enclosures.
Materials Needed:
- PVC sheets (typically 1/4″ or 3/8″ thick)
- PVC cement (specifically for bonding PVC)
- Acrylic panels for doors
- Sliding door tracks
- Aluminum screen
- Heat tape or heat panel mounting brackets
- Circular saw with fine-tooth blade
Recommended Dimensions (for adult ball python):
- Length: 48″
- Width: 24″
- Height: 16″
Step-by-Step Instructions:
Step 1: Cut PVC panels PVC can be scored and snapped for straight cuts, but a circular saw gives cleaner edges. Cut:
- Back: 48″ x 16″
- Bottom: 48″ x 24″
- Sides: 24″ x 16″ (2)
- Top: 48″ x 24″
Step 2: Create ventilation strips Rather than large holes, create ventilation strips by cutting 1″ wide slots. Cut 3-4 slots on each side panel, each about 10″ long. Cover with aluminum screen from the interior, using PVC cement to bond.
Step 3: Bond the enclosure PVC cement creates a chemical weld. Apply cement to both surfaces, press together firmly, and hold for 30 seconds. Work in a well-ventilated area. Assemble in this order:
- Attach back to bottom
- Attach sides to back and bottom
- Attach top panel
Step 4: Install sliding doors Mount aluminum or plastic door tracks to the front edges. Cut acrylic panels to fit, leaving 2″ of overlap. Sand acrylic edges smooth to prevent scratching.
Step 5: Add mounting points Before final assembly, install mounting points for heat sources. Use small PVC blocks glued to the interior ceiling for hanging heat panels or mounting radiant heat panels.
Pro Tips:
- PVC expands and contracts with temperature—leave 1/8″ gaps at joints
- Black or dark-colored PVC helps reptiles feel secure
- Install a thermostat probe port by drilling a small hole in the back
- Add removable PVC dividers to create separate zones for multiple juveniles
Why PVC is superior for snakes:
- Retains humidity better than wood
- Non-porous surface prevents mite infestations
- Lighter weight for rearranging
- Can be easily cleaned with reptile-safe disinfectants

3. 4x2x2 Reptile Enclosure (The Standard)
Difficulty: Intermediate
Cost: $120-$200
Best for: Adult bearded dragons, tegus, larger monitors
Build time: 5-7 hours
The 4x2x2 (48″ long, 24″ wide, 24″ tall) is considered the minimum standard for many popular reptiles. This design uses melamine with reinforced joints for durability.
Materials Needed:
- 2 sheets melamine particleboard (4′ x 8′, 3/4″ thick)
- Wood support beams (1×2″ or 2×2″)
- Heavy-duty hinges
- Sliding glass door tracks
- Large aluminum screen panel (for top)
- Reflective insulation foam (optional, for heat retention)
- Corner brackets
Step-by-Step Instructions:
Step 1: Cut and reinforce Cut your melamine panels to size. Here’s the critical step most people skip: add wooden support beams to the back panel and bottom. Screw 2×2″ wood strips along the edges on the exterior. This prevents sagging over time, especially important for larger enclosures.
Step 2: Create the frame Using corner brackets and wood glue, assemble the box structure. The bottom should rest on support legs (add four 2″ wooden blocks as feet) to allow airflow underneath if using heat mats.
Step 3: Design ventilation zones For a 4x2x2, create two ventilation zones:
- Top ventilation: Cut a large section of the top panel (about 36″ x 16″) and replace with aluminum screen framed in wood
- Side ventilation: Cut 8″ x 4″ openings on both sides near the top, covered with screen
Step 4: Install front doors For an enclosure this large, sliding glass doors work best. Install heavy-duty tracks that can support glass weight. Standard glass thickness should be 1/4″.
Step 5: Interior finishing Apply waterproof sealant to all seams. Consider adhering reflective foam insulation to the back and sides to help maintain temperature gradients—especially useful if keeping species that need basking spots above 100°F.
Pro Tips:
- Add a basking shelf 8-10″ from the top using secured wood platforms
- Create a hide box area by dividing one end with a partial wall
- Install feeding ledges if housing arboreal species
- Use LED strip lights along the top for viewing without heat output
Temperature Gradient Setup: In a 4x2x2, you can create an ideal gradient:
- Basking spot: 95-110°F (depending on species)
- Warm side ambient: 85-90°F
- Cool side: 75-80°F

4. DIY Reptile Terrarium with Rock Wall Background
Difficulty: Advanced
Cost: $100-$180 (plus materials cost)
Best for: Crested geckos, day geckos, anoles, tree frogs
Build time: 8-12 hours (plus drying time)
Adding a custom rock wall background transforms a basic enclosure into a naturalistic terrarium. This project combines enclosure building with artistic sculpting.
Materials Needed:
- Base enclosure (glass or PVC)
- Expanding foam insulation
- Silicone sealant (100% silicone, no mold inhibitors)
- Coco fiber or peat moss
- Acrylic paints (earth tones)
- Non-toxic grout or tile adhesive
- Serrated knife
- Brush for applying silicone
Step-by-Step Instructions:
Step 1: Build your base enclosure Start with any rectangular enclosure. A 24″ x 18″ x 24″ vertical terrarium works well for arboreal species. Ensure it has front-opening doors for access.
Step 2: Create the foam base Working inside the enclosure (protect the glass with tape), apply expanding foam in layers to the back and sides. Let each layer expand fully before adding more. Create:
- Ledges and shelves for climbing
- Crevices for hiding
- Varied textures by pulling and shaping foam while semi-cured
Step 3: Carve the foam Once fully cured (24 hours), use a serrated knife to carve realistic rock textures. Create:
- Horizontal ledges
- Vertical climbing surfaces
- Caves and hiding spots
- Plant pockets (indent areas where you’ll place live plants)
Step 4: Seal and texture This is a multi-day process:
- Brush on a thick layer of silicone
- Immediately press coco fiber or peat moss into the silicone
- Let cure 24 hours
- Repeat 2-3 times for complete coverage
- The final layer should fully hide all foam
Step 5: Paint and seal Mix acrylic paints with silicone to create colored sealant:
- Base coat: Dark brown or gray
- Highlights: Tan, cream, or rust colors
- Apply unevenly for natural variation
- Final thin layer of clear silicone seals everything
Step 6: Add live plants Once fully cured (3-5 days), add live plants in the pockets you created:
- Pothos (hardy and easy)
- Bromeliads (hold water for drinking)
- Small ferns
- Moss
Pro Tips:
- Install misting system tubing during foam construction
- Create drainage layer at bottom with hydro balls and mesh
- Test all materials are fully cured by smelling—no chemical odor should remain
- Add cork bark pieces to foam before coating for varied texture
Best Species for Naturalistic Terrariums:
- Crested geckos
- Gargoyle geckos
- Day geckos
- Green anoles
- Small tree frogs

5. Corner Reptile Cage Design
Difficulty: Intermediate
Cost: $90-$140
Best for: Small to medium snakes, juvenile monitors
Build time: 5-6 hours
Corner enclosures are perfect for maximizing room space. This design fits into a corner and provides more floor space than its footprint suggests.
Materials Needed:
- Melamine or plywood (3/4″ thick)
- Wood or PVC trim
- Acrylic sheet for front panel
- Hinges
- Aluminum screen
- Wood screws and glue
- Edge banding (optional, for finished appearance)
Recommended Dimensions:
- Front width: 36″
- Side depths: 24″ each
- Height: 24″
- Interior angles: 45° corner cut
Step-by-Step Instructions:
Step 1: Plan the triangle Sketch your design. You’re creating a triangle-shaped enclosure that fits flush against two walls. The back will have two flat sides at 90° to each other.
Step 2: Cut angles This requires precise cuts:
- Two back panels: Each 24″ deep, 24″ tall
- Bottom: Create a triangular base (36″ front edge, two 24″ sides meeting at 90°)
- Front panel: 36″ wide, 24″ tall (later cut for door access)
- Top: Matches bottom triangle shape
Step 3: Assemble the structure Start by joining the two back panels at a 90° angle using a corner brace and wood glue. Attach the triangular bottom, then sides complete the structure. The front-facing edge should be one continuous 36″ opening.
Step 4: Install ventilation Cut ventilation strips into the upper portions of each back panel (where they won’t be visible against walls). Cover with screen mesh.
Step 5: Create access The entire front can be one large hinged door, or divide it into two doors meeting in the center. Use acrylic for visibility. Install magnetic catches to keep doors closed.
Pro Tips:
- Paint the exterior sides that face the walls—they won’t be visible but should be sealed
- Add interior corner shelves at different heights for climbing species
- Use LED strip lights along the top front edge for even illumination
- Consider a false bottom design for hiding electrical cords and equipment
Space Efficiency: A corner cage with a 36″ front provides approximately 6 square feet of floor space while only using about 4 square feet of room floor space—50% more efficient!

6. Screen Reptile Cage for Chameleons
Difficulty: Beginner-Intermediate
Cost: $60-$100
Best for: Chameleons, some arboreal species
Build time: 3-4 hours
Chameleons need maximum airflow, making screen cages essential. This lightweight aluminum-framed design is easy to build and allows climbing on all sides.
Materials Needed:
- Aluminum channel framing (available at hardware stores)
- Aluminum window screen (heavy-duty)
- Corner connectors for aluminum frame
- Screen spline and roller tool
- PVC door frame
- Magnetic screen door catches
- Hacksaw
Recommended Dimensions (adult veiled chameleon):
- Length: 24″
- Width: 24″
- Height: 48″
Step-by-Step Instructions:
Step 1: Build the aluminum frame Cut aluminum channels to length:
- 8 vertical pieces: 48″
- 8 horizontal pieces: 24″ Connect using corner brackets to form the rectangular frame structure—essentially creating two rectangular frames (front and back) connected by horizontal supports.
Step 2: Attach screening Lay screen material over each face of the frame. Using the screen spline and roller tool, press spline into the channel, securing the screen. Trim excess screen with a utility knife.
Step 3: Create door access On the front face, before attaching screen, install a PVC door frame. Create a screen door that can be held closed with magnetic catches. Make it large enough for plant maintenance (typically half the front face).
Step 4: Add interior structure Because the cage is all screen, you’ll need to add:
- Horizontal branches secured with zip ties
- Hanging plant hooks
- Drip system mounting points
Step 5: Bottom pan Create a solid PVC or melamine bottom pan that sits under the cage to catch water from misting. Add a drainage hole in one corner with a bulkhead fitting.
Pro Tips:
- Double-screen the top to support mounting heavy misting system components
- Create a removable bottom screen panel for deep cleaning
- Position the cage near a window for natural UV exposure (if safe to do so)
- Paint the aluminum frame with white enamel for a clean, bright appearance
Why Screen Works for Chameleons:
- Maximum UVB penetration
- Prevents respiratory infections from poor airflow
- Allows natural temperature gradients
- Provides climbing surfaces on all sides

7. Multi-Level Reptile Enclosure
Difficulty: Advanced
Cost: $180-$300
Best for: Green tree pythons, emerald tree boas, tokay geckos
Build time: 10-14 hours
Arboreal reptiles need vertical space with multiple levels. This design creates distinct zones at different heights, all accessible to your climbing reptile.
Materials Needed:
- Melamine or PVC sheets
- Interior hardwood plywood for shelves (1/2″ thick)
- Stainless steel brackets and screws
- Multiple glass or acrylic panels for front access
- LED strip lighting
- Heavy-duty hinges
- Natural cork bark or branches
Recommended Dimensions:
- Length: 36″
- Width: 24″
- Height: 48″
Step-by-Step Instructions:
Step 1: Build the main structure Construct a tall rectangular enclosure using standard methods. The key is making it tall (48″ minimum) rather than long.
Step 2: Plan your levels Divide the vertical space into zones:
- Bottom level (0-16″): Substrate area, water bowl, ground hiding spot
- Mid level (16-32″): Main living area with basking branch
- Upper level (32-48″): Cooler area, sleeping perches
Step 3: Install permanent shelves Using stainless steel L-brackets, install two permanent shelves:
- Mid shelf at 16″ high (covers half the enclosure floor area)
- Upper shelf at 32″ high (covers 1/3 of floor area) Offset these shelves so your reptile can climb between levels.
Step 4: Add natural climbing elements Between shelves, install:
- Diagonal cork bark ramps connecting levels
- Horizontal branches secured with screws through the back panel
- Hanging perches suspended from the top
Step 5: Create accessible front Install three separate front-opening panels:
- Bottom door: For accessing ground level
- Middle door: For reaching mid-level areas
- Top door: For accessing upper perches This prevents having to reach through the entire cage for maintenance.
Step 6: Lighting zones Install different lighting at each level:
- Top: Low-wattage LED for ambient light
- Middle: Basking bulb focused on main perch
- Bottom: No direct lighting (natural shade)
Pro Tips:
- Add hinged trap doors in the permanent shelves for easier access to lower levels
- Install the basking bulb (this one is dependable, choose the correct watt) outside the cage aimed through screen for safety
- Create “highways” between levels so your reptile has multiple route options
- Use removable branches attached with velcro strips for easy reconfiguration
Temperature Gradient in Vertical Space: Unlike horizontal enclosures, vertical ones create natural temperature layers:
- Top level: Warmest (heat rises)
- Middle level: Moderate (ideal for basking spot)
- Bottom level: Coolest (perfect for nighttime cooling)

8. Outdoor Reptile Enclosure
Difficulty: Intermediate-Advanced
Cost: $150-$350
Best for: Tortoises, box turtles (daytime use only)
Build time: 8-12 hours
An outdoor enclosure allows your reptile to bask in natural sunlight. This semi-permanent structure works well in yards or patios and can be disassembled for winter storage.
Materials Needed:
- Pressure-treated lumber (2x4s and 2x6s)
- Hardware cloth (1/4″ mesh, galvanized)
- Solid roofing material (polycarbonate or corrugated metal)
- Wood screws (exterior grade)
- Hinges for access door
- Ground anchors or concrete pavers
- Sand or soil for substrate
Recommended Dimensions (tortoise):
- Length: 8′
- Width: 4′
- Height: 18-24″
Step-by-Step Instructions:
Step 1: Build the base frame Construct a rectangular frame using 2×6 boards. For an 8′ x 4′ enclosure:
- Two 8′ boards (long sides)
- Two 4′ boards (short sides)
- Join with exterior wood screws at corners
- Add a center support beam for rigidity
Step 2: Install bottom barrier To prevent burrowing escapes, you have two options:
- Bury method: Dig down 8-12″, line with hardware cloth, refill with soil
- Paver method: Place concrete pavers along the bottom interior edges
Step 3: Build vertical walls Install 2×4 vertical posts at each corner and every 2 feet along the sides. Height should be appropriate for your species:
- Tortoises: 18″ minimum (they can’t climb)
- Box turtles: 24″ (they can climb surprisingly well)
Step 4: Attach hardware cloth Staple hardware cloth to all sides, including the top. Use 1/4″ mesh to keep out predators (including rats, snakes, and birds). Overlap edges by 2″ and double-staple for security.
Step 5: Create partial roof Cover 1/3 to 1/2 of the top with solid roofing material (polycarbonate panels work well). This provides:
- Shade during hottest parts of the day
- Rain protection
- Refuge from aerial predators
Step 6: Add hiding structures Inside the enclosure, create hiding spots using:
- Half-buried flower pots
- Cork bark hides
- Small shrubs (safe for reptiles)
- Rock piles (stable construction)
Step 7: Install access door Cut a section of one wall and reattach with heavy-duty hinges. Make it large enough to walk through for maintenance. Install a latch that can be padlocked.
Pro Tips:
- Plant reptile-safe edible plants (for tortoises: dandelion, clover, hibiscus)
- Provide multiple water bowls in different areas
- Create varied terrain with slopes and flat areas
- Add a small “mud zone” for box turtles
- Never leave unattended—outdoor enclosures are for supervised time only
Safety Considerations:
- Check for predators in your area (raccoons, hawks, neighborhood cats)
- Ensure no toxic plants are accessible (inside or reaching into enclosure)
- Monitor temperature—even outdoors can get too hot
- Always bring reptiles inside at night
- Install a thermometer in the enclosure

9. DIY Reptile Dresser Conversion
Difficulty: Beginner-Intermediate
Cost: $50-$100 (assuming you have/find used furniture)
Best for: Small snakes, leopard geckos, juvenile reptiles
Build time: 4-6 hours
Repurposing furniture is an economical and attractive option. An old dresser can house multiple reptiles in separate drawers, perfect for breeders or those with limited floor space.
Materials Needed:
- Solid wood dresser (avoid particle board)
- Acrylic sheets for front panels
- Hinges or magnetic latches
- Heat tape or heat cable
- Aluminum screen for ventilation
- Waterproof sealant
- Drill and hole saw bit
Step-by-Step Instructions:
Step 1: Select appropriate furniture Look for:
- Solid wood construction (will hold humidity and heat better)
- Large drawers (minimum 18″ deep, 30″ wide)
- Sturdy structure (will hold weight of substrate and decorations)
Step 2: Remove drawer fronts Take out all drawers and remove the decorative fronts. You’ll reattach these later, but they need modification first.
Step 3: Create ventilation For each drawer, drill ventilation holes:
- Use a 1″ hole saw bit
- Drill 8-10 holes along the top back of each drawer
- Cover from inside with aluminum screen (staple or glue)
- Drill additional holes in dresser back panel aligned with drawer locations
Step 4: Seal interiors Coat the inside of each drawer with waterproof sealant or epoxy. This protects the wood from moisture and makes cleaning easier.
Step 5: Install viewing windows Cut large rectangular openings in the drawer fronts, leaving a 2-3″ frame. Install acrylic sheets from the inside using small screws or strong adhesive. The original drawer handle can remain functional.
Step 6: Reattach drawer fronts Using hinges, reattach the modified drawer fronts so they open like doors. Alternatively, keep the drawer system functional if the dresser has metal drawer slides.
Step 7: Add heat sources For each drawer/enclosure:
- Install heat tape on the bottom exterior of the drawer
- Route cords through the back panel
- Use thermostats to control each drawer independently
Pro Tips:
- Remove every other drawer to create double-height enclosures for taller species
- Paint the exterior in colors that match your home décor
- Add LED strip lighting inside the top of each “enclosure”
- Create removable substrate trays that slide out for easy cleaning
- Install a main power strip on the back of the dresser for all equipment
Drawer Organization: For a standard 4-drawer dresser:
- Top drawer: Juvenile reptiles or quarantine area
- Middle drawers: Adult small species (geckos, small snakes)
- Bottom drawer: Storage for supplies (extra substrate, supplements)
Species Perfect for Dresser Conversions:
- Leopard geckos
- African fat-tailed geckos
- Corn snake hatchlings
- Kenyan sand boas
- Rosy boas
- House snakes

10. Styrofoam Terrarium Build (Naturalistic Paludarium)
Difficulty: Advanced
Cost: $120-$250
Best for: Red-eyed tree frogs, crested geckos, fire-bellied newts
Build time: 12-16 hours (plus curing time)
This advanced build creates a waterfall-featured paludarium using carved styrofoam. While time-intensive, the results are museum-quality naturalistic habitats.
Materials Needed:
- Glass aquarium (40-gallon breeder works well)
- Styrofoam sheets (2-3″ thick, XPS foam preferred)
- Silicone sealant (multiple tubes)
- Coco fiber and peat moss
- Non-toxic grout (tile adhesive)
- Acrylic paints
- Small water pump
- Aquarium tubing
- Egg crate (lighting diffuser material)
- Serrated knife and hot knife tool
Recommended Base Tank:
- 36″ x 18″ x 18″ glass aquarium
- Should have separate land and water sections
Step-by-Step Instructions:
Step 1: Plan your landscape Sketch the interior design:
- Water area (25-40% of base)
- Land area with varying heights
- Waterfall location
- Plant placement
- Basking areas
Step 2: Create water barrier Install a glass or acrylic divider separating water and land sections. Seal with aquarium silicone. Allow 24 hours to cure. The water section should be 4-6″ deep.
Step 3: Build the false bottom On the land side, create a drainage layer:
- Cut egg crate to fit
- Elevate it on PVC risers 2″ off the bottom
- Add landscape fabric on top
- This prevents soil from becoming waterlogged
Step 4: Stack and shape styrofoam This is the artistic phase:
- Stack styrofoam sheets to create background height
- Use silicone between layers
- Carve shapes while semi-bonded (easier than fully cured)
- Create a channel for waterfall from top to water area
- Form caves, ledges, and planting pockets
Step 5: Detail carving Using a serrated knife and hot knife:
- Add rock-like textures and cracks
- Create horizontal ledges for climbing
- Form natural-looking cave entrances
- Make pockets for mounting plants
Step 6: Seal and coat This is the messiest but most important phase:
- Apply thick silicone over all exposed styrofoam
- Press coco fiber into wet silicone (work in sections)
- Allow to dry 24 hours
- Apply second layer of silicone and coco fiber
- Let cure fully (2-3 days)
Step 7: Paint and seal Mix acrylic paints with silicone:
- Base coat: Dark browns and grays
- Highlights: Tans and lighter browns
- Green accents for moss effect
- Apply unevenly for realistic variation Final coat of clear silicone seals everything
Step 8: Install water features
- Place water pump in the water section
- Run tubing up through background to waterfall start
- Test water flow and adjust positioning
- Add smooth river stones in water area
Step 9: Add substrate and plants
- Add ABG mix soil (for bioactive setups) to land area
- Plant live plants in carved pockets
- Add moss to all surfaces
- Install lighting (LED floods work well)
Step 10: Final details
- Add leaf litter for isopods (if bioactive)
- Install misting system
- Place branches across open areas
- Add floating plants to water section
Pro Tips:
- Make the waterfall silent by having water run over textured surfaces, not drop
- Install underwater LED lights for nighttime viewing
- Use Great Stuff Pond & Stone foam for initial structure (expands less than regular foam)
- Create a cleaning door by making part of the background removable
- Add a false sky background to the back glass before building
Making it Bioactive: Complete the ecosystem by adding:
- Springtail culture
- Isopod culture (dwarf white or powder blue)
- Beneficial bacteria starter
- These clean-up crews will maintain the terrarium
Long-term Maintenance:
- Water changes weekly (25-30% of water section)
- Trim plants monthly
- Clean pump filter monthly
- Replenish clean-up crew populations as needed
Essential Tools for DIY Reptile Enclosures
Regardless of which project you choose, having the right tools makes the job easier and produces better results.
Basic Tool Kit:
- Circular saw or jigsaw: For cutting panels
- Drill with bits: For pilot holes and ventilation
- Measuring tape: Accuracy is critical
- Carpenter’s square: Ensures 90° angles
- Screwdriver set: Both Phillips and flathead
- Silicone gun: For applying sealant
- Staple gun: For attaching screen mesh
- Sandpaper: 80-grit and 220-grit
Optional but Helpful:
- Table saw: For perfectly straight cuts
- Miter saw: For angled cuts (corner enclosures)
- Hot knife: For cutting/shaping foam
- Router: For professional-looking edges
- Paint sprayer: For even finishes
Safety Equipment:
- Safety glasses
- Dust mask (especially when cutting melamine)
- Ear protection (power tools)
- Work gloves
Choosing the Right Materials
Different materials work better for different applications. Here’s a breakdown:
Melamine-Coated Particleboard
Best for: Most wooden enclosures
Pros: Water-resistant surface, easy to clean, affordable
Cons: Can swell if water penetrates coating, heavy
Cost: $40-50 per 4’x8′ sheet
PVC Sheets
Best for: Snake enclosures, high-humidity setups
Pros: Completely waterproof, excellent heat retention, lightweight
Cons: More expensive, requires specific adhesive
Cost: $90-150 per 4’x8′ sheet
Plywood (sealed)
Best for: Large custom builds, outdoor enclosures
Pros: Very strong, can support heavy weight
Cons: Must be sealed thoroughly, can warp with humidity
Cost: $30-60 per 4’x8′ sheet
Glass
Best for: Front panels, viewing areas
Pros: Crystal clear visibility, easy to clean
Cons: Heavy, can break, poor insulation
Cost: $40-80 for standard tank glass
Acrylic
Best for: Lightweight doors, curved surfaces
Pros: Lighter than glass, won’t shatter, can be heated and formed
Cons: Scratches easily, more expensive than glass
Cost: $50-100 per sheet
Ventilation Design Principles
Proper airflow is critical for reptile health. Poor ventilation leads to respiratory infections, mold growth, and temperature regulation issues.
Cross-Flow Ventilation
Create airflow by having ventilation openings on opposite sides of the enclosure:
- Low intake: One side, bottom third of the enclosure
- High exhaust: Opposite side, top third of the enclosure Heat rises naturally, creating airflow even without fans.
Ventilation Size Guidelines
- Desert species (bearded dragons, leopard geckos): 15-20% of one wall should be ventilation
- Tropical species (green tree pythons, boas): 8-12% ventilation to maintain humidity
- Temperate species (corn snakes, king snakes): 12-15% ventilation
Ventilation Placement
- Top only: Works for very dry species but risks hot spots
- Sides only: Best for maintaining humidity while ensuring airflow
- Combination: Top and sides provide maximum air exchange
Avoid These Mistakes:
- Ventilation only at the bottom (no airflow)
- All ventilation on one side (no cross-flow)
- Too much ventilation for humidity-dependent species
- Using only tiny holes instead of mesh-covered openings
Heating and Lighting Integration
Design your enclosure with heating and lighting in mind from the start.
Heat Source Placement
- Under-tank heaters: Require clearance underneath enclosure (add feet)
- Basking bulbs: Mount at top, focused on specific area
- Radiant heat panels: Can be mounted inside ceiling (safest)
- Heat tape: Can be attached to bottom exterior or back wall
Wiring Considerations
Plan for cables and cords:
- Drill a cable management hole in the back panel (2″ diameter)
- Use a grommet to protect wires from sharp edges
- Keep all cords away from moisture-prone areas
- Install a thermostat probe port separately from main cable hole
Lighting Fixtures
- Dome fixtures: Mount on screen top or outside for safety
- LED strips: Can be installed inside along top edge for even lighting
- Fluorescent tubes: Use external mounting brackets above screen
- UV bulbs: Position 12-18″ from basking spot for proper UV exposure
Temperature Gradient Creation
Every enclosure needs cool and warm areas:
- Heat source on one end only
- No heat sources in the center
- Thermometers at both ends to verify gradient
- Basking spot: Focused heat (95-110°F depending on species)
- Ambient warm side: 85-90°F
- Cool side: 75-80°F
Substrate Containment
Keeping substrate inside the enclosure and making cleanup easy requires planning.
Raised Lip Design
Add a 2-3″ raised edge along the front:
- Attach a strip of wood or PVC along the bottom front
- Prevents substrate from spilling when opening doors
- Makes spot-cleaning easier
Removable Substrate Tray
For maximum ease:
- Build a shallow tray that fits perfectly inside the enclosure bottom
- Use PVC, melamine, or plastic cement board
- Add handles to the tray for easy removal
- Entire substrate layer can be removed for deep cleaning
Liner System
Alternative to loose substrate:
- Install PVC trim along edges to create a lip
- Cut reptile carpet or tile to fit precisely
- Easy to remove and clean
- No risk of substrate spillage
Access Door Options
How you access your enclosure affects daily maintenance and your reptile’s stress levels.
Front-Opening Doors
Best for: Most species
Pros: Less threatening to reptiles (not reaching from above)
Types:
- Sliding glass: Best for larger enclosures
- Hinged acrylic: Good for medium enclosures
- Magnetic screen: Best for screen cages
Top-Opening Access
Best for: Very calm species, supplementary access
Pros: Easier to reach entire enclosure
Cons: Stressful for many reptiles (predators come from above)
Multiple Access Points
For large or tall enclosures:
- Front door for daily maintenance
- Top door for reaching deep areas
- Side door for accessing hides (optional)
Security Latches
Escape artists (snakes!) require secure closures:
- Sliding doors should have stops at both ends
- Hinged doors need locking hasps or barrel bolts
- Magnetic latches are NOT secure for snakes
- Test all closures before introducing your reptile
Cost-Saving Tips
Building your own saves money, but you can maximize savings:
Material Sourcing
- Used furniture stores: Dressers, cabinets for conversions
- Habitat for Humanity ReStores: Discounted building materials
- Craigslist/Facebook Marketplace: Free or cheap aquariums
- Building supply stores: Ask for damaged/returned items at discount
Bulk Buying
If building multiple enclosures:
- Buy full sheets of materials (saves on cutting fees)
- Purchase silicone in bulk (tubes are expensive per ounce)
- Buy screen material by the roll
- Get mixed scrap wood for structural supports
Repurpose and Reuse
- Old aquariums can become terrariums
- Broken furniture can be salvaged for panels
- Leftover materials from one project start the next
What NOT to Cheap Out On
Safety and security items should never be compromised:
- Don’t use cheap silicone (use aquarium-grade)
- Don’t skimp on thermostats (risk of burns)
- Don’t use thin glass (risk of breakage)
- Don’t use toxic paints or sealants (risk of poisoning)
Common Mistakes to Avoid
Learn from others’ errors:
Design Mistakes
- Inadequate ventilation: Causes respiratory infections
- No temperature gradient: Reptiles can’t thermoregulate
- Doors too small: Makes maintenance difficult
- Forgetting drainage: Essential for tropical setups
- Poor sight lines: Unable to see your pet
Construction Mistakes
- Not sealing wood: Leads to rot and mold
- Using wrong screws: Regular screws rust in humid conditions
- Sharp edges: Can injure reptiles and humans
- Unstable structures: Risk of collapse
- Gaps in screen: Escape routes for small species
Material Mistakes
- Particle board without melamine: Swells with any moisture
- Regular paint: Must use non-toxic varieties
- Wrong foam type: Some foams are toxic
- Treated wood for interior: Chemicals can be harmful
- Copper or metal in water features: Toxic to amphibians
Planning Mistakes
- Building too small: Reptiles outgrow enclosures quickly
- No expansion room: Future equipment upgrades
- Ignoring weight: Large tanks on weak furniture
- Forgetting electrical access: Need nearby outlets
- No quarantine plan: Always need a spare enclosure
Customizing for Specific Species
Different reptiles have vastly different needs. Here’s how to modify these builds:
For Bearded Dragons
- Minimum: 4x2x2 enclosure
- Height: Low (18-24″) – they’re ground dwellers
- Ventilation: High – they need very dry conditions
- Basking area: Must reach 100-110°F
- Substrate: Tile, reptile carpet, or paper (avoid sand)
- Furniture: Flat basking rock, logs, cork bark hides
For Ball Pythons
- Minimum: 4x2x2 for adults
- Height: Low (12-18″) – they feel secure in smaller vertical space
- Ventilation: Moderate – maintain 50-60% humidity
- Heat source: Under-tank heater covering 1/3 of floor
- Hides: Two identical hides (warm and cool sides)
- Substrate: Cypress mulch, coco fiber, or paper
For Crested Geckos
- Minimum: 18x18x24 (vertical)
- Height: Tall (24-36″) – they’re arboreal
- Ventilation: Moderate – maintain 60-80% humidity
- Temperature: Moderate (72-78°F) – no basking light needed
- Furniture: Cork bark, bamboo, live plants
- Water: Misting system or daily hand misting
For Leopard Geckos
- Minimum: 20-gallon long (30x12x12)
- Height: Low (12″) – ground dwellers
- Ventilation: High – dry environment (30-40% humidity)
- Heat source: Under-tank heater on warm side
- Hides: Three hides (warm, cool, humid)
- Substrate: Tile, reptile carpet, or paper (never sand)
For Red-Eared Sliders (Aquatic Setup)
- Minimum: 75+ gallons
- Water depth: 2x shell length minimum
- Basking area: Dry platform 12″ above water
- Filtration: Canister filter rated for 2-3x tank volume
- Lighting: UVB and heat lamp over basking area
- Land access: Ramp from water to basking area
Maintenance and Long-Term Care
A well-built enclosure still requires regular upkeep:
Daily Tasks
- Spot-clean feces and uneaten food
- Check and refill water bowls
- Monitor temperatures
- Observe reptile behavior
Weekly Tasks
- Full water bowl cleaning
- Wipe down glass/acrylic panels
- Check all equipment function
- Test thermostat accuracy
Monthly Tasks
- Deep clean one section at a time
- Replace substrate or clean liner
- Trim live plants (naturalistic setups)
- Clean heat sources and bulbs
- Check for wear on doors/latches
Quarterly Tasks
- Full enclosure breakdown and disinfection
- Replace UVB bulbs (every 6 months)
- Check wood for water damage
- Inspect electrical cords
- Verify screen mesh integrity
Signs Your Enclosure Needs Renovation
- Wood swelling or warping
- Mold growth in seams
- Rust on hardware
- Screen mesh coming loose
- Doors not closing properly
- Persistent odors (indicates inadequate sealing)
Troubleshooting Common Issues
Problem: Difficulty Maintaining Humidity
Solutions:
- Reduce ventilation openings by 25%
- Add a water feature or larger water bowl
- Cover part of screen top with acrylic
- Use moisture-retaining substrate (coco fiber, sphagnum moss)
- Install automatic misting system
Problem: Temperature Gradient Too Narrow
Solutions:
- Move heat source closer to one end
- Add insulation to sides and back
- Increase enclosure length
- Use lower-wattage bulb focused on smaller area
- Add a fan to cool side (carefully monitored)
Problem: Substrate Constantly Spills Out
Solutions:
- Add higher front lip (3-4″)
- Install a substrate dam below doors
- Switch to larger particle substrate
- Use a substrate tray system
- Consider switching to tile or reptile carpet
Problem: Glass/Acrylic Constantly Foggy
Solutions:
- Increase ventilation slightly
- Add a small fan for air circulation
- Reduce misting frequency
- Use Rain-X or similar product on interior glass
- Check for water leaks creating excess humidity
Problem: Reptile Can’t Thermoregulate
Solutions:
- Create larger temperature gradient (cool to hot)
- Verify basking spot temperature with temp gun (for checking basking surface temps)
- Add more hiding spots at different temperatures
- Ensure basking spot is properly elevated
- Check that enclosure isn’t too small
Bioactive Enclosure Integration
Turn any of these builds into a bioactive setup:
What is Bioactive?
A bioactive enclosure includes:
- Live plants
- Clean-up crew (springtails and isopods)
- Naturalistic substrate with drainage layer
- Beneficial bacteria ecosystem
Converting to Bioactive
- Install drainage layer:
- False bottom using egg crate or hydroballs
- Landscape fabric barrier
- 2-3″ depth
- Add substrate mix:
- ABG mix (Atlanta Botanical Garden mix)
- Or: coco fiber, sphagnum moss, tree fern fiber, charcoal
- 3-4″ depth minimum
- Introduce clean-up crew:
- Springtails: Eat mold and fungus
- Isopods: Process waste and dead plant matter
- Start cultures 2 weeks before adding reptile
- Plant selection:
- Pothos (hardy, easy)
- Spider plants (safe for most species)
- Bromeliads (hold water, provide hiding spots)
- Ferns (humidity-loving)
- Establish ecosystem:
- Let terrarium establish for 2-4 weeks
- Monitor microfauna populations
- Adjust lighting for plant growth
- Add leaf litter for isopods
Benefits of Bioactive
- Reduces cleaning frequency (no full substrate changes)
- More naturalistic appearance
- Better for reptile mental stimulation
- Waste is naturally processed
- Plants improve air quality
Species Best for Bioactive
- Crested geckos
- Day geckos
- Dart frogs
- Tree frogs
- Some python species
- Anoles and small lizards
Legal and Safety Considerations
Before building, consider these factors:
Zoning and HOA Rules
- Some areas restrict exotic pets
- HOAs may have rules about outdoor structures
- Check local ordinances on outdoor enclosures
- Verify if permits are needed for electrical work
Fire Safety
- Keep heat sources away from flammable materials
- Use GFCI outlets in wet locations
- Never run extension cords under carpets
- Install smoke detectors in reptile room
- Have a fire escape plan that includes reptile rescue
Child and Pet Safety
- Secure all enclosures with locks (some reptiles carry salmonella)
- Store building tools safely
- Keep toxic materials (silicone, paints) away from children
- Ensure enclosures can’t tip over
- Screen all openings to prevent children from reaching in
Structural Considerations
- Verify floor can support weight (large tanks can exceed 500 lbs)
- Use studs when wall-mounting heavy enclosures
- Distribute weight evenly on furniture
- Consider seismic safety in earthquake zones
- Check home insurance coverage for exotic pets
Frequently Asked Questions
Q: How long does it take to build a DIY reptile enclosure?
Simple wooden enclosures take 4-6 hours. Complex builds with backgrounds and water features can take 12-16 hours spread across several days due to curing times.
Q: Is building your own really cheaper than buying?
Yes, typically 40-60% cheaper. A commercial 4x2x2 enclosure costs $300-500, while DIY versions cost $120-200 in materials.
Q: What’s the best material for beginners?
Melamine-coated particleboard. It’s affordable, easy to work with, water-resistant, and available at any hardware store.
Q: Can I use regular lumber?
Only if properly sealed with waterproof coating. Untreated wood will warp, rot, and harbor bacteria. PVC or melamine is better for most builds.
Q: Do I need special tools?
Basic builds only need a drill, saw, and screwdriver. More complex projects benefit from jigsaws, circular saws, and hot knives.
Q: How do I prevent my snake from escaping?
Use secure latches (barrel bolts or cam locks), ensure no gaps larger than half your snake’s body diameter, and test all closures before introducing your reptile.
Q: Can I convert an old aquarium?
Absolutely! Glass aquariums make excellent bases for terrariums. Add a custom lid, background, and proper heating.
Q: How often should I replace a DIY enclosure?
With proper maintenance, wood enclosures last 5-10 years. PVC enclosures can last 15+ years. Replace when you see structural damage, warping, or persistent mold.
Q: Is it safe to use expanding foam?
Yes, once fully cured and sealed. Use Great Stuff Pond & Stone foam (safest for reptiles), let cure 48 hours, then coat with multiple layers of silicone and substrate.
Q: What size enclosure does my reptile need?
General rule: Length + width should equal at least 2x your reptile’s adult length. Check species-specific requirements as some need much more space.

About Author
Hello, I’m Muntaseer Rahman, the owner of AcuarioPets.com. I’m passionate about aquarium pets like shrimps, snails, crabs, and crayfish. I’ve created this website to share my expertise and help you provide better care for these amazing pets.
Disclaimer
This site is owned and operated by Muntaseer Rahman. AcuarioPets.com is a participant in the Amazon Services LLC Associates Program, an affiliate advertising program designed to provide a means for sites to earn advertising fees by advertising and linking to Amazon.com. This site also participates in other affiliate programs and is compensated for referring traffic and business to these companies.