This post was created with help from AI tools and carefully reviewed by a human (Muntaseer Rahman) . For more on how we use AI on this site, check out our Editorial Policy.
Check Out These FREE Tools We Made JUST For You!
DIY Reptile Decor Ideas: Transform Your Terrarium Without Breaking the Bank

Look, I’m not saying store-bought reptile decorations are highway robbery, but when a plastic rock costs $30, something’s fishy.
Your scaly friend doesn’t care if their hide came from a boutique pet store or your creative genius in the garage. What they do care about is having a safe, stimulating environment that feels like home.
Let’s dive into budget-friendly DIY reptile decor ideas that’ll make your terrarium look like a million bucks while keeping your wallet happy.
Why DIY Your Reptile Decor?
Save Your Hard-Earned Cash
Here’s the thing about reptile decor: the markup is insane. A basic hide can run you $20-30, while making your own with foam and grout costs maybe $15 total—and you’ll have enough materials for multiple projects.
Think about it like this: if you’re setting up a new enclosure, you’re looking at $100+ just for decorations. DIY that same setup for under $30.
Customize to Your Heart’s Content
Want Hagrid’s hut for your bearded dragon? Go for it. Millennium Falcon hide for your leopard gecko? Why not.
The commercial stuff is boring, cookie-cutter, and frankly, it all looks the same. DIY lets you create something unique that matches your vision and your reptile’s needs.
It’s Actually Fun (No, Really)
There’s something satisfying about building something with your own hands and watching your reptile use it. Plus, it’s a great weekend project that doesn’t require a PhD in engineering.
Budget-Friendly Materials That Actually Work
Household Items You Already Have
Plastic Containers with Lids – Cut a door-sized hole in a cheap storage container, add some damp moss, and boom—instant humid hide. Perfect for helping with sheds, and it costs basically nothing.
Flower Pots – Here’s a trick that’s been around forever: break a flower pot in half (carefully!) and you’ve got an instant hide. The rough texture actually helps reptiles shed, which is a nice bonus.
Cardboard Tubes – Toilet paper rolls and paper towel tubes work great for smaller reptiles like young snakes and geckos. Free, replaceable, and your reptile doesn’t judge you for it.
Cork Bark – Okay, this one you have to buy, but it’s worth every penny. Cork bark is lightweight, natural-looking, and lasts forever. You can find it online in bulk for way cheaper than pet stores.
Dollar Store Finds
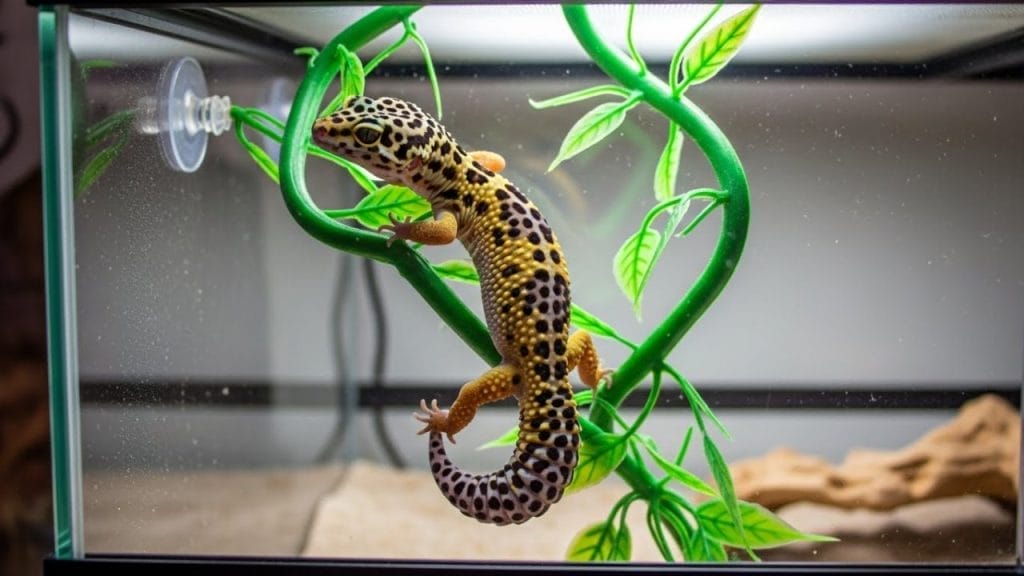
Plastic Vines – The dollar store floral section is your friend. These plastic vines can be sanitized easily and attached with suction cups. They work best for ground-dwelling reptiles since they can’t hold much weight.
Pro tip: avoid vines with wire innards. The plastic can break after a few uses and that wire could hurt your reptile.
Fabric for Hammocks – Grab some sturdy fabric, cut it to size, and attach it with suction cups. Instant reptile hammock for like $3.
The Foam and Grout Method (The Gold Standard)
This is the technique that gives you those stunning, professional-looking backgrounds and hides.
What You’ll Need
- Expanding foam (Great Stuff brand works well) – $5
- Non-sanded grout (easier to work with than sanded) – $10
- Minwax polyurethane (clear satin finish) – $6
- Foam panels (from Lowes/Home Depot) – $8
- Box cutter and kitchen knife – probably in your kitchen already
- Hot glue gun – $8
- Paint brushes – $1
- Sandpaper – $3
Total cost: Around $40 for materials that’ll make 5-10 projects.
The Process (Simplified)
- Sketch your idea first. Don’t wing it. Paper and pencil will save you from foam disasters.
- Cut foam panels to size. Use a box cutter for rough cuts and a kitchen knife for details. The foam cuts like butter.
- Shape and assemble. Carve your design, then hot glue pieces together. Fill gaps with more hot glue or expanding foam.
- Apply grout. This is where the magic happens. 2-3 thin coats, letting each dry completely. This seals the foam and gives that realistic rock texture.
- Seal with polyurethane. 3 coats with overnight drying between each. This makes it waterproof and safe.
- Let it air out. At least one week before putting it in with your reptile. This is crucial—you don’t want any chemical fumes harming your pet.
Pro Tips from the Trenches
- Work outside or in a well-ventilated area. Those foam fumes are no joke.
- Use toothpicks or skewer sticks to hold pieces together while the glue dries.
- Add play sand to your final grout coat for extra texture.
- Non-sanded grout gets into crevices better than sanded.
Moldable Plastic Magic
Want something a bit easier? Moldable plastic pellets are your new best friend.
How It Works
Heat the pellets in boiling water until they turn transparent. Pull them out, shape them into whatever you want (mushroom ledges are popular), and let them cool.
The cool part: You can reheat and reshape them if you mess up. It’s like creative Play-Doh that becomes rock-hard.
What You Can Make
- Feeding ledges with built-in magnets
- Mushroom perches (these look awesome and reptiles love them)
- Custom climbing structures
- Water dish holders
One keeper made a mushroom perch near her gargoyle gecko’s heat lamp thinking it was just decorative. It became the gecko’s favorite spot until she outgrew it.

Natural Materials (The Easy Button)
Branches and Driftwood
Go outside. Find some branches. Bake them at 200°F for 30-45 minutes to kill any hitchhikers.
Congratulations, you just saved $20 on a climbing branch.
Important safety note: Avoid pine and cedar. These woods release aromatic compounds that can harm reptiles in enclosed spaces. Hardwoods like oak, maple, and fruit trees (pesticide-free!) work great.
Rocks and Stones
Head to a clean area away from roads and pollution. Look for interesting rocks. Wash them thoroughly, bake them to sanitize, and you’re done.
Rocks can do more than look pretty:
- They help regulate temperature and humidity
- They provide basking spots
- They create visual barriers and security
- They add climbing opportunities
Stack them carefully with aquarium-safe silicone if you want permanent structures. Just make sure they’re stable—you don’t want a rock avalanche.
Live Plants (Yes, Really)
Some reptiles do great with live plants in their enclosures. It improves air quality and looks incredible.
Safe options include:
- Pothos (basically indestructible)
- Spider plants
- Air plants (mount them high where curious mouths can’t reach)
- Snake plants
Research what’s safe for your specific species. Some plants are toxic to certain reptiles.
Safety First (Seriously, Don’t Skip This)
Materials to AVOID
Pine and Cedar Wood – The aromatic oils can damage respiratory systems. Even though reptiles live in pine forests in the wild, those areas have ventilation that your glass box doesn’t.
Grape Wood – Not toxic, but molds super easily. Not worth the hassle.
Polymer Clay – Releases nasty fumes when heated and isn’t food-safe. Hard pass.
Toxic Paints and Sealants – Always use aquarium-safe or explicitly reptile-safe products. Your reptile’s health isn’t worth the risk.
Sharp Edges – Sand everything down. Your reptile’s skin is more delicate than you think.

The Safety Checklist
✓ All materials are non-toxic
✓ No sharp edges anywhere
✓ Nothing can be ingested and cause blockages
✓ Items are secured and won’t fall
✓ Everything is properly cured/aired out before use
✓ No small parts that could break off
Cleaning and Maintenance
Your DIY decor needs regular cleaning just like store-bought stuff.
For non-porous items: Wipe with reptile-safe disinfectant and rinse thoroughly.
For porous items like wood: Hot water and a scrub brush. You can bake them periodically to kill any bacteria.
Replace items when they start breaking down. Natural materials won’t last forever, and that’s okay.
Advanced DIY: 3D Backgrounds
Want to go all-in? Custom 3D backgrounds transform a basic enclosure into a work of art.
The Basic Approach
- Build a frame that fits your enclosure back wall
- Add foam layers for depth and texture
- Carve details into the foam
- Cover with grout for that rock-wall look
- Seal with polyurethane
- Mount securely to prevent collapses
Some builders use aquarium-safe silicone (500 PSI tensile strength) to mount rocks directly to the background. This is advanced stuff—only try it if you’re confident in your building skills.
Add Living Elements
Mount cork bark pieces to your background for plants. Add small pots or film canisters as planters. You can even create a full bioactive setup with moss growing right on the background.
The end result? A living, breathing ecosystem that looks like a slice of rainforest in your living room.
Mistakes I’ve Seen (Learn from Others’ Pain)
Mistake #1: Not Planning Size – That adorable baby gecko will grow. Build for their adult size, not their current size. One keeper made a tiny mushroom perch that became useless in three months.
Mistake #2: Using Too Much Expanding Foam – This stuff expands more than you think. Start small, add more if needed. Otherwise you’re carving for hours.
Mistake #3: Skipping the Air-Out Period – Chemicals need time to off-gas. One week minimum, two weeks is better. Your reptile’s lungs will thank you.
Mistake #4: Ignoring Your Reptile’s Behavior – Arboreal species need height. Terrestrial species need floor space. Research before building.
Mistake #5: Making Everything Too Smooth – Rough textures help with shedding and climbing. Don’t sand everything perfectly smooth.

The Ultimate Budget Setup
Let’s build a complete terrarium setup for under $50:
Base Layer:
- Natural substrate from outside (free, just bake it)
- Rocks from your yard ($0)
Hides:
- Broken flower pot ($2)
- DIY foam hide ($10 in materials, makes 3 hides)
Climbing:
- Branches from outside (free)
- Dollar store vines ($1)
Decoration:
- Cork bark flat ($8)
- Homemade background panels ($15)
- Live plant cuttings from friends (free)
Water:
- Shallow dish from thrift store ($1)
Total: Around $37 for a setup that looks better than most $200+ commercial setups.
Making It Personal
Here’s where you can get creative and have some real fun.
Want a desert theme? Use lighter colored grout, add some dried cactus skeleton, scatter some decorative sand.
Rainforest vibe? Go heavy on the moss, add multiple layers of branches, use darker colors.
Prehistoric look? Add some 3D-printed dinosaur skeletons (resin is reptile-safe once cured). They actually make resin dino decor specifically for terrariums now.
Your imagination is literally the only limit.

Tools and Skills You’ll Actually Need
Skill level: If you can make a sandwich, you can DIY reptile decor.
Seriously. The most “advanced” skill here is using a box cutter and mixing grout. If you’ve ever done any craft project, you’re overqualified.
Essential tools:
- Box cutter or utility knife
- Hot glue gun
- Paint brushes
- Mixing containers
- Measuring cups
- Sandpaper
Nice to have:
- Dremel tool for detailed carving
- Heat gun for moldable plastic
- Wire cutters for vine modifications
Time Investment
Simple projects: 30 minutes to 2 hours
- Flower pot hide: 10 minutes
- Dollar store vine setup: 30 minutes
- Basic foam hide: 2 hours (plus drying time)
Intermediate projects: 4-8 hours spread over several days
- Foam and grout hide with texture: 6 hours (plus week of drying/airing)
- Custom climbing structure: 4 hours
- Moldable plastic ledges: 3 hours
Advanced projects: 10-30 hours
- Full 3D background: 20+ hours
- Complete terrarium overhaul: 15+ hours
The drying and curing time is the real time sink, not the actual work.

When to Buy Instead of DIY
Look, sometimes buying makes more sense.
Buy when:
- You need something immediately
- You’re not confident in your building skills
- The commercial version is actually affordable
- Safety is extra critical (like thermostat guards)
- You just don’t enjoy crafting
DIY when:
- You’re on a tight budget
- You want something custom
- You enjoy hands-on projects
- You’re setting up multiple enclosures
- You like learning new skills
There’s no shame in buying commercial products. The goal is a happy, healthy reptile, not proving you’re the craftiest keeper around.
Final Thoughts
Creating DIY reptile decor isn’t just about saving money (though that’s a nice perk). It’s about building something unique for your scaly friend and actually enjoying the process.
Your first project might not be Instagram-worthy. That’s fine. Your reptile won’t judge you, and you’ll get better with practice.
Start small. Make a simple hide. See how it goes. Then maybe try a climbing branch setup. Before you know it, you’ll be that person with the amazing custom terrarium that everyone asks about.
The reptile hobby can get expensive fast. DIY decor is one area where you can stretch your budget without compromising your pet’s quality of life.
Plus, there’s something genuinely satisfying about watching your reptile bask on a branch you found, or hide in a cave you sculpted with your own hands.
Just remember the golden rule: Safety first, aesthetics second, budget third.
Now go make something cool. Your reptile is waiting.

About Author
Hello, I’m Muntaseer Rahman, the owner of AcuarioPets.com. I’m passionate about aquarium pets like shrimps, snails, crabs, and crayfish. I’ve created this website to share my expertise and help you provide better care for these amazing pets.
Disclaimer
This site is owned and operated by Muntaseer Rahman. AcuarioPets.com is a participant in the Amazon Services LLC Associates Program, an affiliate advertising program designed to provide a means for sites to earn advertising fees by advertising and linking to Amazon.com. This site also participates in other affiliate programs and is compensated for referring traffic and business to these companies.