
This post was created with help from AI tools and carefully reviewed by a human (Muntaseer Rahman) . For more on how we use AI on this site, check out our Editorial Policy.
Check Out These FREE Tools We Made JUST For You!
How to Crochet a Realistic Betta Fish (With Free Pattern & Photos)
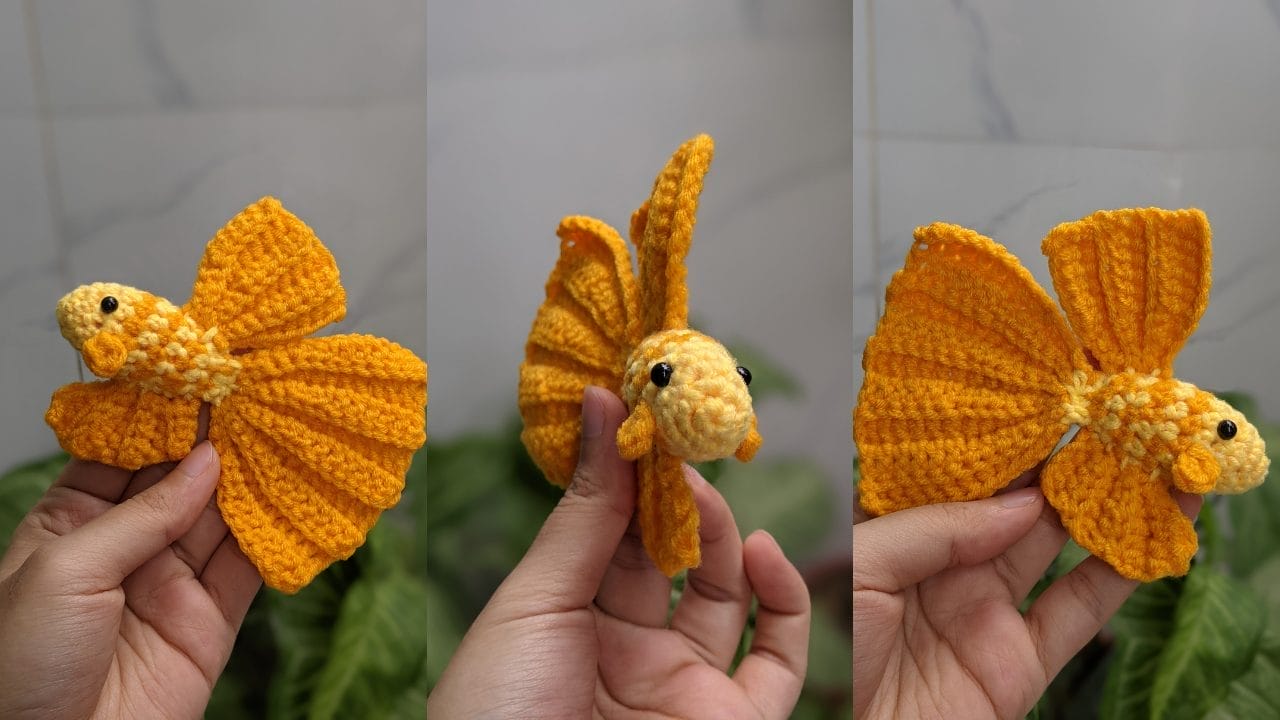
Want to make a betta fish that actually looks like the real deal?
This pattern creates a surprisingly realistic little guy with all those fancy fins and that classic betta attitude.
I’ve been obsessed with perfecting this design, and honestly, it turned out way better than I expected!
Hooked on aquatic amigurumi? Pair this betta with a matching crochet goldfish pattern, or stitch up a quick betta fish plushie you can finish in one sitting.
Love these betta patterns? My complete 5 Betta Fish Crochet Pattern Book includes this design plus four more stunning variations – perfect for creating your own colorful school!
Get Hooked on the Cutest Betta Fish You’ll Ever Make!
What’s Inside?
- 5 Complete Betta Fish Patterns – From simple beginner designs to show-stopping realistic beauties
- Step-by-Step Photo Guides – Because sometimes written instructions just don’t cut it
- Instant Download – Start crocheting in the next 5 minutes
Skill Level:
Intermediate. You’ll need to know how to do single crochet, increase, decrease, work in the round, and sew parts together.
Finished Size:
Roughly 4 inches (10 cm) from nose to tail, depending on your yarn, hook, and tension.

Materials:
- 3-ply milk cotton yarn (orange and yellow)
- 3.0 mm crochet hook (the hook set I use for every amigurumi)
- Safety eyes (5 mm) or small black beads
- Fiberfill stuffing
- Tapestry needle
- Scissors
Abbreviations Used:
- MR = Magic Ring
- ch = Chain
- sc = Single Crochet
- inc = Increase
- dec = Decrease
- sl st = Slip Stitch
- BLO = Back Loop Only
- R = Round/Row
Making The Betta Crochet Pattern Step By Step
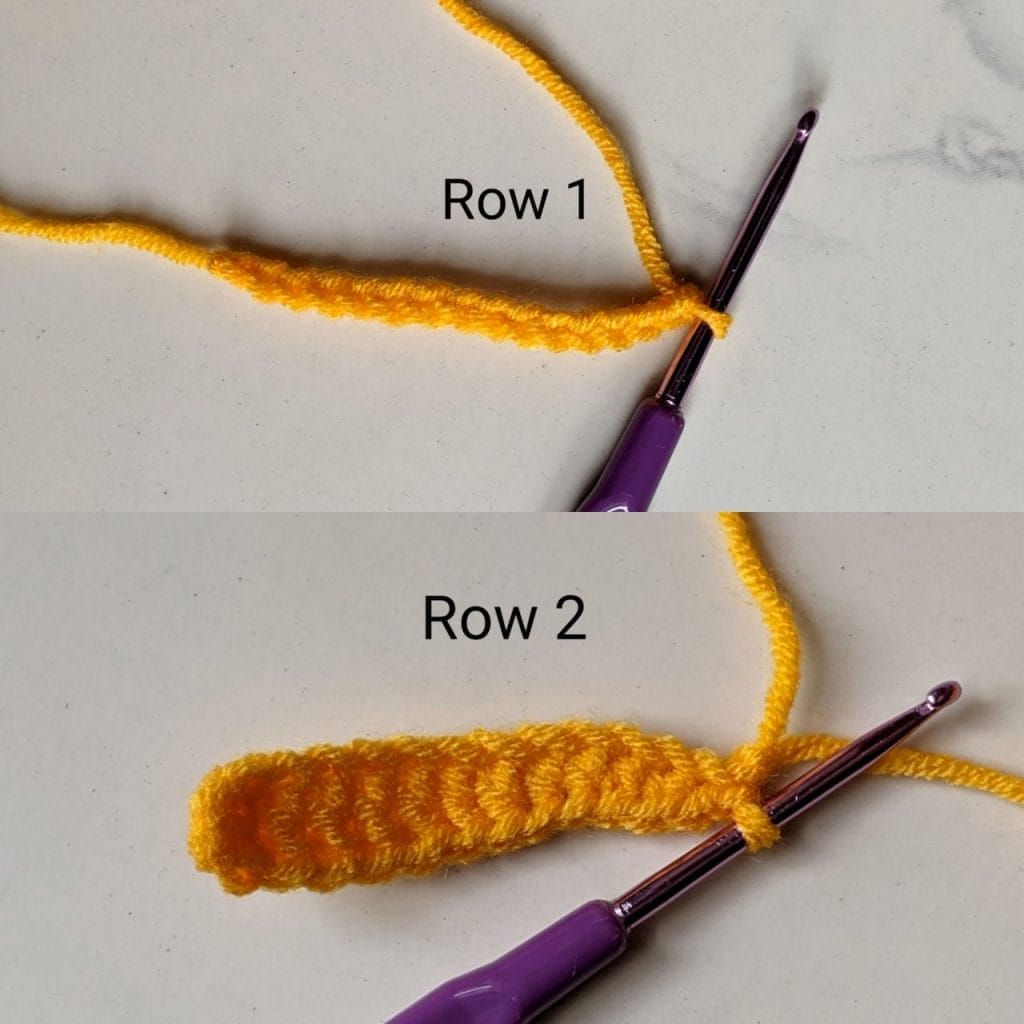
Head + Body (Make 1)
This is the base of your betta — the little body everything else attaches to. It starts as a ball, stretches into a tube, then tapers off near the tail. You’ll also add the safety eyes and stuffing here.

Start with yellow yarn.
- R1: MR, 4 sc [4]
- R2: inc x 4 [8]
- R3: (sc, inc) x 4 [12]
- R4–R5: sc around [12]

(Insert eyes between R4–R5, stuff body)
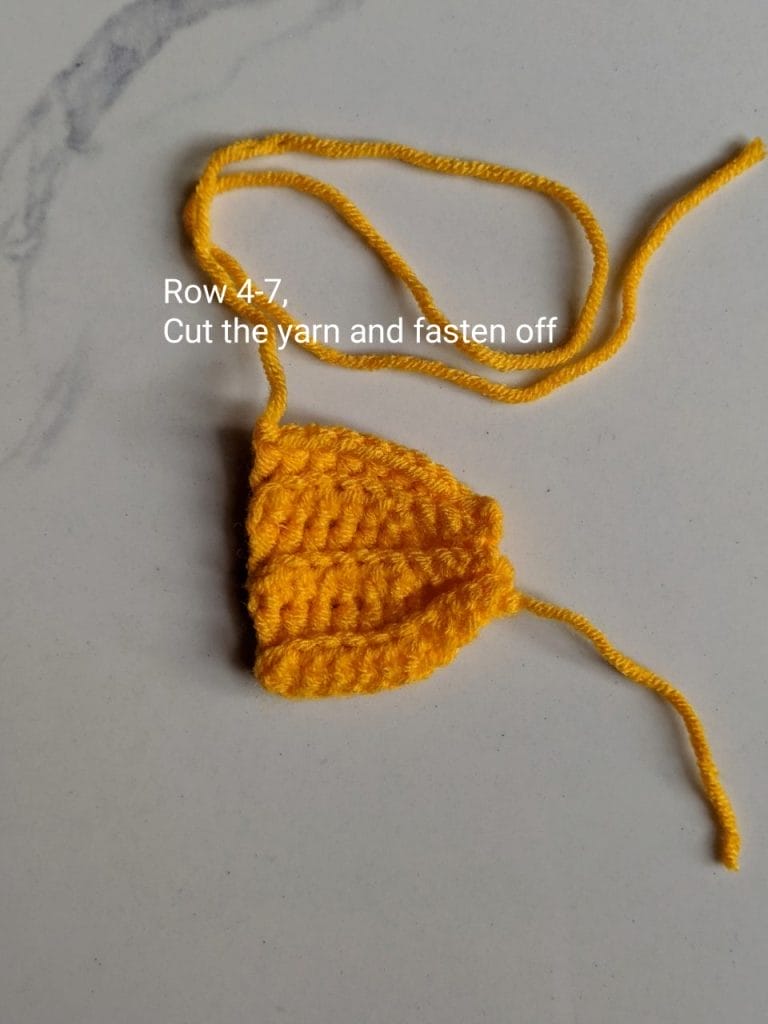
Switch to orange. From R6–R13, alternate orange/yellow every round.
- R6–R8: sc around [12]
- R9: (4 sc, dec) x 2 [10]
- R10: sc around [10]
- R11: (3 sc, dec) x 2 [8]

- R12: (2 sc, dec) x 2 [6]

- R13: Close the gap with 3 sc across both sides [3]

- Fasten off and leave a long tail.
Tail (Make 1)


This is the showstopper. Betta fish are famous for their fancy tails, and this pattern makes it ripple-like with rows that alternate direction. You’ll work in the back loop to create texture and flow.
Orange yarn
- R1: ch 15
- R2: (start from 3rd ch) 6 dc, 3 hdc, 2 sc, 2 sl st
- ch 1, turn
- R3: BLO – 2 sl st, 2 sc, 3 hdc, 6 dc
- ch 2, turn
- R4: (start from 3rd ch) BLO – 6 dc, 3 hdc, 2 sc, 2 sl st
- ch 1, turn
- R5–R10: Repeat R3 and R4 alternately
- Fasten off and weave in ends.
Fin 1 (Top Fin – Make 1)

This is the dorsal fin that goes on top of the body. It’s flatter than the tail but adds balance and realism to the fish’s silhouette.
- R1: ch 11
- R2: 6 hdc, 2 sc, 2 sl st
- ch 1, turn
- R3: BLO – 2 sl st, 2 sc, 6 hdc
- Repeat R2–R3 alternately until 7 rows
- Fasten off and weave in end.
Fin 2 (Bottom Fin – Make 1)

This fin goes underneath the body, toward the back. It’s a bit curvier than the top fin and helps round out the look.
- R1: ch 5
- R2: 4 hdc (from 2nd ch)
- ch 1, turn
- R3: BLO – 4 hdc
- ch 2, turn
- R4: BLO – 4 hdc, 1 sc
- ch 1, turn
- R5: BLO – 2 sc, 3 hdc
- ch 2, turn
- R6: BLO – 4 hdc, 1 sc, 1 sl st
- ch 1, turn
- R7: BLO – 1 sl st, 1 sc, 4 dc
- Fasten off and weave in end.
Side Fins (Make 2)

These are the little pectoral fins that stick out on the sides near the head. They’re tiny but important for that signature betta posture. You can sew or glue them, depending on your vibe.
- MR, 4 sc
- sl st to first sc and fasten off
- Leave long tail for sewing (or glue)
Assembly Instructions


Time to bring it all together. Follow this order so your fish doesn’t look lopsided. And don’t stress — slight asymmetry just gives it personality.
- Sew the big tail fin to the back.
- Sew Fin 1 (top fin) to the upper body, around R8–R11.
- Sew Fin 2 (bottom fin) under the body, around R6–R9.
- Attach side fins on both sides between R5–R6. Sew or glue.
- Weave in any loose ends.
That’s a Wrap (Fish Joke Intended)
And there you have it — your very own crocheted betta that doesn’t flop.
If you end up making one, I’d seriously love to see it. Drop a pic in the comments or tag me on Pinterest. I’ll be cheering you on from behind my screen.
Love these betta patterns? My complete 5 Betta Fish Crochet Pattern Book includes this design plus four more stunning variations – perfect for creating your own colorful school!
Get Hooked on the Cutest Betta Fish You’ll Ever Make!
What’s Inside?
- 5 Complete Betta Fish Patterns – From simple beginner designs to show-stopping realistic beauties
- Step-by-Step Photo Guides – Because sometimes written instructions just don’t cut it
- Instant Download – Start crocheting in the next 5 minutes

About Author
Hello, I’m Muntaseer Rahman, the owner of AcuarioPets.com. I’m passionate about aquarium pets like shrimps, snails, crabs, and crayfish. I’ve created this website to share my expertise and help you provide better care for these amazing pets.
Disclaimer
This site is owned and operated by Muntaseer Rahman. AcuarioPets.com is a participant in the Amazon Services LLC Associates Program, an affiliate advertising program designed to provide a means for sites to earn advertising fees by advertising and linking to Amazon.com. This site also participates in other affiliate programs and is compensated for referring traffic and business to these companies.