This post was created with help from AI tools and carefully reviewed by a human (Muntaseer Rahman) . For more on how we use AI on this site, check out our Editorial Policy.
Check Out These FREE Tools We Made JUST For You!
Free Bearded Dragon Crochet Patterns You Can Make Today

Crocheting for your bearded dragon is easier than you think, and these free patterns make it even better. Whether you want cozy sweaters, fun costumes, or stylish hammocks, you’ll find plenty to try today.
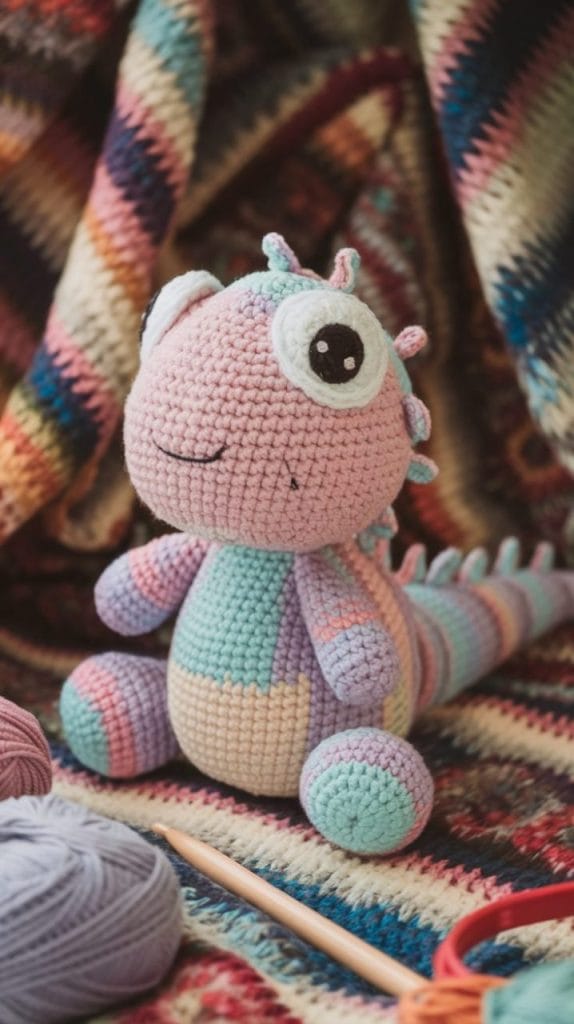
crochet amigurumi bearded dragon plush
Materials Needed
- Worsted weight yarn in two colors (main body + accent for spikes)
- 3.5mm crochet hook
- Yarn needle
- Polyfill stuffing
- 9-12mm safety eyes
- Stitch markers
- Scissors
Abbreviations (US Terms)
- Ch = chain
- Sc = single crochet
- Inc = increase (2 sc in 1 stitch)
- Dec = decrease (single crochet 2 together)
- Sl st = slip stitch
- St = stitch
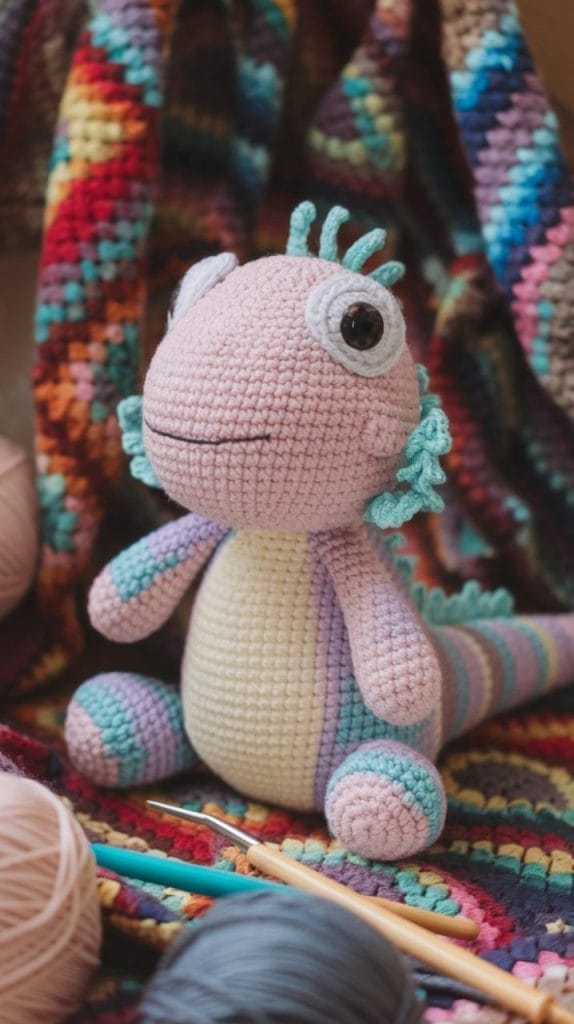
Body (Worked in Continuous Rounds)
- Start with a magic ring, 6 sc into the ring. (6)
- Inc in each stitch around. (12)
- Sc 1, Inc – repeat around. (18)
- Sc 2, Inc – repeat around. (24)
5-12. Sc around (no increases). (24) – This creates the main body length. - Sc 2, Dec – repeat around. (18)
- Sc 1, Dec – repeat around. (12)
- Dec around. (6)
Stuff firmly before closing. Fasten off and weave in the tail.
Head
- Magic ring, 6 sc into ring. (6)
- Inc in each stitch around. (12)
- Sc 1, Inc – repeat around. (18)
- Sc 2, Inc – repeat around. (24)
5-7. Sc around (24). - Sc 2, Dec – repeat around. (18)
- Sc 1, Dec – repeat around. (12)
Insert safety eyes between rows 5-6, leaving 4-5 stitches between eyes. Stuff the head.
10. Dec around. (6)
Fasten off, leaving a long tail for sewing. Attach head to body.
Legs (Make 4)
- Magic ring, 6 sc into ring. (6)
- Sc around for 4 rounds.
- Flatten the leg and sc across the top to close.
Fasten off, leaving a long tail to sew onto the body.
Tail
- Magic ring, 4 sc into ring. (4)
- Inc in each stitch. (8)
3-10. Sc around (8).
Fasten off, leaving a long tail. Lightly stuff the base and sew to the back of the body.
Spikes (Across Back and Head)
- Attach accent color yarn to the top of the head.
- (Ch 3, sl st into next st) – repeat down the back to create little spikes.
These are small chains to mimic the spiny look of a bearded dragon.

Throat Flap (Optional)
- Ch 6.
- Sc across, turn.
- Ch 1, sc across, increasing in the middle stitch.
- Repeat until desired size, keeping it triangular.
Sew under the head for that beardy look.
Final Assembly
- Sew legs evenly on both sides.
- Attach tail.
- Sew spikes along back and head.
- Optional: Embroider nostrils and mouth.
Free Crochet Patterns for Bearded Dragon Clothes

1. Basic Bearded Dragon Sweater crochet pattern
This is a simple tube-style sweater that fits over the dragon’s body, keeping them warm and cute.
Materials Needed:
- Soft cotton yarn (medium weight)
- 3.5mm crochet hook
- Yarn needle
- Stitch markers (optional, but helpful)
Abbreviations:
- Ch = Chain
- Sc = Single Crochet
- Inc = Increase (2 Sc in one stitch)
- Dec = Decrease (single crochet 2 stitches together)
Pattern for Basic Bearded Dragon Sweater
Row 1: Ch 22 (adjust if your dragon is bigger or smaller). Join with slip stitch to form a ring. Make sure it’s not twisted. (22)
Row 2: Ch 1 and turn. Sc in each stitch around. Join with slip stitch. (22)
Row 3-6: Ch 1 and turn. Sc in each stitch around. (22)
Row 7 (Leg Hole Row): Ch 1 and turn. Sc in the next 5 stitches. Ch 3, skip the next 3 stitches (this creates the first leg hole). Sc in the next 6 stitches. Ch 3, skip the next 3 stitches (second leg hole). Sc in the remaining stitches. Join with slip stitch. (22 including chains)
Row 8: Ch 1 and turn. Sc in each stitch around, working into the Sc stitches and the chains from the leg holes. (22)
Row 9-12: Ch 1 and turn. Sc in each stitch around. (22)
Row 13: Ch 1 and turn. Dec, Sc in the next 8 stitches, Dec, Sc in the next 8 stitches. Join with slip stitch. (20)
Row 14: Ch 1 and turn. Sc in each stitch around. (20)
Row 15: Ch 1 and turn. Dec, Sc in the next 6 stitches, Dec, Sc in the next 6 stitches. Join with slip stitch. (18)
Row 16-18: Ch 1 and turn. Sc in each stitch around. (18)
Row 19: Ch 1 and turn. Dec, Sc in the next 4 stitches, Dec, Sc in the next 4 stitches. Join with slip stitch. (16)
Row 20-22: Ch 1 and turn. Sc in each stitch around. (16)
Row 23: Ch 1 and turn. Dec, Sc in the next 3 stitches, Dec, Sc in the next 3 stitches. Join with slip stitch. (14)
Row 24: Ch 1 and turn. Sc in each stitch around. (14)
Row 25: Ch 1 and turn. Dec, Sc in the next 2 stitches, Dec, Sc in the next 2 stitches. Join with slip stitch. (12)
Row 26-28: Ch 1 and turn. Sc in each stitch around. (12)
Row 29: Ch 1 and turn. Dec, Sc in the next stitch, Dec, Sc in the next stitch, Dec, Sc in the next stitch. Join with slip stitch. (9)
Row 30: Ch 1 and turn. Sc in each stitch around. (9)
Row 31: Ch 1 and turn. Dec, Sc in the next stitch, Dec, Sc in the next stitch, Dec. Join with slip stitch. (6)
Row 32: Ch 1 and turn. Sc in each stitch around. (6)
Finish off: Cut yarn, leaving a long tail for sewing if needed. Weave in ends.
Key Tips:
- Always check the fit after the first few rows. You want the collar snug, but not tight.
- Cotton yarn is best because it’s soft and breathable for reptiles.
- You can adjust the chain count in Row 1 if your dragon is smaller or larger.
Optional Add-ons:
- Add a small ruffle edge at the end by chaining 3 at each stitch.
- Sew a small bow at the collar for a festive look.
- Use holiday colors for Christmas or Halloween versions.
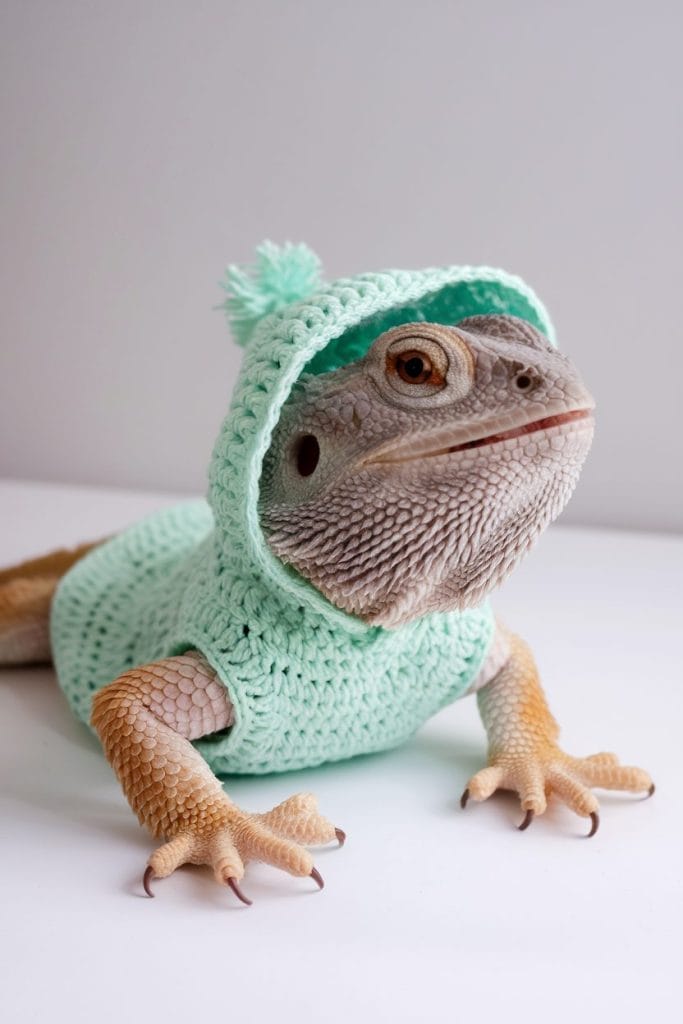
2. Bearded Dragon Hoodie crochet pattern
This adds a small hood for extra style.
Materials Needed:
- Soft cotton yarn (medium weight)
- 3.5mm crochet hook
- Yarn needle
- Scissors
Body (Sweater Base)
Row 1: Ch 26 (or more if your dragon is bigger). Join with sl st to form a ring. Be careful not to twist the chain.
Row 2: Ch 1 and sc in each chain around. Join with sl st. (26)
Row 3-7: Ch 1, sc in each st around. Join with sl st. (26)
Row 8: Ch 1 and turn. Sc in the next 10 st, ch 3 (this makes the first leg hole), skip the next 3 st, sc in the next 10 st, ch 3 (second leg hole), skip the next 3 st, sl st to join.
Row 9: Ch 1, sc around, working into each sc and each chain from the leg holes. Join with sl st. (26)
Row 10-14: Ch 1, sc in each st around. Join with sl st. (26)
Fasten off and weave in ends. This completes the body.
Hood Section
Row 1: Reattach yarn at the top center back of the sweater, where the hood will sit.
Ch 1, sc across the back 10 stitches to form the hood base. Turn. (10)
Row 2-10: Ch 1, sc across. Turn. (10)
Row 11: Fold the rectangle in half to form the hood shape. Sl st across the top to close the hood.
Fasten off and weave in ends.
Optional – Hood Edge Trim
Attach yarn to the bottom edge of the hood and sc evenly around the hood opening to give a cleaner finish.
Optional – Pom Pom
Make a small pom pom using matching yarn. Attach it to the back point of the hood.
This pattern fits a juvenile or small adult bearded dragon. For larger dragons, increase the starting chain and add extra rows.
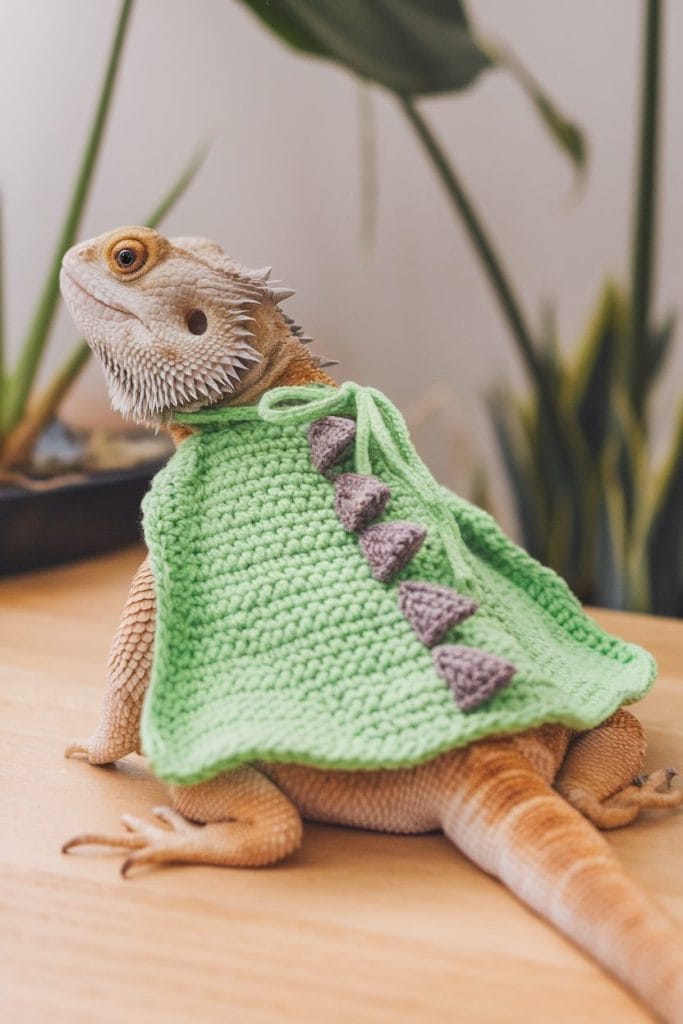
3. Dragon Costume Cape crochet pattern
This is a fun cape that ties around the neck and adds a “dragon wing” look to the back.
This fun cape ties around the neck and drapes over your bearded dragon’s back. You can add spiky ridges down the back to make it look like real dragon scales.
Materials Needed
- Medium weight yarn (green, purple, or any color you like)
- 3.5mm crochet hook
- Yarn needle
- Scissors
Abbreviations
- Ch = Chain
- Sc = Single crochet
- Inc = Increase (2 sc in the same stitch)
- Dec = Decrease (sc 2 stitches together)
- Sl st = Slip stitch
- St = Stitch
Pattern
Row 1: Ch 20. Sc in 2nd ch from hook and across. (19). This forms the top edge of the cape.
Row 2: Ch 1 and turn. Inc in first st, Sc across until the last st, Inc in the last st. (21)
This slightly widens the cape.
Row 3-7: Repeat Row 2. Each row adds 2 stitches, gradually making the cape wider. You should have 29 stitches by Row 7.
Row 8: Ch 1 and turn. Sc across. (29)
This keeps the bottom straight.
Row 9: Ch 1 and turn. Sc across, working in back loops only. (29)
This adds a subtle texture.
Row 10: Ch 1 and turn. Sc across. (29)
Neck Ties
- Attach yarn to the top corner.
- Ch 25 to form the first tie. Fasten off.
- Attach yarn to the other top corner.
- Ch 25 to form the second tie. Fasten off.
These ties let you gently knot the cape around your dragon’s neck.
Optional Spikes (Dragon Ridge)
To make the dragon-like ridge, you’ll crochet small triangles along the back.
Row 1: Attach yarn to the back center (Row 1). Ch 1, Sc in the first stitch. (1)
Row 2: Ch 1 and turn. Inc in the stitch. (2)
Row 3: Ch 1 and turn. Inc in first stitch, Sc in the next. (3)
Row 4: Ch 1 and turn. Sc across. (3)
Row 5: Ch 1 and turn. Dec, Sc in the next. (2)
Row 6: Ch 1 and turn. Dec. (1)
Fasten off.
Skip 2 stitches along the back and repeat the spike pattern to make several spikes from neck to tail.
Finishing
- Weave in all loose ends.
- Make sure ties are long enough to knot loosely around your dragon’s neck.
- Try the cape on to check the fit.


Your Beardie Has More to Say…
This article tells you WHAT to do, but do you know WHY your dragon needs it? Or what they’re thinking when you do it wrong?
Read the full rant (all 20 chapters of it) in: “What Your Bearded Dragon Wishes You Knew”
*Told by a very frustrated beardie who’s had ENOUGH of watching you guess.*
Free Crochet Pattern for Bearded Dragon Hammock (Triangle Shape)
This is a simple triangular hammock that fits into the corner of your bearded dragon’s tank. It’s beginner-friendly and works up fast.
Materials Needed
- Medium weight cotton yarn (cotton works best for reptile tanks)
- 4mm crochet hook
- Yarn needle
- Suction cups with hooks (for attaching the hammock to the glass)
Pattern (Row by Row)
Row 1: Ch 2. Inc in the 2nd Ch from the hook. (2)
Row 2: Ch 1 and turn. Inc in each stitch across. (4)
Row 3: Ch 1 and turn. Inc in the first st, Sc in the next 2 st, Inc in the last st. (6)
Row 4: Ch 1 and turn. Sc across. (6)
Row 5: Ch 1 and turn. Inc in the first st, Sc in the next 4 st, Inc in the last st. (8)
Row 6: Ch 1 and turn. Sc across. (8)
Row 7: Ch 1 and turn. Inc in the first st, Sc in the next 6 st, Inc in the last st. (10)
Row 8: Ch 1 and turn. Sc across. (10)
Row 9: Ch 1 and turn. Inc in the first st, Sc in the next 8 st, Inc in the last st. (12)
Row 10: Ch 1 and turn. Sc across. (12)
Rows 11-20: Repeat the pattern of increasing in the first and last stitch of every odd-numbered row, and crocheting straight across every even-numbered row until you reach the desired size. Usually, 20 rows gives a good size for a juvenile dragon, but you can keep going for adults.
Edge Finishing (Optional):
Once the triangle is done, work a round of single crochet evenly around the edges to give it a neater finish.
Hanging Loops:
At each corner, chain 10 and slip stitch back into the corner stitch to form a loop. This is where you’ll attach the suction cup hooks.
Fasten off and weave in all ends.
Installation
Hook the suction cups onto the glass of the tank and attach the hammock loops to the hooks. Make sure the hammock hangs slightly above the ground, but not too high for your dragon to reach.
7 Tips for Bearded Dragon Crocheting
1. Use soft, natural yarn like cotton
It’s gentle on their skin and less likely to cause irritation. Avoid fuzzy or fluffy yarns since fibers can get stuck in their claws or mouth.
2. Check the fit often
Bearded dragons need loose-fitting items that don’t squeeze their belly or legs. Tight clothes can stress them or restrict movement.
3. Use tight stitches for hammocks or platforms
Loose stitches can trap their nails, which could hurt them.
4. Avoid small decorations like buttons, beads, or dangling parts
Bearded dragons might try to chew on them, which can be dangerous.
5. Keep the belly area mostly open when making clothes
Bearded dragons need direct belly contact with heat sources, so covering the belly can block proper heat absorption.
6. Test new crochet items outside the tank first
Let your dragon wear the clothes or sit on the hammock outside the tank to check if they’re comfortable.
7. Wash crochet items regularly
Use mild, reptile-safe soap and rinse well to remove dirt, shed skin, or bacteria.
About Author
Hello, I’m Muntaseer Rahman, the owner of AcuarioPets.com. I’m passionate about aquarium pets like shrimps, snails, crabs, and crayfish. I’ve created this website to share my expertise and help you provide better care for these amazing pets.
Disclaimer
This site is owned and operated by Muntaseer Rahman. AcuarioPets.com is a participant in the Amazon Services LLC Associates Program, an affiliate advertising program designed to provide a means for sites to earn advertising fees by advertising and linking to Amazon.com. This site also participates in other affiliate programs and is compensated for referring traffic and business to these companies.

